Free Shipping Over $150 Lower 48 States Details

Microsoft Photo Premium Landscape Photo Layout

A beginning note: This tutorial uses lots of screenshots to help you understand the process better.

READ THIS BEFORE STARTING! - This is a "general guide" for using PictureIt to set up and print custom greeting cards on Red River paper. Your screen may look slightly different. Please read up on your software as this will make card setup and printing much easier in the long run.

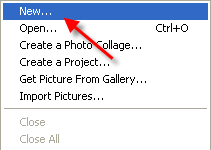
Step 1 - Make a custom Blank Picture. Go to the File menu and select a New Blank Picture.


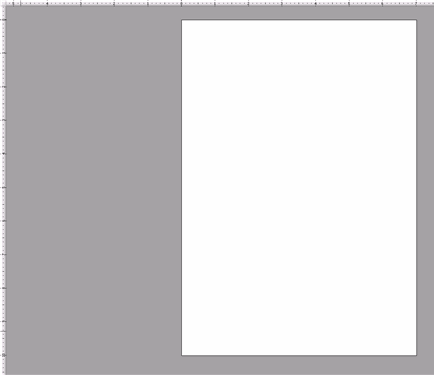
A blank page will appear in the work area.

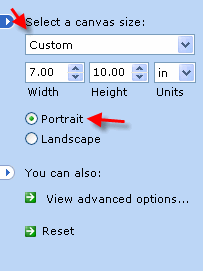
A dialog to define your custom size will appear on the left of your screen.

1) Set Canvas Size to Custom in the drop menu shown at right.

Paper Size Height Width
7x10 10" 7"
6.25x9 9" 6.25"
5.5x8.5 8.5" 5.5"

2) Click on the PORTRAIT button

3) Click Done


Your newly created blank canvas should look like this. Imagine this is an unfolded unprinted greeting card.

The mid-point of the card is the fold line.


Step 2 - Prepping Your Photo

We recommend opening your photos and resizing before putting them on the card layout.

Open your photo (File > Open)

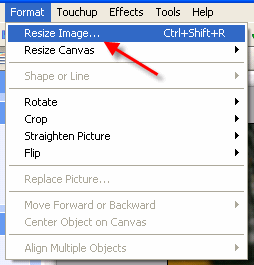
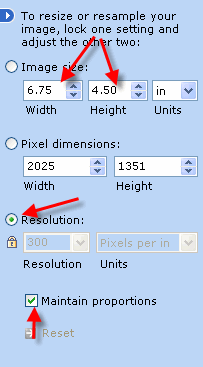
Resize your photo - go to Format > Resize Image and follow the steps.


This menu will appear on the left of your screen.

Resize the photo using this table as a guide

NOTE! When you resize the program will maintain the image proportions. This means your photo will probably NOT be the exact dimensions listed above.

Card Size Max Image Area
7x10 6.75" w x 4.75" h
6.25x9 6" w x 4.25" h
5.5x8.5 5.25" w x 4" h

NOTE: Set resolution to 300 and click the Resolution button to lock the setting

Save the photo (use a different name if you do not wish to alter the original)


Step 3 - Placing Photos on Your Card Layout


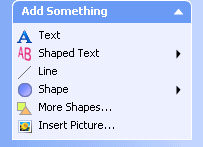
Find the ADD SOMETHING menu panel on the left side of your screen.

Click Insert Picture - now locate the photo you just saved and click OK.

The photo will now appear on your card layout.


NEXT - Setting your Image Location on the Card

Your photo is now on the card layout as a "layer". It will now appear in the STACK pallet at the top right of your screen.

If you do not see the STACK pallett find this menu and click STACK

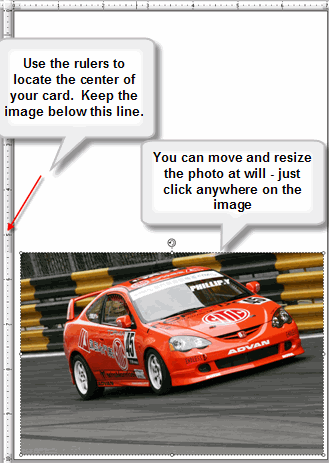
You can now click on the photo and move, resize, and even rotate it freely on the layout.

Using the RULERS get the image centered on the lower half of the card.

NOTE: The 1/4" rule is important to remember

To keep the printer from cropping your photo, make sure you have at least 1/4" space between the photo and the edges of your card layout.


Step 4 - Put some text on your card (optional)


Using the ADD SOMETHING feature - you can add text, shapes, lines, and more photos if desired.

Lets look at adding some basic text.

Click the TEXT button

The text tool appears on your layout - enter the desired text and make any changes using the text menu at the top of the screen. Check your software manual for help with that feature.


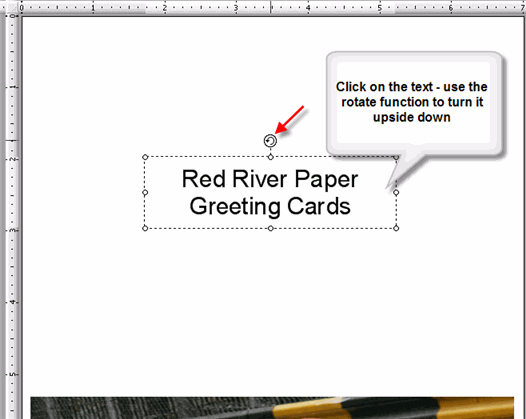
For text on the BACK of your card.

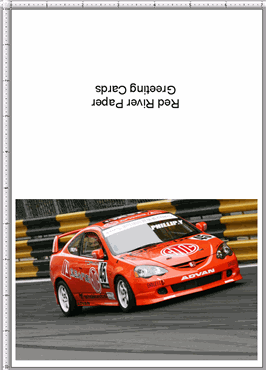
You must rotate the text 180 degrees - it will appear upside down on your layout.

Click on the rotate icon and move your mouse to complete the rotation.

You now have a completed basic photo card layout with some text on the back.

Once you are satisfied with the layout click below to begin the printing process.

Printing is next - choose your printer type


Last updated: February 03, 2020

[ | ]