The Canon PRO-10 was announced in September of 2012 and is the successor to the Canon Pro9500 MkII. It is a 13" wide, ten color, pigment-based photo inkjet printer. Pigment inks provide fade resistance from 40 to 100+ years, depending on the media and display conditions. Photo enthusiasts who want the "better than a lab" print experience and long print life should consider the PRO-10 when making a purchase.
Can't wait for the conclusion? Jump to the end.
Just the Facts
13" wide photo quality inkjet printer
Print 4" x 6" up to 13" x 26" banners
Borderless sizes limited to those set by the factory
Maximum paper length is 26.61”
11x14 not on that list
10 Pigment-Based Inks - Cyan, Yellow, Magenta, Photo Black, Matte Black, Gray, Photo Cyan, Photo Magenta, Red, Chroma Optimizer
Estimated Retail Price $699
Ink Cost - About $16.99 per tank retail
Standard Ink Tanks - Holding about 13mL of ink each
Opening the Box


The Canon PRO-10 box arrived in good condition. The contents came well packed with all of the accessory pieces stored in separate bags. The printer was in its own heavy-duty plastic sack with handles, making removal quite easy. After plugging in the printer, the quick start guide got us started in a few simple steps.
The Canon PRO-10 shipping box includes:
- Canon PRO-10 printer
- CD/DVD Disc Printing Tray
- Manuals and other documents
- Setup CD-ROM
- Setup Ink Tanks
- Power Cord
- Print Head
- USB Cable
Canon Pixma Pro-10 Inks


The printer comes with a full set of PGI-72 ink cartridges. A small amount of ink is used in the printer setup, but you will still have plenty left to make prints and become familiar with the machine.
Anatomy of a Canon ink cartridge
A - Bottom of ink tank and ink outlet.
B - Ink reservoir.
C - Onboard chip. The chip records nozzle firing data sent from the printer and subtracts the volume to track remaining ink level. The system is very accurate, and you will indeed see a dry tank when it comes time to do a replacement.
Print Head
The PRO-10 print head / ink cartridge assembly comes in a separate sealed bag. A large orange plastic cover must be removed to reveal the head (see at right). Installing the head and inks into their carriage is simple, and it takes about a minute.
Close inspection of the print head reveals the amazing technology packed into inkjet printers. Each of the ten dark lines on the head represent thousands of nozzles. Each nozzle aims and fires in sync with those around it placing ink onto the paper at a precise location. Amazing!
Once installed, a light on the front of the ink cartridge illuminates and glows steady red. The same light blinks slowly when you're low on ink and quickly once the tank has been depleted.
Canon PRO-10 Ink Tanks Included
- PGI-72 Matte Black
- PGI-72 Photo Black
- PGI-72 Cyan
- PGI-72 Magenta
- PGI-72 Yellow
- PGI-72 Photo Cyan
- PGI-72 Photo Magenta
- PGI-72 Gray
- PGI-72 Red
- PGI-72 Chrome Optimizer
Getting Ready to Print on the Pixma Pro-10
Once all of the inks were installed, the printer charged up and was ready in less than five minutes.
The printer requires an automated print head alignment sheet to be printed before moving forward.
The assembled printer is 27.2" wide, 15.2" deep, 8.5" high, and weighs 43 pounds.
You'll want at least 10" of clearance from the back of the printer to the wall for proper operation and use of the rear paper feed.
When fully extended, the front paper tray extends 12.5" from the front of the printer.
Front Control Panel

The front control panel of the PRO-10 consists of three controls:
- Power button with light
- Resume / Cancel button with warning light. Errors will be identified by different sequences of blinking. Consult your online manual for help with decoding the sequence should you have a problem.
- Wireless connectivity button with indicator light
Connectivity
The PRO-10 can connect to your computer via USB 2.0, wireless network, or ethernet.
Media Paths

The PRO-10 has two media feed paths and a CD/DVD printing tray
- Rear tray - for the majority of media you'll use
- Manual feed - single sheet tray for heavy and specialty media
Canon notes that the recommended paper capacity for the rear tray is 20 pages for 4" x 6" and 5" x 7" photo media, 10 pages for letter and 8" x 10" photo media and a single page for larger sizes. A single page is also recommended for Fine Art papers.
We conducted tests using a variety of Red River Paper media in the PRO-10. The rear tray can support up to 50 sheets, depending on the thickness of your paper. Photo papers like luster, satin, and glossy at 10.4mil thickness are expertly handled by the PRO-10 with no misfeeds. Photo weight and lighter matte papers also fare well in the rear tray. If you're using thick media, above 11mil, you’ll have better luck feeding one sheet at a time in the rear tray. Fine art stock, canvas, specialty media, and paper over 14mil thickness will work better when fed into the manual single sheet path.
For some driver media settings, the printer will only allow the manual feed path to be used. These settings include:
- Fine Art “Museum Etching”
- Other Fine Art Paper 1
- Other Fine Art Paper 2
- Canvas
- All Hagaki settings
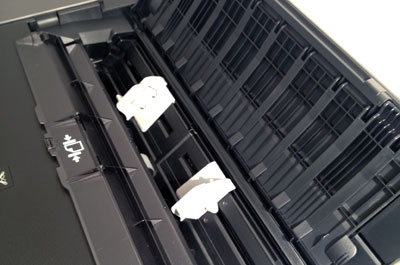
CD Printing Capability

Above you can see the CD holder that comes with the printer. The holder is placed into a front slot on the left side of the machine. Please note that you'll need specialty CD or DVD media coated for inkjet printing.
Canon's My Image Garden software is provided to set up and print discs.
Print Speeds and Results
Print Quality
The Canon PRO-10 produces photo quality typical of today’s inkjet technology - what we would describe as continuous tone. This means that when you are printing a typical photograph, the dots of ink that make up the photo are not visible at normal viewing distance. This is especially true when printing on satin, luster, and glossy media. Solid blocks of color are uniform and smooth looking. Only in some mid-tone areas will you occasionally see a few dots. Again, one would need to be unnaturally close to the print to see them. So from a detail and tonal reproduction standpoint, the PRO-10 produces outstanding photo quality.
Profiles & Color Reproduction
During testing, it became apparent that using an ICC printer profile greatly improved output – both the color fidelity and tonal transition. Prints on luster, glossy, matte, Baryta, and cotton fine art paper all showed the same trend. Printing without a profile yielded decent results, possibly good enough to satisfy viewers not familiar with the original file. When compared to a print made with a profile though, any viewer will likely point to the profiled print as considerably better. Now this is not a bad thing. Serious print makers know profiles exist to produce the best possible quality from a printer / ink / paper combination. They also provide the confidence to know that on-screen edits will be reproduced as close as possible on paper.
However, we noticed how certain colors looked slightly over-saturated - deep blue skies and intense green foliage in particular. Our guess is that Canon rightly tried to make PRO-10 output more saturated and lively than its predecessor, the Pro9500 MkII. Perhaps they overshot a tad. If you happen to see and agree with our opinion, correction is simple with some edits to a file.
Print Speed

An 8" x 10" file at 240ppi (shown above) was printed and timed using the settings listed below:
| 8" x 10" image on 8.5x11 paper | Time in minutes and seconds |
|---|---|
| Luster Paper Highest Quality (Level 1) | 7:10 |
| Luster Paper High Quality (Level 2) | 3:37 |
| Luster Paper Standard Quality (Level 3) | 2:29 |
| Matte Paper High Quality (Level 2) | 4:49 |
| Matte Paper Standard Quality (Level 3) | 3:38 |
| 4" x 6" image on 4x6 paper (borderless) | Time in minutes and seconds |
|---|---|
| Luster Paper High Quality (Level 2) | 1:41 |
| Luster Paper Standard Quality (Level 3) | 1:12 |
Quality Settings
We printed the target file on UltraPro Satin and 47lb. Premium Matte using the Photo Paper Pro Luster and Matte Photo Paper media settings, respectively. The prints were allowed to dry eight hours before being evaluated under balanced 4700k Solux lights.
When viewed at normal distance, each print showed similar saturation and color balance. However, areas of solid color and tonal transition (such as skies and flower petals) at Standard quality were clearly inferior to the other quality settings.
Closer inspection of the Standard quality print revealed a slight reddish cast in skin tones and slightly cooler tone in gray scales.
Additional differences between Standard settings and higher quality settings are edge definition and clarity. You can see the difference in these macro shots below.


There is little difference between Standard quality (Level 3) and the higher quality prints (Level 2 and 1).
On the other hand, it is much more difficult to find differences between Level 1 and Level 2 quality prints. Slight variations in dot placement and areas of fast tone change are evident upon very close inspection. Viewed at reasonable distance, the differences have all but vanished. Please note, the Level 1 setting is only available for select photo glossy and luster media settings.
Our conclusion is that Level 2 High print quality is the best setting for most print jobs. We'd switch to Standard quality (Level 3) for proofing and everyday photo sharing projects.
Black & White

The Canon PRO-10 features a specialty Black & White function, combining black, gray, and spare amounts of other colors to make grayscale images. Black & White tests consisted of the 8x10 test image printed using the driver's B&W feature. The file was printed from Photoshop set to "Printer Manages Color". The PRO-10's driver has three pre-set Black & White modes - “Black & White”, “Cool Tone”, and “Warm Tone”. We made a target print using each setting. After drying for eight hours, the prints were evaluated under balanced Solux light. The results are noted below:
Black & White - neutral grays with little or no color cast
Cool Tone - a very slight shift to blue and a cooler look
Warm Tone - a light but noticeable warm shift with a slight yellow tone
In the end, we preferred the Cool Tone setting which gave the print a bit more contrast and depth.
Black & White tonality can also be controlled via X and Y variables, slider bars, or by placing your mouse inside the “Tone box”. See image above.
Brightness settings include normal, light, and dark. Intensity and contrast are sliders allowing for finer adjustments.
All of these adjustments will be "previewed" using a standardized sample image. The drop down menu below the pencil photo at right allows you to choose different preview samples. What actually happens on your printed image may be different. We suggest being judicious with changes and make small test prints when getting started. p>
Overall, we were pleased with the results. You will benefit from well prepared files, which means proper exposure as well as some additional mid-tone contrast. Both are helpful in adding the proper amount of intensity and life to black & white print.
Canon Pro-10 Printer Driver Tour
Quick Setup Tab

The Canon PRO-10 printer drivers are basically unchanged from previous PRO printer models. We're starting on the Quick Setup tab, which contains most of the controls you'll need for printing.
From this menu, you can choose the media type (paper type), paper size, print quality, and other important features.
Main Tab

We recommend using this screen as much as possible as it gives you access to the custom print quality and manual color controls.
Media Type
When setting up a print job, you must tell the printer the type of inkjet paper (media) that you are using. Think of the media type as part color profile and part ink throttle. Different inkjet papers need different amounts of ink to perform properly - and this is where the media setting becomes important.
If you are using ICC color profiles, the media type is critical. You have to set the media according to your profile's instructions in order to get the best results.
Note! You will not see alternative paper brands, such as Red River Paper, in this listing. Only manufacturer inkjet media options are in this drop down.
Fine Art Margins - If you choose a fine art or non-Canon specialty media type, the printer driver forces a 30mm (1.18") margin to the top and bottom of your print. The left and right margins are set at 3.4mm (0.13"). The media settings also limit the available paper size you can use to:
- Letter
- A4
- A3
- A3+ 13x19
The feature is most likely an attempt to minimize possible head strikes at the beginning and ending of a print when using "fine art" papers. As a result, Red River Paper and other paper companies have chosen to make their fine art printer profiles with the Matte Photo Paper setting, which avoids the size and margin constraint.
Quality Options

Print quality can be controlled from the Quick Setup and Main tabs.
Quality Choices
On either the Quick Setup or Main tab, quality settings of Standard and High are available when using photo quality media.
To access the custom quality menu, go to the Main tab, click on the Custom radio button, and then click Set. A slider controls the print quality setting. Level 2 corresponds to High and Level 3 to Standard quality. You will also find a third quality choice, the Level 1 setting. Canon has not given this setting a named label. We will call it "Highest" for the purposes of this review.
Only glossy, semigloss, and luster media settings have Highest quality as an option. Lower quality settings, such as Fast (Level 4), are available when plain paper or envelope media are selected. You would choose this setting for text and light graphic printing.
Color / Intensity

The PRO-10 driver color controls have an Auto and Manual mode. In Auto mode, the printer is completely in control of color management. You'll choose this setting if you are not using a printer color profile or if you have found the printer's default setting to offer adequate output quality.
If you need to make slight adjustments to the printer's color output, you can click on the Manual radio button then the Set button for the Manual Color Adjustment menu.

On the Color Adjustment tab, you'll find a number of sliders. These are "rough" controls for color saturation, brightness, intensity, and contrast. We say rough because there is no color managed preview of your image with the changes. The workflow pattern would normally be print, adjust, print, and adjust until you got the desired results.
To avoid this ambiguity, we recommend using printer color profiles for all of your output. Profiles take the guesswork out of correction and faithfully reproduce your file to the best of your paper's ability.
For those not swayed by the printer profile argument, Canon has a feature called Pattern Print. Accessible from the printer properties (Windows) or the Print Studio Pro plug-in, Pattern Print will setup and print a repeating series of your image on a single sheet of paper. The pattern represents and denotes various changes to color or brightness/contrast settings. Upon consulting the choices, you can dial in the recommended changes into the printer's color adjustment controls. Make sure you let the test print dry at least an hour, preferably longer, before making any decisions.
Below is a screen shot from Print Studio Pro showing the pattern layout and recommended Cyan, Magenta, and Yellow settings to achieve the look of each variant.

If you are using a printer color profile (ICC profile), then you will select the Matching tab. Under the heading Color Correction you'll find:

Driver Matching - this is the default setting for printer color management
None - this setting turns off the printer's color controls. Use this setting when you have a printer color profile and are using it to print via Photoshop, Photoshop Elements, Lightroom, Qimage, and the like.

ICM - Rarely used, ICM allows you to print using a printer color profile from software that is not "ICC aware". This applies to basic photo software and layout tools where the developers did not know of or consider color management important.
Page Setup

Controls for paper size, print orientation, and layout options are on the Page Setup tab.
Borderless Options

The Borderless print controls are of particular interest. When Borderless is selected, you will notice the "Amount of Extension" slider appear. When printing without borders, the PRO-10 will automatically stretch out the edges of a file to insure ink covers the edges of the paper. You can increase or decrease this function. Move the slider to the left for more extension. If you have a photo with important details at the edges, reduce the amount of extension to avoid those areas being cut off.
Borderless printing is an option with the following media settings:
- Photo Paper Pro Platinum
- Photo Paper Plus Glossy II
- Photo Paper Pro Luster
- Photo Paper Plus Semi-gloss
- Matte Photo Paper
Borderless Sizes Choices

Above, you'll see all of the possible Canon PRO-10 borderless size options. These are set by the factory and cannot be modified.
Custom Paper Sizes

Like other Canon printers, the PRO-10 allows you to define custom paper sizes. The limits:
Max Paper Width: 12.95" - After some experimentation, we found that a custom size set to 13" causes a print error. Using 12.95" fixed that issue. You will notice 16.54 on the width scale. This seems to be a software coding error.
Max Paper Height: 26.61" - We found the effective maximum print height is 25.7".
Maintenance Tab

The Nozzle Check, Head Cleaning, and Print Head Alignment are all critical tools to have if you experience a drop in print quality. You can call up your printer status dialog from this screen.
Custom Settings

You will find a very important control in the custom settings menu, Prevent Paper Abrasion. Always turn it on when you use heavy or specialty media. We recommend using the feature with papers over 12mil thickness.
"Ink Drying Wait Time" controls the pause between print head passes. Because dye inks dry rapidly, the setting will likely not need to be changed.
If you use custom sizes and encounter a driver error relating to paper size and setting compatibility, try turning off the" Detect Paper Width" feature.
Clear Coating

You can manage the use of the PRO-10's Chroma Optimizer cartridge from the Clear Coating tab. From the Clear Coating Area drop down menu:
- Auto - applies coating to areas where ink is laid down
- Overall - applies coating to the entire page
- Custom - you can create custom coating templates
The custom feature is interesting but not something we tried to grasp in the scope of our review.
Included Software
Descriptions are taken from the Canon online manual.
My Image Garden
My Image Garden is an application that allows you to utilize your digital photos for a variety of purposes. You can organize a vast number of images easily, or you can create collages, cards, and other items from your favorite photos and print them. Moreover, you can perform various scans with one click.
Print Studio Pro
Print Studio Pro is a plug-in that makes professional photo printing easier and more convenient.
In addition to printing bordered photos and borderless photos, you can perform various printing tasks such as index printing, grayscale printing and printing using ICC profiles. You can also adjust the margins or add text.
Quick Menu
Quick Menu is software that allows you to easily start the applications and manuals supplied with the machine or quickly access online product information. In addition, with simultaneously installed Image Display, you can enjoy patterns of collages and other items created automatically by the item recommendation function of My Image Garden as well as slide shows of images saved on a computer.
Easy-WebPrint EX
Easy-WebPrint EX is software that allows you to easily print web pages displayed in Internet Explorer.
You can print a web page by automatically reducing its size to fit the paper width to prevent the edges from being cropped or by selecting pages in preview.
My Printer
My Printer is an application that allows you to display the setting screen of the printer driver or look up solutions to operational problems.
Red River Paper Compatibility
Our line of premium inkjet papers includes Over 20 Inket Papers that work well in the Canon PRO-10. You can also see the Most Popular Papers for the PRO-10. You can Evaluate These Papers by Ordering a Sample Kit.
Print Testing
We made a number of prints on all compatible Red River papers from 4x6 up to 13x19. Prints were made using Color Profiles for the PRO-10. Using profiles is always a good idea, and in the case of this new printer they are highly recommended to achieve proper color balance.
Glossy Papers
Smooth glossy papers like Red River Paper's UltraPro Gloss 2.0 work well. Compared to the Pro9500 MkII, the PRO-10's performance on glossy paper is much better. There were no hints of bronzing or gloss differential. The PRO-10's enhanced color gamut and clear coating make printing on glossy paper much more enjoyable and rewarding.
Satin / Luster Papers
The PRO-10 seems best suited to print on satin and luster papers. We found that prints looked good and withstood handling well. Red River's most popular paper, UltraPro Satin, and true professional grade paper, Arctic Polar Luster, are sure to please when paired with the PRO-10.
Photo Metallic Paper
Photo metallic inkjet paper features a high gloss surface with a unique metallic undercoating. It allows inkjet users to capture the look of Kodak Endura Metallic™, a process previously reserved for labs. Images virtually jump off the page; colors are vibrant and almost luminous. Red River Paper was the first to introduce this type of inkjet paper in 2010 with Polar Gloss Metallic 255 (formerly 66lb. Polar Pearl Metallic). As with other glossy media, the PRO-10 performed well on photo metallic.
Photo Matte and Cotton Fine Art
Matte and most cotton art papers have a non-reflective surface. They are a good choice for landscapes, fine art black & white, and images where you find a lot of detail. Lack of reflections and glare allow the viewer to concentrate on these details more fully. We made prints on a number of matte papers as well as Red River Paper's Aurora Art Natural and White. Detail and color balance were good, and with the help of our profile, the print met expectations. We did find black density, or dMax (the blackest black a printer and paper can make), to be lower that we expected. This issue is a running theme with desktop pigment ink printers from Canon. It's not a deal breaker for owning the machine, but you should be aware of the limitations if you are a dedicated matte paper user.
Canvas and Baryta
The new easier to use single sheet tray makes using specialty media like canvas and baryta a joy. Make sure to set the "Prevent Paper Abrasion" feature in the printer's utility when using these inkjet papers. Prints on Red River Paper San Gabriel Baryta SemiGloss 2.0 and Blanco Matte Canvas looked great and help highlight the versatility of the PRO-10.
First Impressions
After spending a few weeks with this printer, we find the Canon PRO-10 a welcome replacement for the Pro9500 MkII. The printer's color gamut and quality are good though not quite as vivid as they probably could be given Canon's enormous technology resources. The easy to use specialty media path for thick papers is evidence Canon acknowledges the needs of photo enthusiast customers.
Positives
- Photo quality from the PRO-10 is on par with its competitors. At normal viewing, distance prints appear continuous tone.
- Good color reproduction made better and more predictable with printer profile use.
- Good black & white capability. Specific B&W software controls make the task of grayscale printing easier and more predictable.
- Robust paper handling from both the regular paper tray and the single sheet specialty path.
- Compatible with virtually all quality inkjet papers.
- Long term fade resistance from Lucia™ pigment inks.
Issues
- Black density on matte and matte fine art stocks not on par with competitor machines like the Epson R3000.
- No 11x14 borderless capability
- Limited print length - the 26.1" maximum seems arbitrary and should in our opinion be at least 44".
- Print speed slow compared to competitive printers. We would not recommend the PRO-10 for users needed large quantities of prints daily.
Similar Printers
- Epson R3000 - Read the Epson R3000 Review
- Canon PRO-1 - Review coming soon
Have Questions? Want to Know More?
Please Contact us via the Support Center with your questions about the PRO-10, or anything inkjet related. We're happy to share our knowledge from 15 years in inkjet printing with you!
Best Inkjet Papers for the Canon PRO-10 Printer
You can Shop for our Most Popular Papers on One Page.
Pick Up a Sample Paper kits for the PRO-10.
Last updated: August 25, 2023


