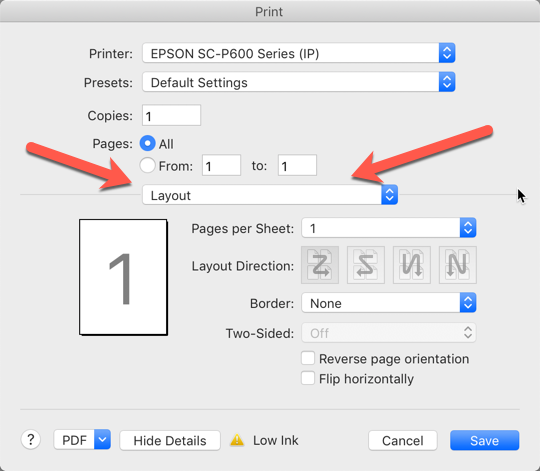
The Print dialog remains unchanged as it is driven by the Mac OS. From this menu you can control most aspects of the printer.
The Presets feature allows you to save settings you use most often, naming them for future use.
Photo Black Ink vs. Matte Black Ink
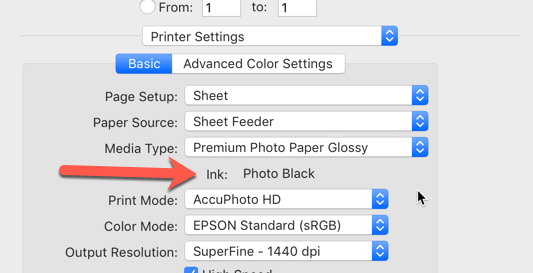
The media type also dictates the use of Photo or Matte black. For example, glossy and luster will use Photo Black while matte and most fine art settings use Matte Black. You can also execute the change using the printer's control panel. The switch can be automatic based on media selection, or you can choose to receive a warning when change is required. This feature is found on the printer's control panel under System Administration > Printer Settings > BK Ink Auto Change. We recommend you turn it off to prevent unwanted switching.

The P600 has a new feature for saving ink during the black ink modes. The control is accessed from the printer control panel under System Administration > Printer Settings > BK Ink Change Setting. The options are Normal and Save Ink. Epson tech specs show ink usage during the swap as:
- Matte to Photo Black approx. 3 ml (1 ml Save Ink Mode)
- Photo to Matte Black approx. 1 ml (1 ml Save Ink Mode)
Media Type
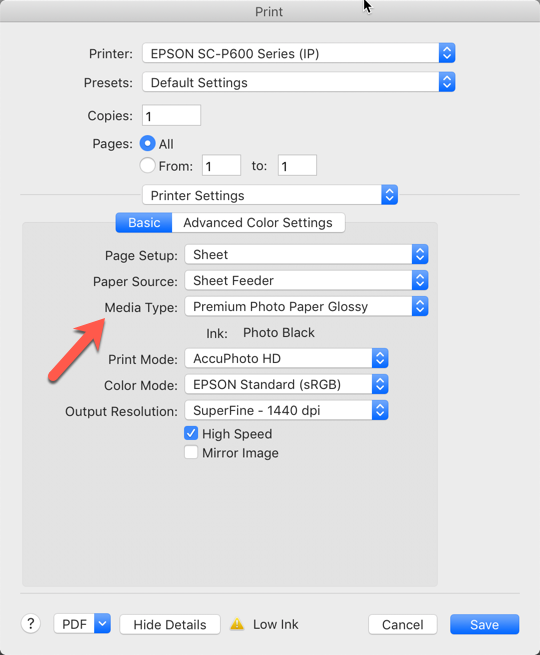
With each print, you must designate the type of inkjet paper (media) that you are using. You can think of media type as part color profile and part ink throttle. Different inkjet papers need different amounts of ink to perform properly, and this is where the media setting becomes important.
Even if you are using ICC color profiles, choosing the right the media type is important. The right choice should be included with your profile's instructions. It is important to note that the drop down menu at right is a fixed list and only contains Epson media names. When using non-Epson papers, you are going to choose the closest media type.
Quality Options
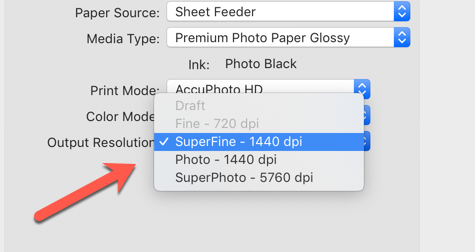
To get to this menu, go to the Output Resolution drop-down. Your options are:
- Superfine 1440 - 1440x720dpi
- Photo 1440 - 1440x1440dpi
- SuperPhoto 5760 - 5760x1440dpi
We recommend the Photo setting for most users. It offers the best combination of quality, speed, and ink economy.
The High-Speed option puts down ink each time the print head passes over the paper. Turning High Speed off means the print head only puts down ink in one direction. For most, high speed yields excellent results. For even better quality turn high speed off if you see fine banding that runs parallel to the print head path.
Print Mode
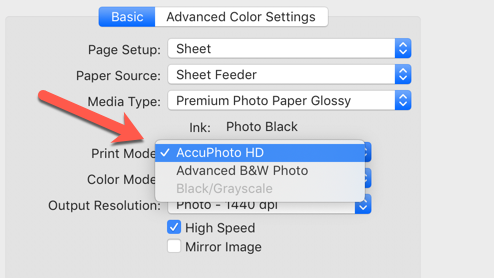
This drop-down controls printer color management. Provided your editing software is set to "Printer Manages Color", the Print Mode dropdown will display AccuPhoto HD and Advanced B&W Photo.
There are two situations where the Print Mode selections will be grayed out:
- Your printer software is set to manage color output. In this case, the printer driver's color management will be automatically disabled.
- ColorSync is selected on the Color Matching tab (see below)
Color Matching
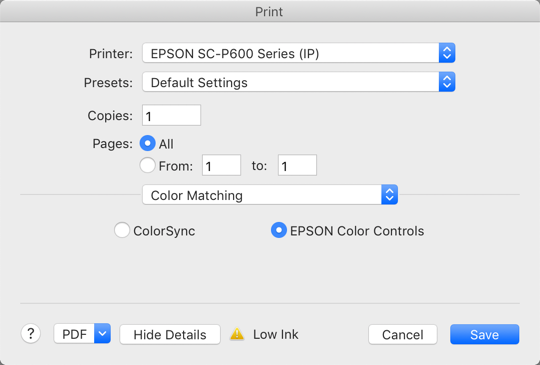
The Color Matching tab gives you access to the ColorSync controls. ColorSync is Apple's internal color management system. Though rarely used today, the system allows users of non-ICC aware applications like iPhoto to print using a printer color profile.
This menu should default to Epson Color Controls so that the Print Mode controls will be active. If you notice the Print Mode options are grayed out, and you did not set your editing software to manage colors, check the Color Matching tab. You may find that ColorSync is active. Clicking on Epson Color Controls will restore the Print Mode options.
Advanced Media Control
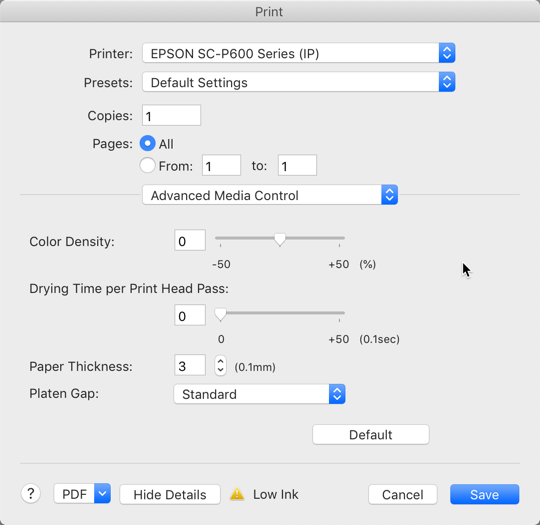
Platen Gap
This menu is most important when using thick papers. Any paper over the standard 10.4 mil photo thickness warrants the platen gap being set to Wide.
Paper Thickness
The paper thickness control is useful when you use media above 15mil thick. Canvas is an excellent example where thickness can easily exceed 19mil. The control is measured in tenths of a millimeter. Over the years, we have determined setting paper thickness to 6 works well and provides good quality with more than enough clearance to avoid head strikes.
Color Density
The Color Density control acts as an ink throttle. If you encounter a paper that warps or buckles under heavy ink loads (this is usually image dependent), try setting Color Density to minus 10. It will normally help with the warping but will not degrade image quality.
The Drying Time per Print Head Pass feature is nice but does not really apply much these days. We recommend increasing dry times for metals, translucent media, and self coated materials.
Paper Sizes

Unlike the Windows printer driver, the Mac OS handles paper sizes. As a result, your borderless options and paper feed choices are built into the sizes as shown at right.
The P600 can print these sizes borderless.
- 3.5 x 5
- 4 x 6
- 5 x 7
- 5 x 8
- 4 x 7.11
- 8 x 10
- A3
- A4
- 8.5 x 11
- 11 x 17
- 10 x 12
- 11 x 14
- 12 x 12
- 13 x 19

Borderless options include Auto Expand and Retail Size. Epson's Auto Expand feature stretches the edges of your image, expanding the image size to make certain the print is borderless. The amount of expansion can be controlled from the Roll Paper Settings drop-down menu under Expansion.
The Retain Size option prints the file's true size without expansion. If you use this option, make sure the file size is as big or slightly bigger than your paper size.
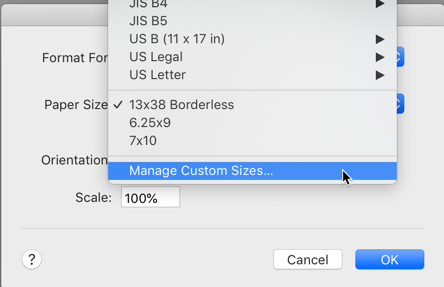
Manage Custom Sizes
Like other Epson printers, the P600 allows you to define custom paper sizes. According to the manual, the size limits are:
Paper Width: 3.5" - 12.95"
Paper Height: 3.5" - 129"
The Non-Printable Area controls, or the margins of the custom size, are of particular importance.
Access the Custom Paper Size menu from the Page Setup / Paper Size menu:

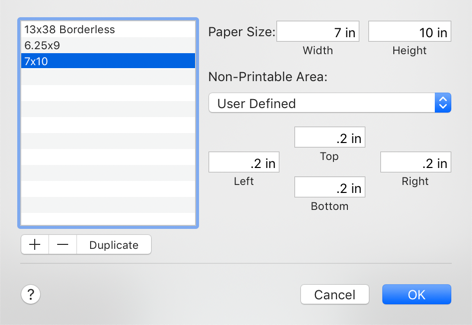
KEY CONCEPTS
Unless you are printing to a roll, do not set the margins smaller than 0.2". Making them smaller will likely cause a print error.
Width - Always the smaller dimension of your paper
Height - Always the larger dimension of your paper
Using a Custom Size
When you have chosen a custom size in the Paper Size menu, the Page Setup option appears in the Printer Settings dialog.
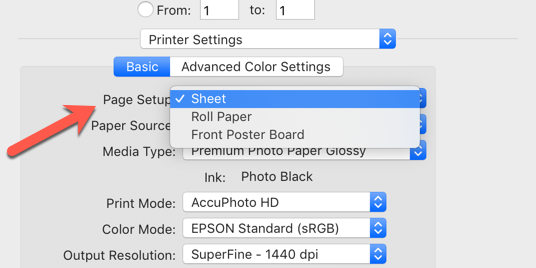
From the Page Setup drop-down menu you can choose how you will feed your custom size paper:
- Sheet (the top auto-load tray)
- Roll Paper
- Front - Poster Board
Custom Borderless Sizes are an Option
Like the Epson R2000 and R3000, the P600 offers some custom borderless print capability. Borderless widths are fixed at the factory while you can define any borderless height/length. Unfortunately, the Mac driver does not list or otherwise explain how this system works.
You will start by defining a new custom paper size.
Create a new custom size using one of the widths BELOW.
The Non-Printable Area (margins) must be set to 0"
Name the new size and then click OK.
When you are ready to print, choose the new custom size from the Paper Size menu.
As shown below, the Page Setup drop down will now have a "Sheet Feeder - Borderless" option. This process also applies to printing borderless 13" rolls.
Custom Borderless Widths
- 3.5
- 3.94
- 4.00
- 5.00
- 8.00
- 8.27
- 8.5
- 10.00
- 11.00
- 11.63
- 12.00
- 12.95


This feature opens fun opportunities for printing borderless greeting cards as well as pano and landscape prints.
Borderless Greeting Cards
You can now print Red River Paper's 7x10, 8.5x5.5, and 8x9 Pano Cards without borders. Instructions for Setting Up these Custom Borderless Sizes.
Pano and Landscape Prints
You can now print stunning panos and landscape images on Red River Paper's 13" x 38" and 8.5" x 25" Flat Sheets.
Paper Handling
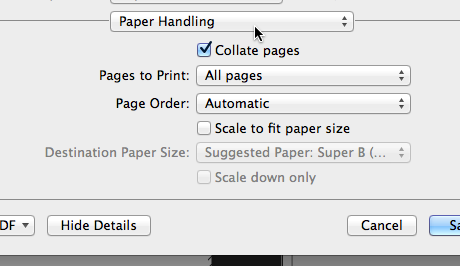
Use this tab to choose:
- Pages to print
- Page order
- Scaling images to fit a specific paper size
Printer Utilities


You should come to this tab often to perform routine printer checks and maintenance. The Nozzle Check, Head Cleaning, and Print Head Alignment are all critical tools to have it you experience a drop in print quality.
You can quickly bring up the print queue in case you need to check on a job.
Advanced Black & White
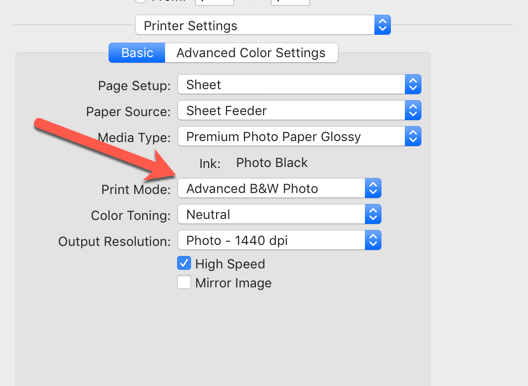
The Epson P600 has three black inks available for your printing needs. Using the Advanced Black & White (ABW) mode, the P600 blends these inks to create a totally neutral black & white image. The system can also create toned grayscale images from cool, to warm, to sepia.
To access ABW, go to the Printer Settings menu and select "Advanced B&W Photo" from the Print Mode drop-down.
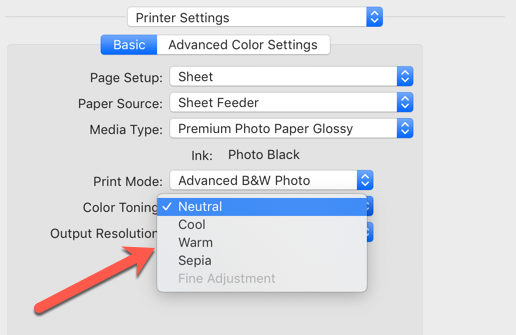
When ABW is active, A "Color Toning" drop-down menu appears as seen at right. This is the quick method of using ABW for basic neutral or toned images.
ABW - Advanced Settings
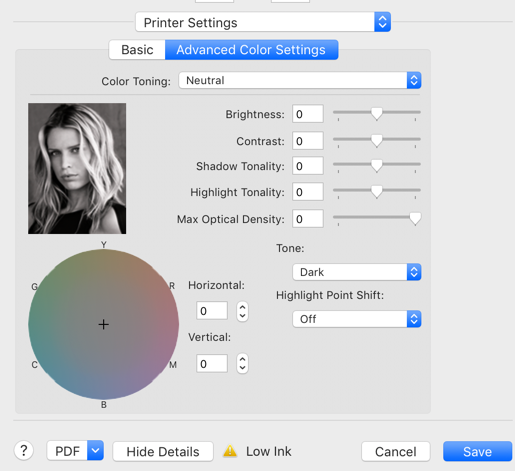
For more detailed adjustments, clicking the Advanced button above brings up the Color Controls menu for ABW.
A number of variables are available including a color wheel for precise toning work. The only issue you'll find with these controls is the lack of a "live" preview of your image in the driver dialog. You are provided with a static image that shows the effect of different settings.
We noticed a reference to Epson Print Layout software in the original P600 press release. The software can be downloaded from Epson America here. The program is quite remarkable, with controls for print layout, setup and templates, and printer color management with automatic soft-proofing based on the print profile. That feature extends to the ABW system and will soft-proof your images based on ABW settings. A detailed review of the program is forthcoming.
Read a More Detailed Explanation of the ABW controls.
Last updated: December 02, 2022


