How to create user defined paper sizes - Epson | Lightroom Classic | Windows
For Red River Paper greeting cards, scrapbook 12x12 sheets, panorama printing, and other special projects, you need to define a custom paper size in the Epson printer properties. Below are instructions for setting a custom paper size in Lightroom.
Written instructions are included below.
Written Instructions
After completing your edits, go to the Print module.

Now click the Page Setup button. On the lower left of your screen.

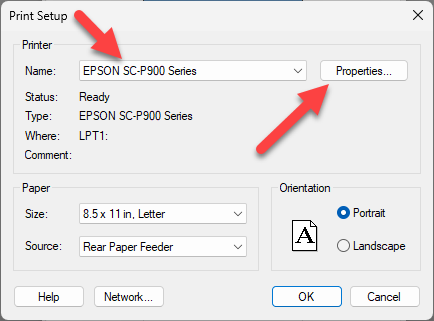
The Print Setup dialog appears. Choose your printer and click Properties. This will launch the printer properties dialog.
Epson Printer Driver
If your printer properties do not look like these screen shots, scroll down to the older Epson driver version instructions.
On the Main tab of the printer's properties, locate and click the "User Defined..." button.

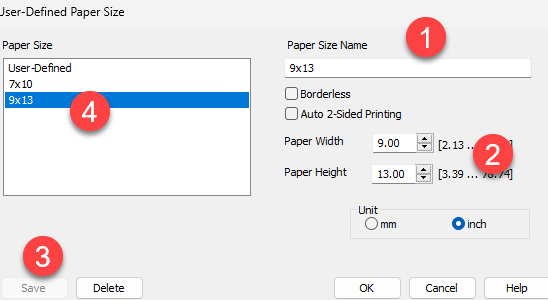
This launches the User-Defined Paper Size dialog.
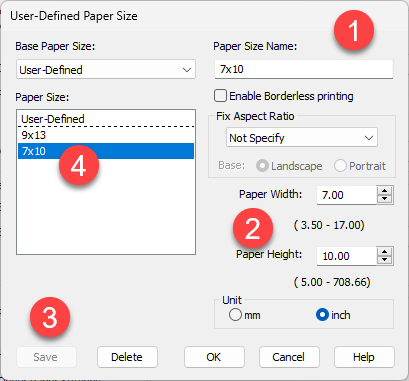
1 - Name your new paper size something easy to understand. Enter it in the dialog at the top of the menu.
2 - Now enter the paper's width and height.
Example - for a 7x10 greeting card 7 is the width and 10 the height regardless of the print orientation.
3 - Click Save
4 - The new size will appear in the Paper Size listing.
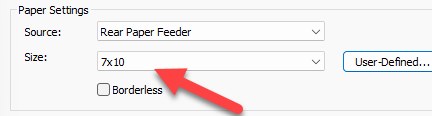
The custom size will now be available for your use in the paper size drop-down menu.
Note: 13x38 sheet size users - set the paper width to 12.95.
Alternative Epson Properties Versions
There are more than one Epson properties (drivers) version. Below is one you may find that your printer uses.
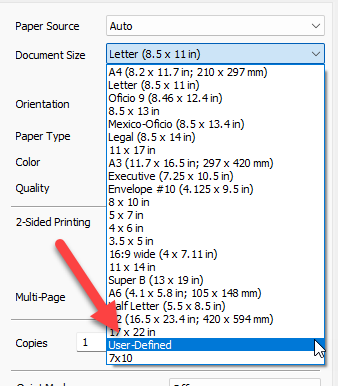
From the Document Size drop-down choose USER DEFINED.

1 - Name your new paper size something easy to understand. Enter it in the dialog at the top of the menu.
2 - Now enter the paper's width and height.
Example - for a 7x10 greeting card 7 is the width and 10 the height regardless of the print orientation.
3 - Click Save
4 - The new size will appear in the Document Size listing.
Note: 13x38 sheet size users - set the paper width to 12.95.
Going Back to Lightroom
Once you create a custom size, set media type, print quality, and color management click OK to exit the printer properties.

Once the printer properties close, you will again see the Print Setup dialog. Choose the orientation of your print then click OK.

You are now back in the Lightroom print module.
Set the cell width and height to their maximum.
You will normally set margins to their minimum value. Notice that they cannot be set to zero. This is because you are using a custom size and printers have a minimum printable margin.
Once complete, Lightroom should display a preview of your image set properly onto the custom size.

Last updated: January 24, 2024


