For some jobs, you may need to print on a custom paper size from your desktop or wide format inkjet printer. A good example is printing custom greeting cards. This brief lesson shows you how to define a custom size that can be saved and used again and again. It is specific to InDesign on a Mac.
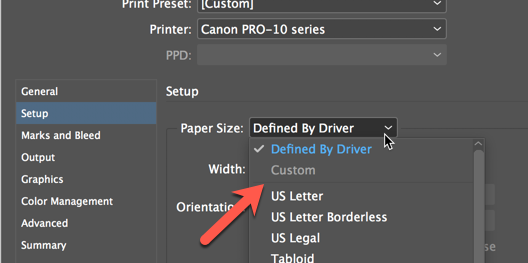
InDesign wants you to use the program's print dialog for everything. That works great until it doesn't. A good example is creation and use of custom paper sizes. As you can see below, "Custom" is grayed out of the InDesign Paper Size selection menu. This means you have to use the printer driver to accomplish the task.
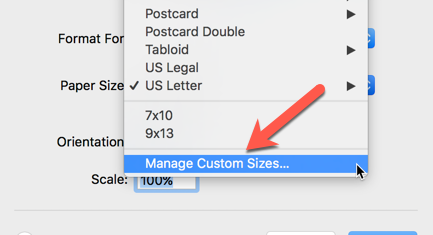
Locate and click on Page Setup as shown below.

In the Page Setup dialog, click on the Paper Size drop down.

Scroll to the bottom of the paper size list, locate and click "Manage Custom Sizes"
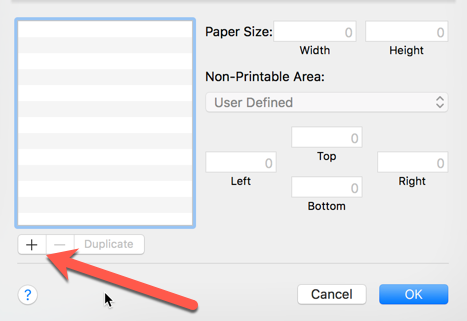
The custom paper size dialog appears. Click the "+" button to define a new size.
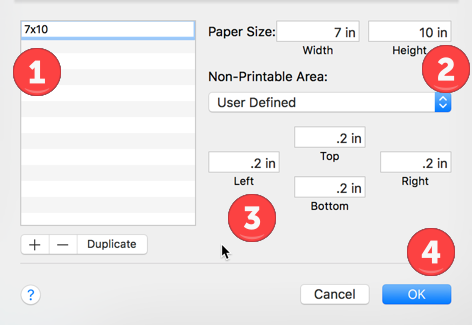
1 - Double click on the "untitled" new size and name it.
2 - Enter new paper size.
The width must be the smaller dimension and height must be longer dimension. If you do it backwards, your print is likely to fail.
3 - Set Non-Printable Area to 0.2 in on all four sides.
4 - Click OK. This saves your size.
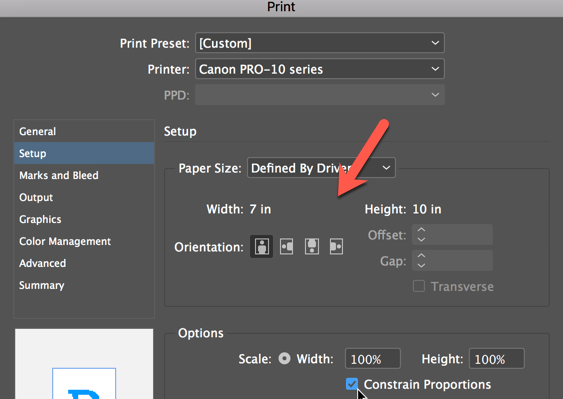
Back at the InDesign print dialog, you will see Paper Size - Defined by Driver and the custom size displayed in the width and height section below.
That's it. You have now defined a custom paper size. It will be available for future use, listed using the name you designated, in the paper size drop down menu.
Last updated: April 05, 2024


