How to Import Install Canon AM1X Media Config Files
Starting in the summer of 2016, Canon changed their PROGRAF config files from AM1 to AM1X format. This document explains the significance of config files, how to install them, and how they relate to ICC printer color profiles.
Part 1 Windows - Installing a custom paper AM1X config file
Canon Prograf series printers allow for the addition of "custom media types" into the printer's firmware and driver. This is accomplished via the Canon Media Configuration Tool (MCT), software that ships with all Prograf models. Using a custom media type offers users several advantages over selecting a generic media type. It allows the following information to be built into the media type file:
- Ink density limits, paper feed vacuum strength, and print head height / platen gap
- Roll paper settings - automatic cutting, drying time and borderless printing rules
- Paper feed adjustment which is particularly useful with super-heavy media such as canvas
Start by downloading the printer profile from Red River Paper's Profile Library. Select Canon Prograf profiles to come with the corresponding AM1X config files.
In the example below, you see the files included with a profile download. Click for help installing ICC profiles.
Item 1 is the profile.
Item 2 is the AM1X file.

The AM1X file installation requires you to start the Canon Media Configuration Tool (MCT).
Your printer must be turned on, ready, and connected to the computer before you begin. The MCT's main screen is shown below.

Click the button shown below to begin the add process.

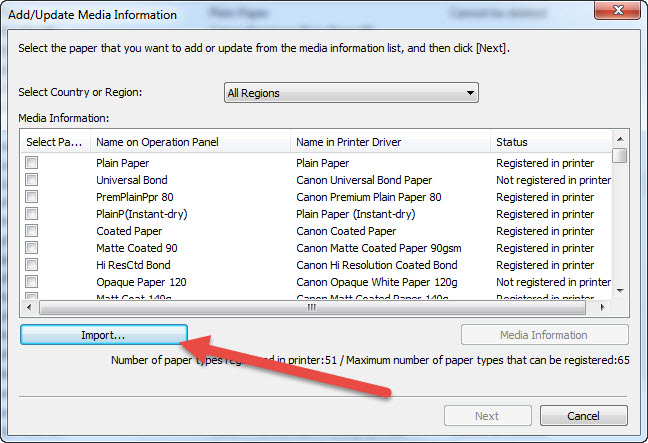
The Add Media Information dialog will appear.
Click the Import button then click the "Acquire" button as shown below.
The Open dialog will appear. Use it to locate the profile and config files you downloaded. In most cases, the files end up in the Downloads folder or on the Desktop.
Highlight the config file you wish to install and click "Open". You can add one config file at a time.

You will be back at the Add Media Information dialog. Verify the config file name is checked and click "Next" as shown below.

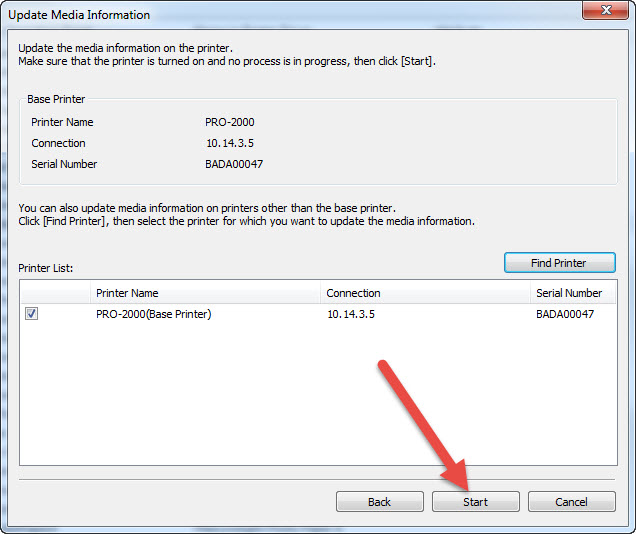
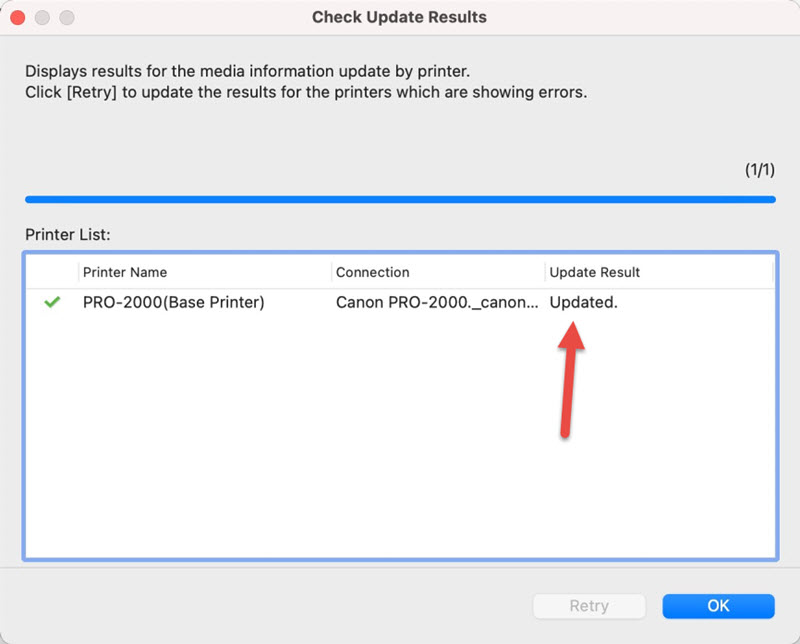
The "Update Media Information" dialog appears. Click "Start" to install the config file in your printer.
When the process is complete, you will see the result below. Click "OK"

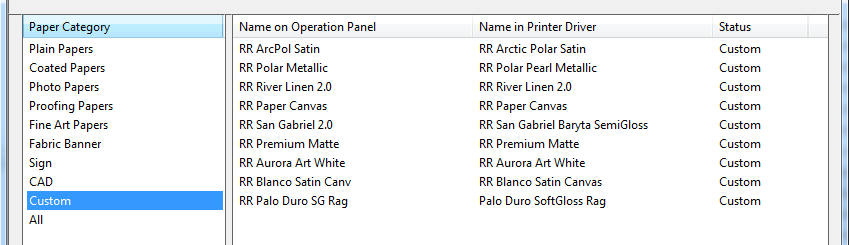
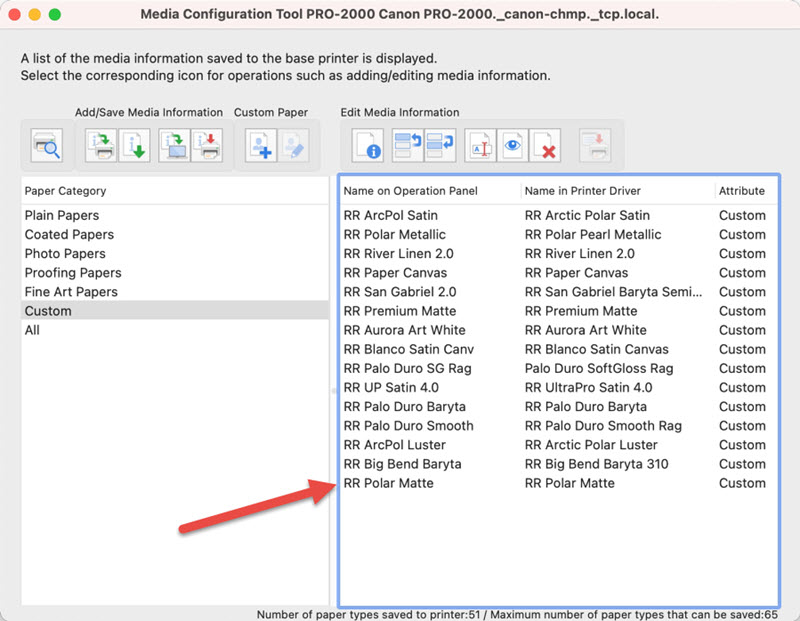
Back on MCT main control panel, locate and click the "Custom" selection as shown below. The config file you just installed will be shown on the right column. In the example below, you can see all of the Red River Paper AM1X config files currently installed on our printer.
NEXT
How to Use Canon AM1X Config Files During Printing
Part 1 Mac - Installing a custom paper AM1X config file
Canon Prograf series printers allow for the addition of "custom media types" into the printer's firmware and driver. This is accomplished via the Canon Media Configuration Tool (MCT), software that ships with all Prograf models. Using a custom media type offers users several advantages over selecting a generic media type. It allows the following information to be built into the media type file:
- Ink density limits, paper feed vacuum strength, and print head height / platen gap
- Roll paper settings - automatic cutting, drying time and borderless printing rules
- Paper feed adjustment which is particularly useful with super-heavy media such as canvas
Start by downloading the printer profile from Red River Paper's Profile Library. Select Canon Prograf profiles to come with the corresponding AM1X config files.
In the example below, you see the files included with a profile download. Click for help installing ICC profiles.
Item 1 is the profile.
Item 2 is the AM1X file.
The AM1X file installation requires you to start the Canon Media Configuration Tool (MCT).
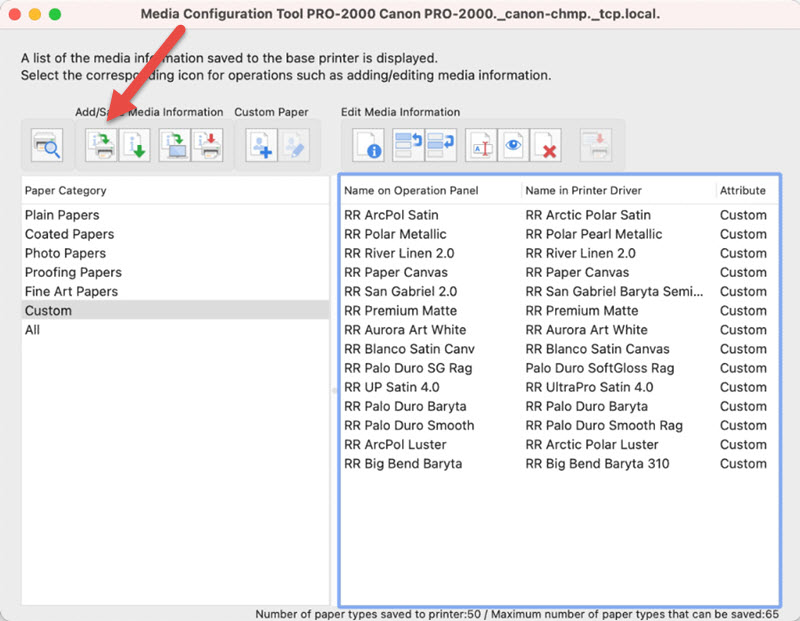
Your printer must be turned on, ready, and connected to the computer before you begin. The MCT's main screen is shown below.
Click the button shown below to begin the add process.
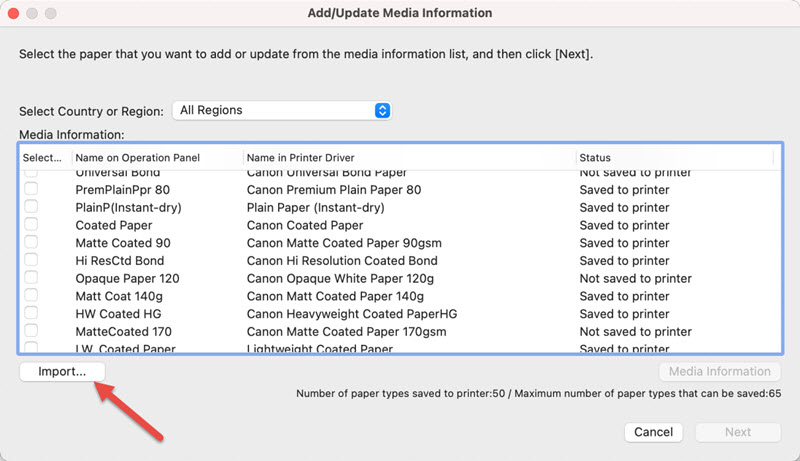
The Add Media Information dialog will appear.
Click the "Import" button.
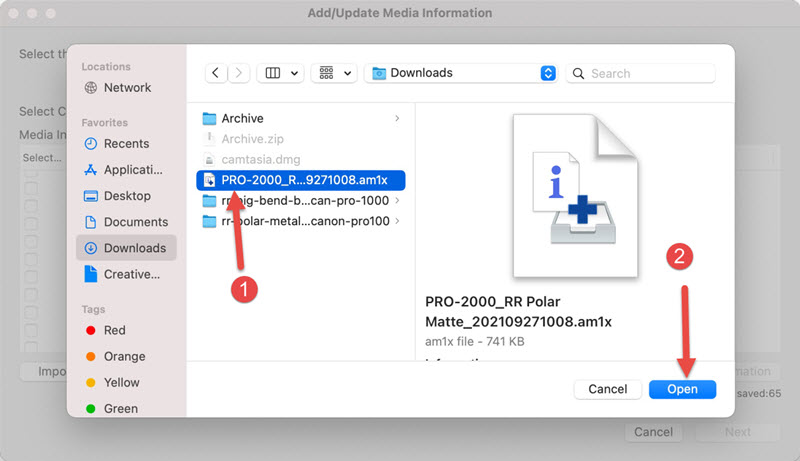
This dialog will appear. Use it to locate the profile and config files you downloaded. In most cases, the files end up in the Downloads folder or on the Desktop.
Highlight the config file you wish to install and click "Open". You can add one config file at a time.
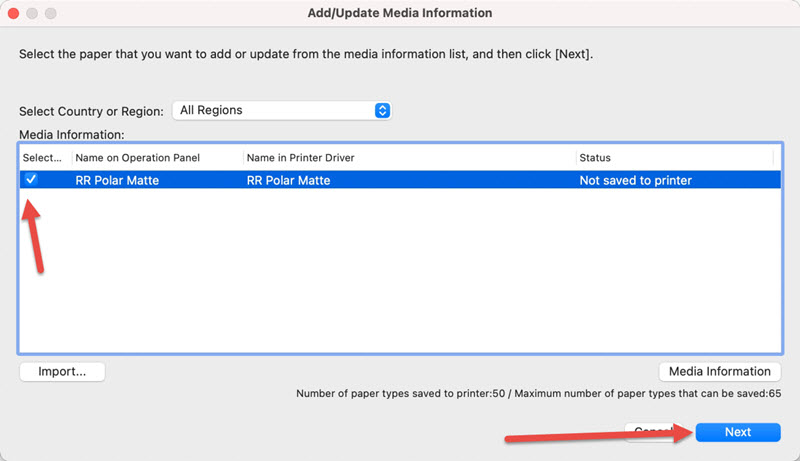
You will be back at the Add Media Information dialog. Verify the config file name is checked and click "Next" as shown below.
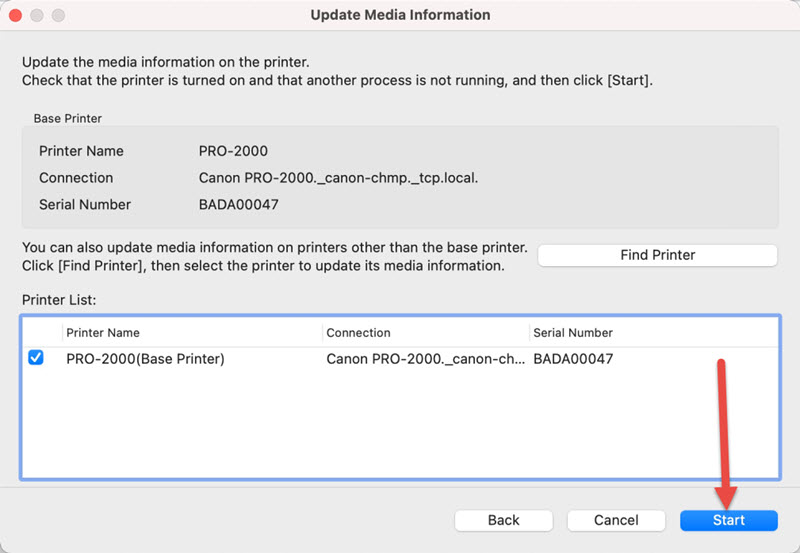
The "Update Media Information" dialog appears. Click "Start" to install the config file in your printer.
When the process is complete, you will see the result below. Click "OK"
Back on MCT main control panel, locate and click the "Custom" selection as shown below. The config file you just installed will be shown on the right column. In the example below, you can see all of the Red River Paper AM1X config files currently installed on our printer.
NEXT
How to Use Canon AM1X Config Files During Printing
Last updated: September 30, 2021


