Using ICC Printer Color Profiles - Lightroom | Windows | Epson
Start by going to the Print module.
Activating Profiles in Lightroom
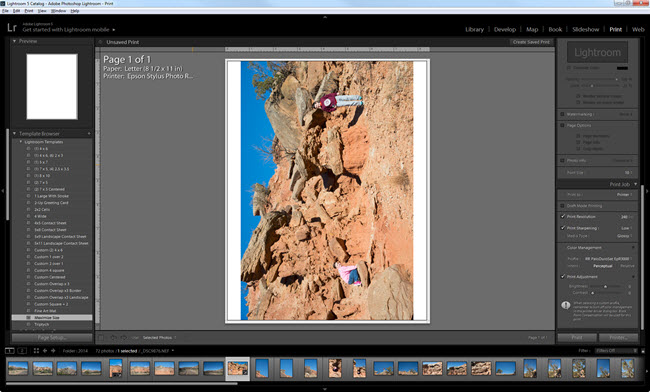
Start by accessing the Print Module as seen above. In order to achieve a color managed print, follow the instructions below and insure your dropdown and check box selections are correct.
 |
 |
The default color management setting is Managed by Printer. To use a printer color profile, click the drop down and choose "Other..." This will bring up the Choose Profiles dialog that displays all of the printer profiles currently installed on your printer.

Place a check box next to any ICC printer profiles that you'd like to use in Lightroom in the future. Click OK when complete.
Printing with a Profile from Lightroom
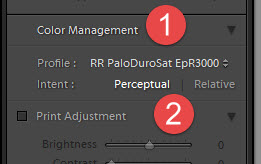
Locate the Color Management section on the right column of the print module. 1. Click the Profile drop down menu and choose the profile for your paper and printer combination. 2. Choose the rendering intent. The default is Perceptual. More information on rendering intents is here
|
 |
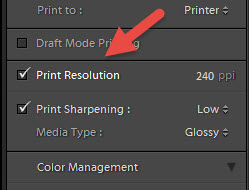
You will notice two controls above the Color Management section - Print Resolution and Print Sharpening. Print Resolution - If left unchecked Lightroom will use your file's native resolution. For the most part this will work fine provided you are not trying to print a web size image that has very low resolution. If you check Print Resolution 240ppi is the default setting and is sufficient for most high quality print jobs. Print Sharpening - This sharpens your photo above and beyond any sharpening done in the Develop module. You can set the level at low, standard, or high. Media type choices are Glossy and Matte. The rules for print sharpening differ for reflective and non-reflective media and this control takes that into account. You can choose Glossy for any reflective inkjet media. Note - Print adjustments do not preview onscreen. |
 |
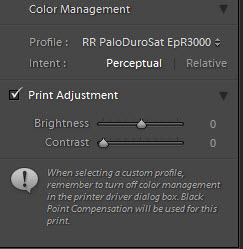
Lightroom features two last minute adjustment controls for your print - Brightness and Contrast. They were included because so many people report their prints being "too dark". That issue is almost always related to no monitor calibration or images being underexposed. However, for expedience sake Adobe put these controls in for a quick fix should you need them. Note - Print adjustments do not preview onscreen. |
 |
| Next you must set your printer properties. Locate and click on the Page Setup button on the lower left of your screen. |  |
| When the print setup menu appears, choose your printer from the Name dropdown and click the Properties button. |  |
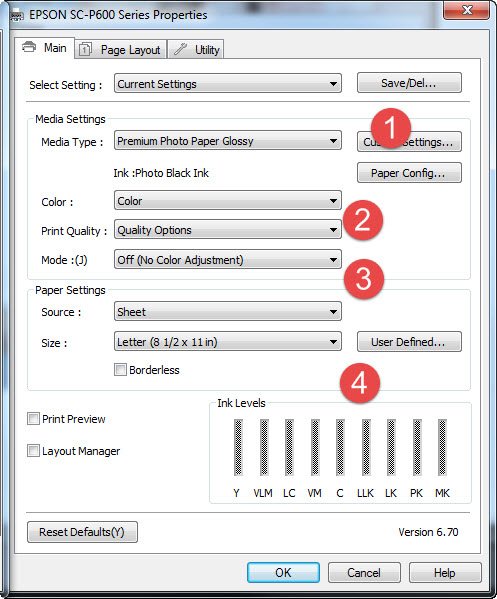
Your printer properties dialog will appear. 1. Choose the Media Type based on the instructions file you received with the profile download.
2. Set print quality. Choose Quality Options then select level 4 or 5 from the dialog. High Speed is on by default. Turn it off if you see very thin white banding in your prints. 3. Under Mode or Color Management choose "Off (No Color Adjustment)". The dialog may vary with different with Epson printers but you will always set it as mentioned above.
4. Set the paper size. |
 |
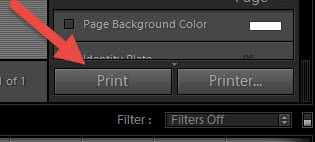
You can now click OK until you're back at the Lightroom print module. You can now click the print button, located at the lower right side of your screen. |
 |
Extra Tips - Lightroom Print Templates
You can save all of your Lightroom print mod settings in the form of a Print Template.
Click the + button and name the template. It will be available the next time you make a print.