Using ICC Printer Color Profiles in Lightroom
Epson Inkjet Printers / Mac
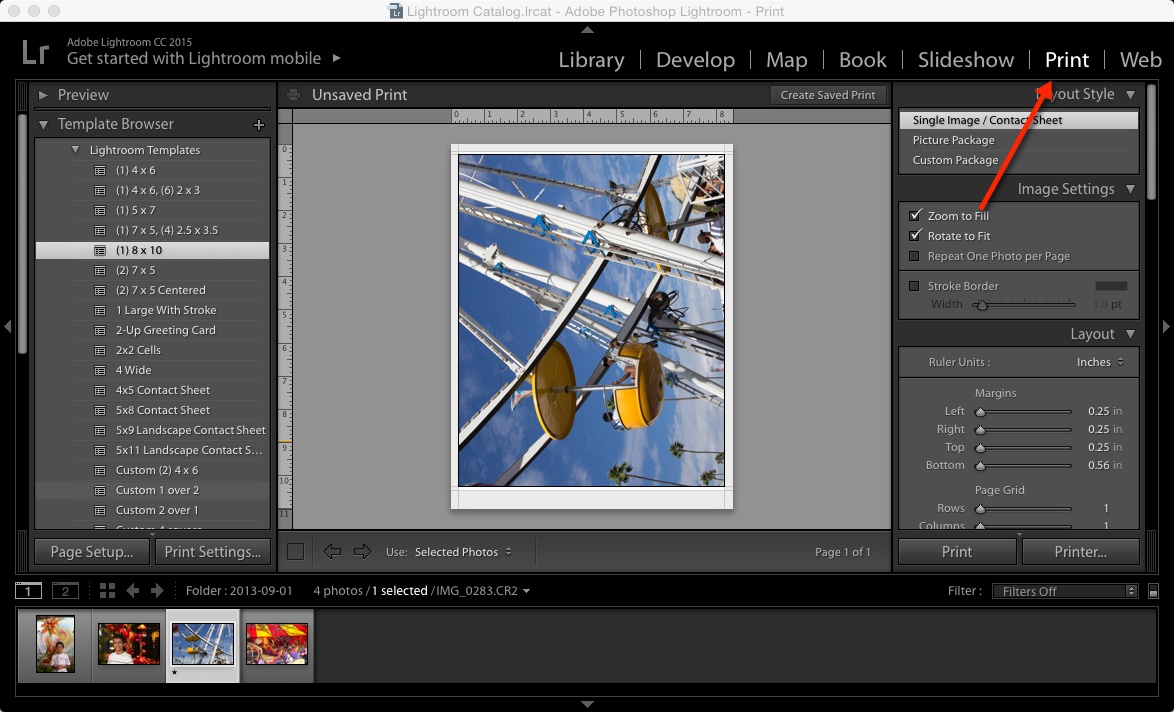
Start by accessing the Print Module as seen below. In order to achieve a color managed print, you'll need to follow the instructions below, and insure your dropdown and check box selections are correct.
Adding Profiles to Lightroom
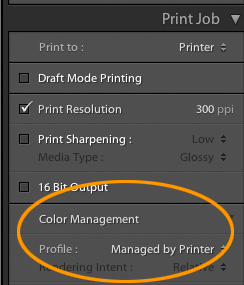
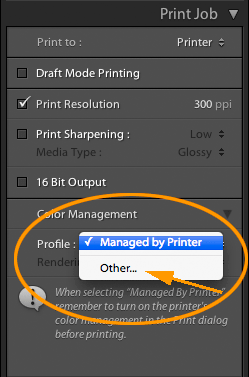
The default color management setting is Managed by Printer. To use a printer color profile, start by clicking the drop down and choose Other. This will bring up the Choose Profiles dialog that displays all of the printer profiles currently installed on your printer.
 |
 |
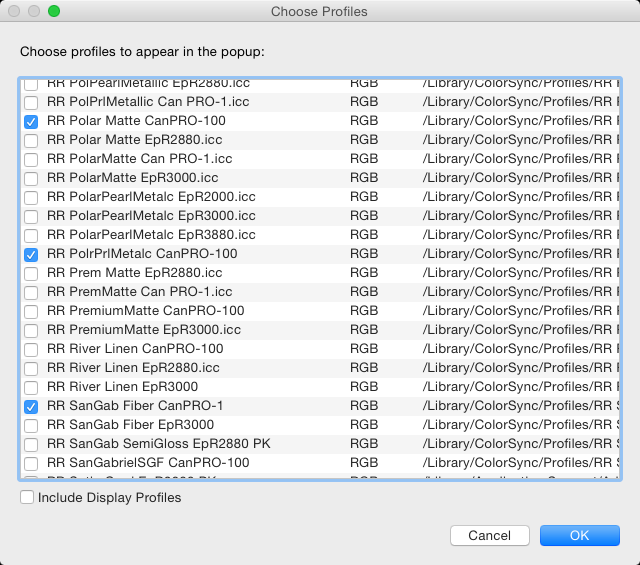
In the Choose Profiles dialog, you will see all ICC profiles that are installed on your computer. (Help installing profiles is here)
Scroll down until you find the Red River Paper profiles. All start with the letters "RR". Check the profiles you wish to add to Lightroom's Print Module and then click OK.
Choosing the Profile for Printing
Back in the Print Mod, click on the Profile drop down menu again. The drop down menu will now contain the profiles you checked in the above dialog. Click on the profile's name to select it for your print job.
You can now select your Rendering Intent. More information on rendering intents is here
Print Settings for Your Epson Inkjet Printer
Once you've instructed Lightroom to use your printer / paper profile, you'll need set your printer properties. You will be selecting media type, print quality, and turning off printer color management.
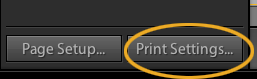
Click the Print Settings button on the lower left side of the Print Mod.
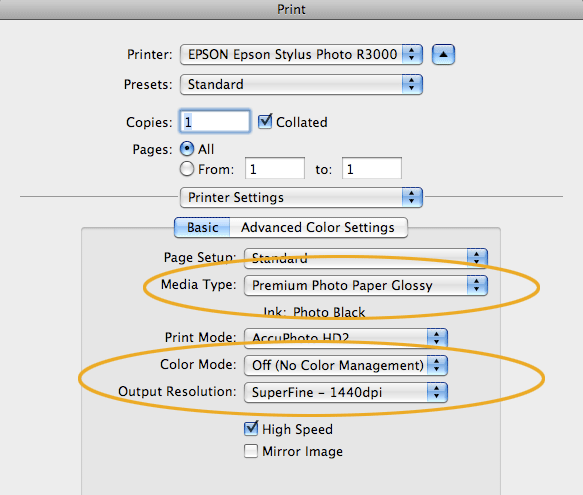
When the print menu appears, choose your printer from the Printer dropdown.
Start by choosing the Media Type. We include an instructions file with each profile download. Consult these instructions for the correct media setting.
Note! You will not see the Red River paper name in this menu. It only contains the names of the printer manufacturer's papers.
Next, check that your Color Mode is set to "Off (No Color Adjustment)". If it is not, see the next step.
Set your Output Resolution. We generally recommend Best Photo, SuperFine, or 1440dpi for consistent high quality results.
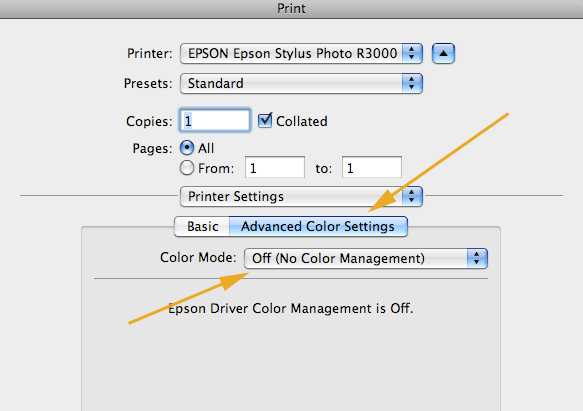
If you do not see the Color Mode set to "Off (No Color Adjustment)", click on the Advanced Color Settings, then choose that setting from the Color Mode drop down.
You can now click Save until you're back at the Lightroom print module.
You can now click the print button, located at the lower right side of your screen.
![]()
Lightroom Print Templates
You can save all of your Lightroom print mod settings in the form of a Print Template.
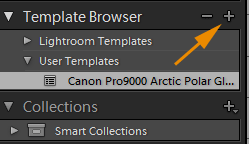
Click the + button and name the template. It will be available the next time you make a print.