Mac User? Click here for instructions
Click to learn how to uninstall profiles
The process of "installing" an ICC color profile is nothing more than pasting (or drag and drop) into a specific folder in the operating system. Your printing software looks in that folder when it comes time to print. It then creates a profile list you can choose from in the print dialog.
If you use Photoshop CS4 or earlier, or Photoshop Elements, restart your computer after following these instructions.
Written Instructions for Windows
Step 1 - Extract / Unzip the file you downloaded from our website
You do not need special software to extract zip files. Windows comes with this capability.
On most Windows computers, the zipped file will look like a folder with a zipper.
1) Right mouse-click on the zipped filer and choose "Extract All".
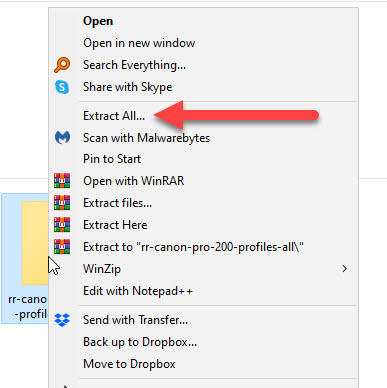
2) The Extract dialog will appear. We recommend you leave the destination as is.
We recommend checking the "Show extracted files when complete"

3) When the folder is extracted, you will see the files:
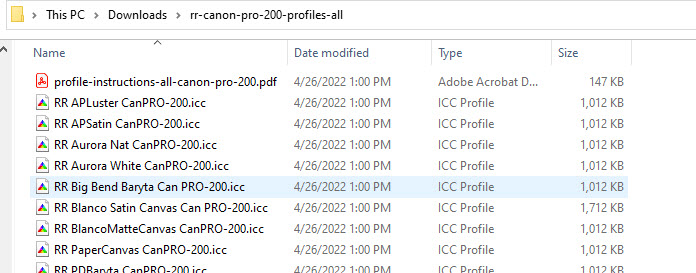
Profiles will have a .ICC or .ICM extension. The profile will contain the name of the photo paper and your printer model.
Step 2 - Install the profile
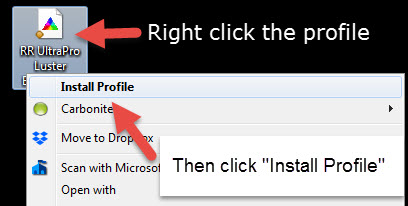
Right click on the profile you want to install.
A menu will appear.
Select "Install Profile".
This concludes the tutorial. Good luck and happy printing. Contact Red River Paper support with any questions.
Next Steps - Using Profiles
After the profile is installed, you will use them during the print dialog of your photo or art editing application. Detailed help using ICC printer color profiles.
Troubleshooting
If you do not see the "Install Profile" option, the file is not extracted or there is a glitch in your Windows installation. In this case, you will have to copy and paste the profile to the proper system folder.
In Windows, profiles are stored in the Color folder. It resides in this path:
Windows > System32 > Spool > Drivers > Color

The "Windows" folder (the beginning of the path above) is reached by going to your root directory, usually the C Drive from My Computer or Computer menus.
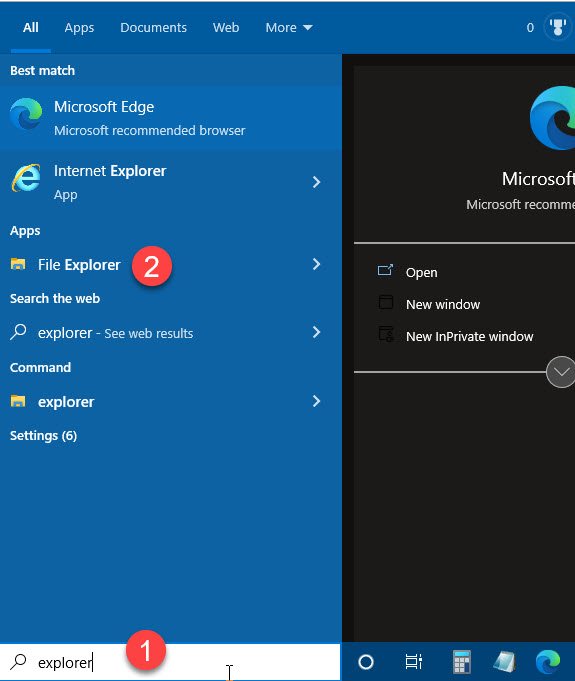
Use the File Explorer (Not Internet Explorer the web browser) to get to this folder.
1 - In most versions of Windows, find the search bar at the bottom and type "Explorer"
2 - From the results, find and click on File Explorer.
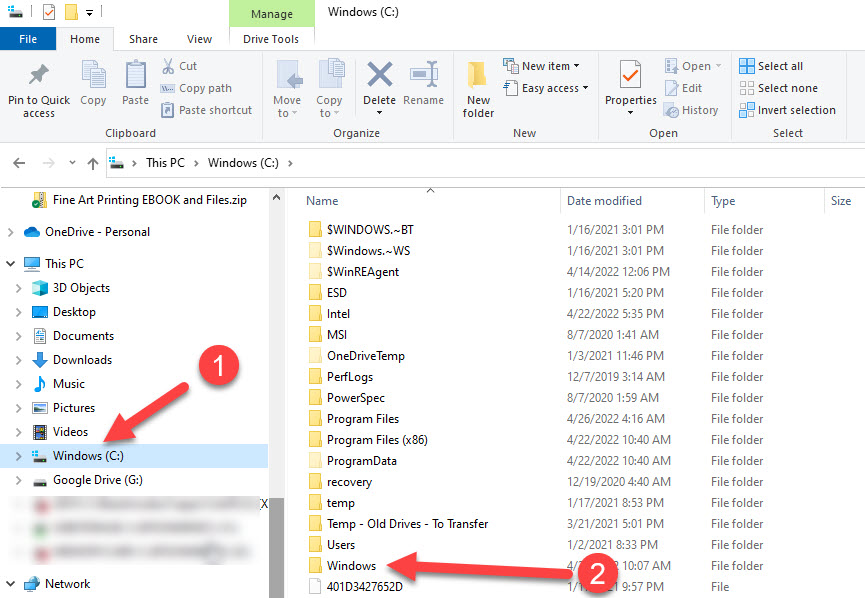
1 - When the File Explorer launches, locate the Windows C drive on the left column and click.
2 - Look for the Windows directory under the C drive.
You can then navigate to the Color folder.
Last updated: April 22, 2024


