STEP 4 - CUSTOM PAPER SIZE The Page Setup dialog box will appear. Click the Printer button at bottom right. |
 |
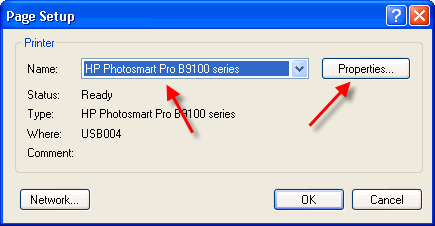
When this dialog box appears: 1) Make sure you have the right printer chosen 2) Click the Properties button near the top right. |
 |
On the printer properties menu:
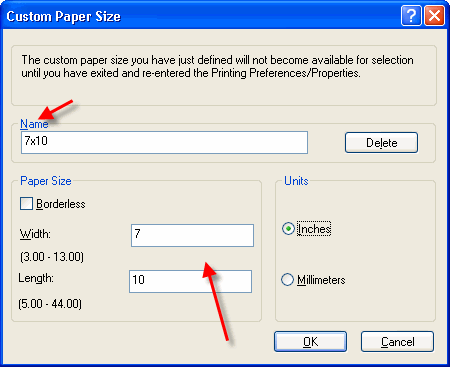
1) Click on the Features tab 2) Click PORTRAIT 3) Under Paper Size Opens choose Custom |
 |
This dialog will appear: Using the chart below:
3) Name the custom size HP B9180 Note - This printer is unique in its ability to use custom borderless sizes. These will work with Red River card sizes. 4) Make media and quality selections then Click OK |
|
STEP 5 - PRINTING
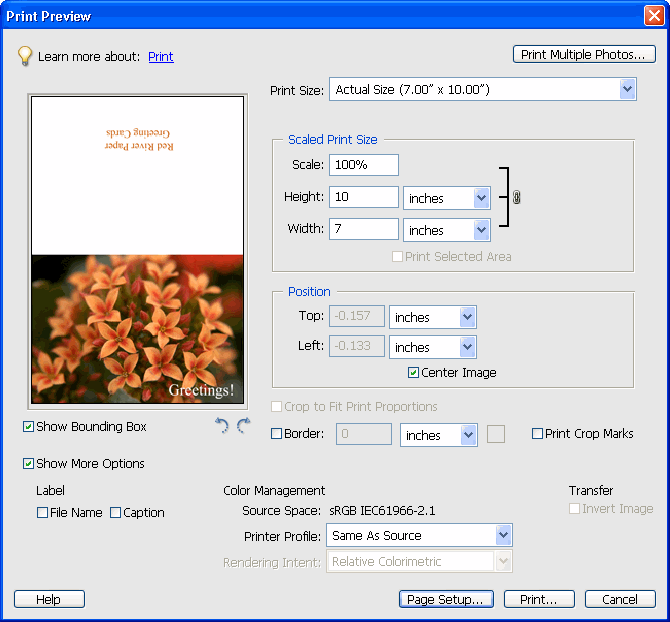
Notice that the preview screen looks like the printed card should - the excessive white space is gone.
If it looks incorrect still, go back to the printer properties and verify you are set to PORTRAIT orientation.
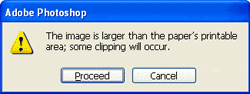
You can now click print and proceed as normal. You may see this warning - if so simply click proceed and begin printing.
Trouble shooting questions? Click here
Last updated: February 03, 2020


