 |
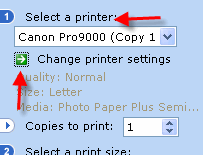
Go to the File menu and choose PRINT This dialog will appear on the left side of your screen. Choose your printer from the drop menu Click CHANGE PRINTER SETTINGS |
Once in the printer properties, set the appropriate media, quality, and color settings.
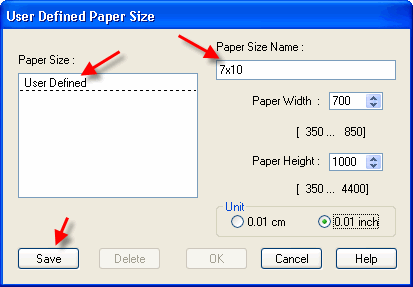
Now in the SIZE drop menu select USER DEFINED

This dialog at right will appear. 1) Name the paper size 2) Set the dimensions using this chart
3) Click SAVE then OK Now back at the Printer Properties menu click OK to return to the program |
 |
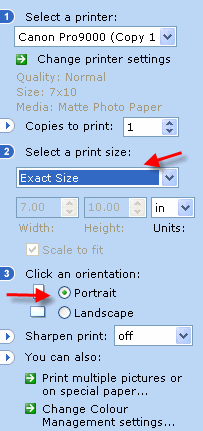
You should return to the program with the print dialog at right. Set Select a Print Size to Exact Size And choose PORTRAIT ORIENTATION (this step is critical and cannot be skipped) Now you are ready to click PRINT and make a custom photo card! 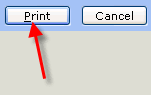 |
 |
Trouble shooting questions? Click here
Last updated: February 03, 2020


