For Red River Paper greeting cards, scrapbook 12x12 sheets, panorama printing, and other special projects, you need to define a custom paper size in the printer properties.
Canon Printer Alert - Canon printers can use sheets up to 26.6" long and on some printers 47.5". Refer to your manual or the Canon website for details. This rule is hard wired into the driver by Canon and cannot be overcome.
TO BEGIN
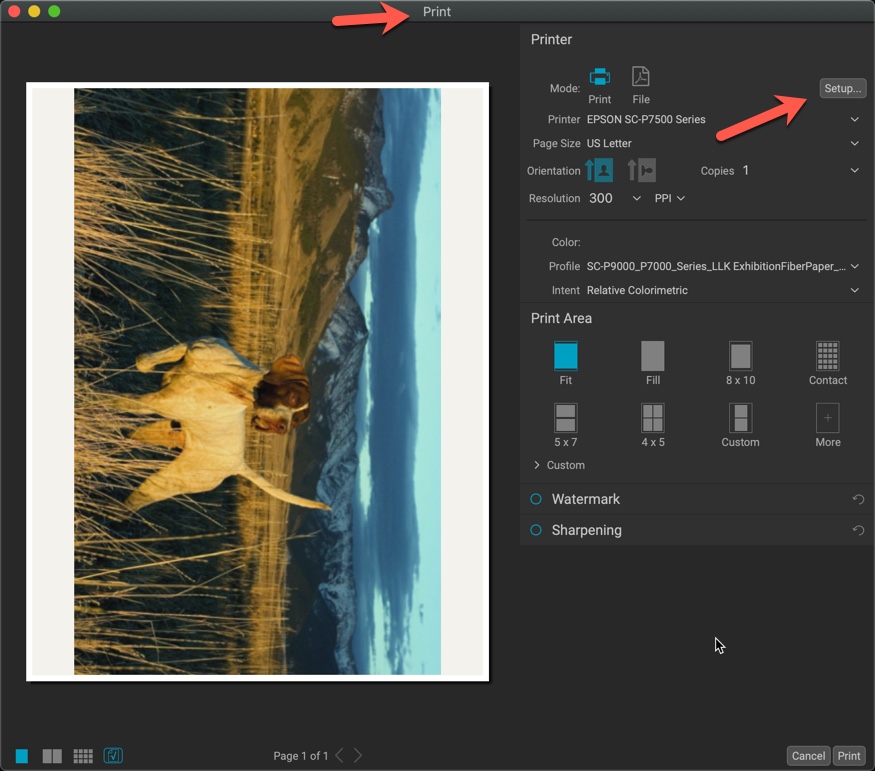
From the File menu, choose PRINT
Choose your printer from the Printer drop down menu
Then click SETUP
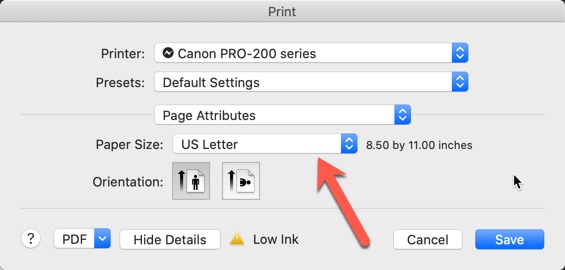
PRINT DIALOG
Click the Paper Size drop down menu.
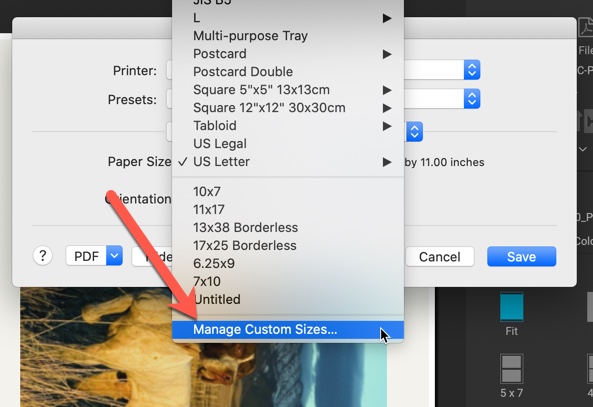
Scroll to the bottom and select Manage Custom Sizes.
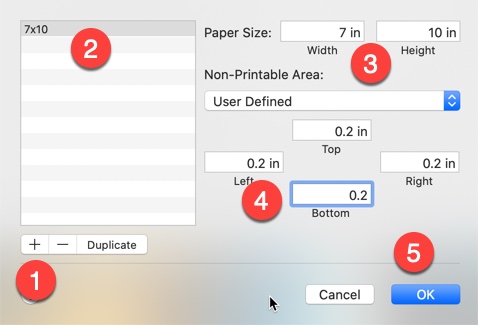
To create a new custom size, click the + button.
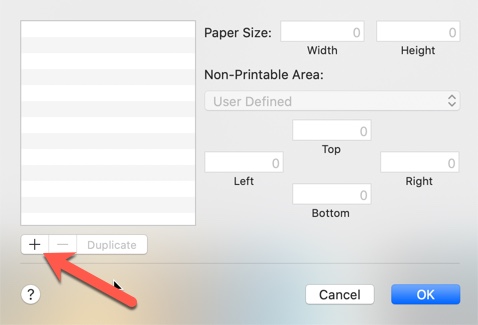
After clicking the + button (1)
2. The word "untitled" will appear in the section labeled 2 above. Click on the new size and name it something appropriate.
3. Set the width and height of the custom size.
Width is always smaller dimension of your paper
Height is always longer dimension of your paper
4. Set Printer Margins. Use 0.2" on all four sides. Setting the number lower will likely result in errors or partially printed images.
The Apple OS may not handle custom paper sizes correctly. It is system and printer specific and may not happen to you. If it does, prints will have uneven margins or print only a portion of the image. Come back to this dialog box and adjust the Printer Margins. This may take some experimentation but is necessary.
Click OK to complete the process.
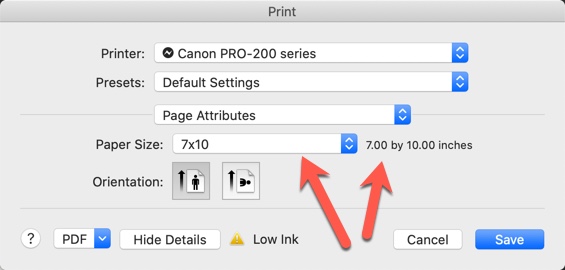
Back at the Print dialog, you will see the new custom size selected.
Canon Printer Alert - Canon printers can use sheets up to 26.6" long and on some printers 47.5". Refer to your manual or the Canon website for details. This rule is hard wired into the driver by Canon and cannot be overcome.
Last updated: April 05, 2024


