This brief tutorial shows you how to use inkjet printer color profiles when printing from Affinity Photo
BEFORE YOU BEGIN
If you're not familiar, you can learn more about printer profiles and why they can be helpful.
Learn how to install printer profiles on your Win or Mac computer
Quick Tip:
When using a printer profile, you will let Affinity Photo control output color management.
This means turning off your printer's color management controls system.
GET STARTED
When you are ready to print, go to the File menu and select Print. Or hit Ctrl + P on your keyboard.
The Affinity Photo Print dialog will appear.
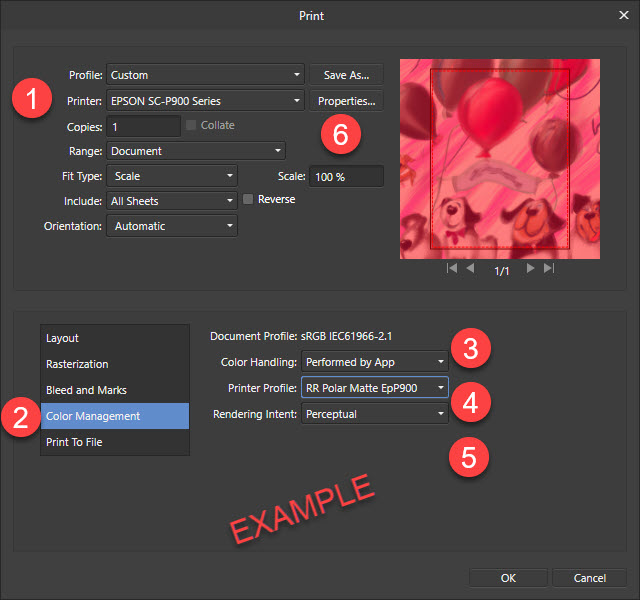
1 - Select your printer
2 - Click on the Color Management tab
3 - Color Handling set to Performed by App. App refers to Affinity Photo.
4 - Printer Profile: Choose the profile for the paper and printer you're using. Red River Paper profiles all start with "RR".
5 - Rendering Intent: We recommend Relative Colorimetric for most prints. You can also try Perceptual if your results are not satisfactory. Click here for info on rendering intent.
6 - Click Printer Properties
PRINTING
We'll cover Canon and Epson setup below.
Canon
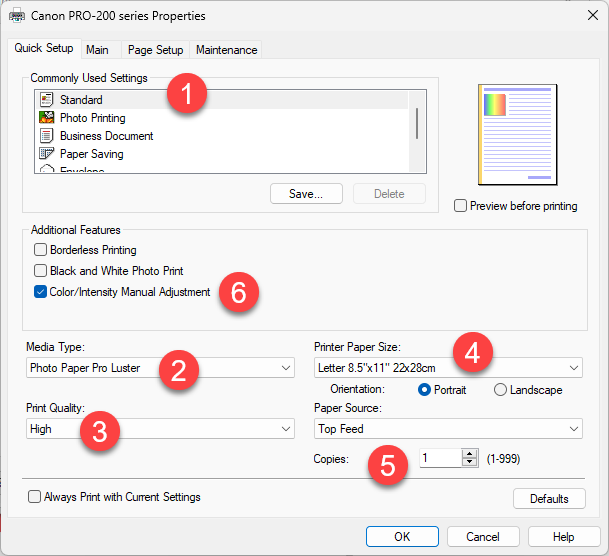
1 - Leave Commonly Used Settings as Standard
2 - Media Type - we tell you the right setting in the instructions that come with the profile download or on the download page.
Alert: The Red River Paper profile name will not appear in this drop down. Only Canon brand media types.
3 - Print Quality - Normally set to High
4 - Choose the correct Paper Size
5 - Choose the correct Paper Source
6 - Check Color Intensity Manual Adjustment. The Manual Color Adjustment dialog will appear.
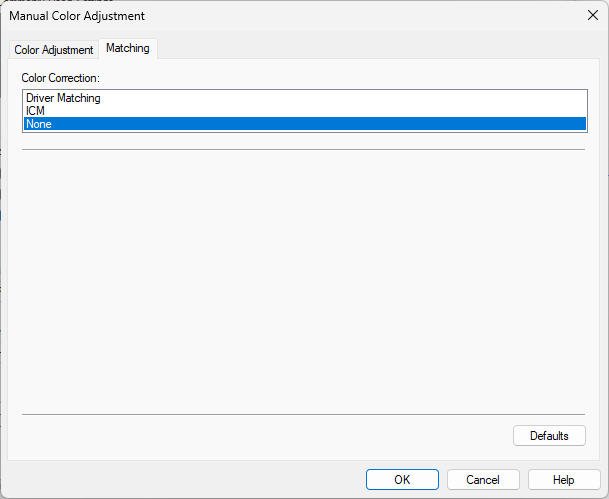
Click the Matching tab and then choose Color Correction NONE.
That completes the setup. Click to return to Affinity print dialog and click Print.
Epson
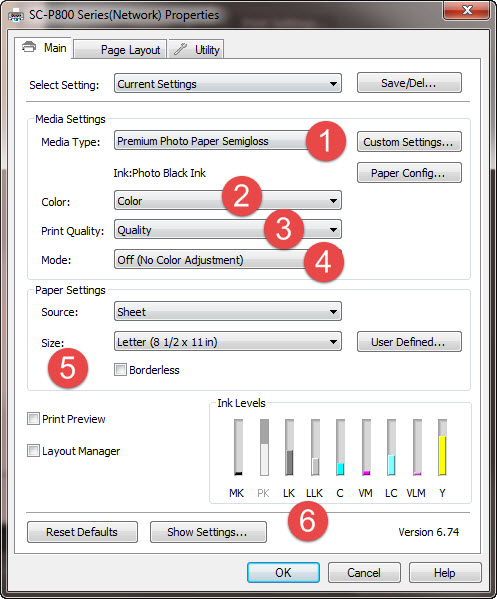
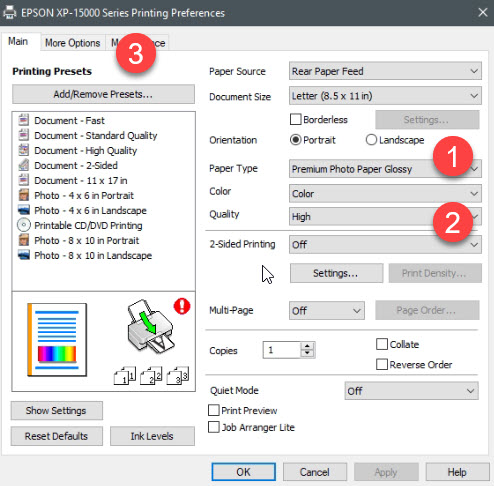
1 - MEDIA TYPE - Start by setting the media type - we tell you the right setting in the instructions that come with the profile download or on the download page.
2 - Color - Set this drop down menu to Color.
3 - PRINT QUALITY - Pick your preferred print quality. With Epson printers, the "Quality" or "Level 4" setting is recommended for most print projects.
4 - MODE - Set the mode to "Off (No Color Adjustment)".
5 - Paper Size and Source - Verify or choose your paper size and feed source.
6 - Click OK - This will return you to Photoshop's print dialog. You can then click print.
That completes the setup. Click to return to Affinity print dialog and click Print.
Alternative Driver Epson
Epson does not use the same driver dialogs for all of their printers. Below is a driver you might see with some desktop models.
1 - MEDIA TYPE - Start by setting the media type - we tell you the right setting in the instructions that come with the profile download or on the download page.
2a - Color - Set this drop down menu to Color.
2b - PRINT QUALITY - Pick your preferred print quality. With Epson printers, the "Quality" or "Level 4" setting is recommended for most print projects.
3 - Click More Options tab.
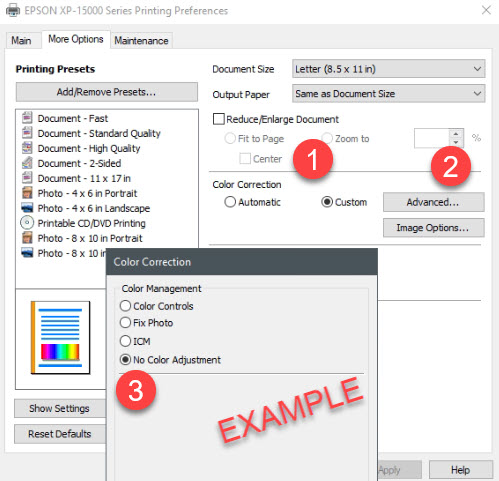
1 - Color Correction Custom
2 - Advanced
3 - Color Correction - No Color Adjustment
That completes the setup. Click to return to Affinity print dialog and click Print.
Questions?
Contact us via the support center
Last updated: August 19, 2023


