This brief tutorial will show you how easy it is to properly use a printer color profile from CorelDRAW.
If you're not familiar, you can learn more about printer profiles and why they can be helpful.
Quick Tip: When using a printer profile, Corel Draw controls color management.
This means you will turn off the color management controls of your inkjet printer in the process.
To begin - File > Print or hit Ctrl + P on your keyboard.

1 - Choose your printer
2 - Click the gear icon to launch the printer's preferences, also known as the driver.
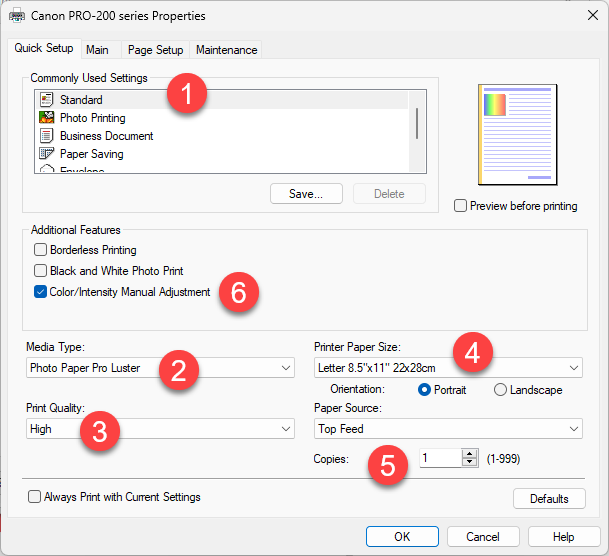
1 - Leave Commonly Used Settings as Standard
2 - Media Type - we tell you the right setting in the instructions that come with the profile download or on the download page.
3 - Print Quality - Normally set to High
4 - Choose the correct Paper Size
5 - Choose the correct Paper Source
6 - Check Color Intensity Manual Adjustment. The Manual Color Adjustment dialog will appear.
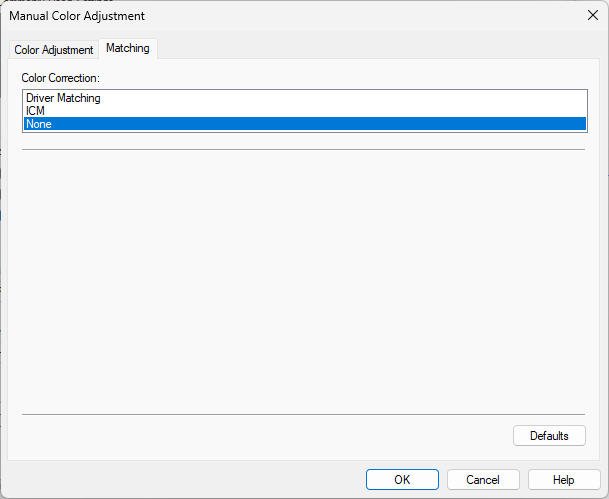
Click the Matching tab and then choose Color Correction NONE.
Click OK and the OK again to return to the Corel print dialog.
When you return to the Print dialog, click on the Color tab.
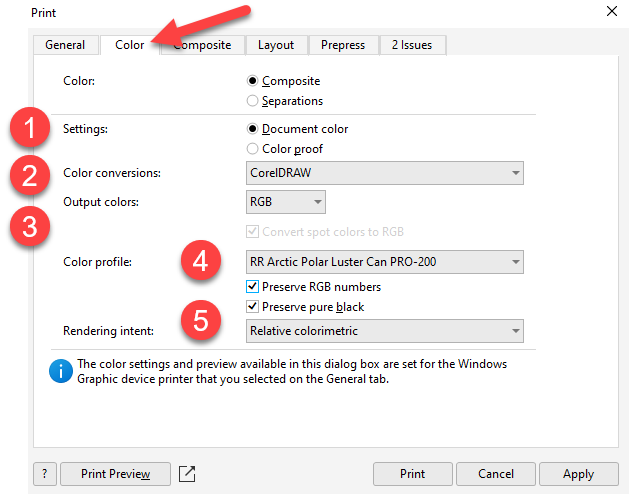
1 - Settings: Document color
2 - Color Conversions: CorelDRAW - this instructs Corel to manage color output
3 - Output colors: RGB
4 - Color Profile: choose the profile for the paper and printer you are using. Learn about installing profiles.
5 - Preserve RGB numbers checked / Preserve pure black checked
Rendering intent - Recommended setting is Relative colorimetric. The alternative is Perceptual. Learn about rendering intents.
NOTE - Using the Print Preview feature (bottom left on the Color tab) is not recommended as it can break the color management process.
READY TO PRINT
Once you verify the setup above, you can click Print.
Last updated: July 04, 2023


