Step 4 - Canon Custom Paper Size Setup
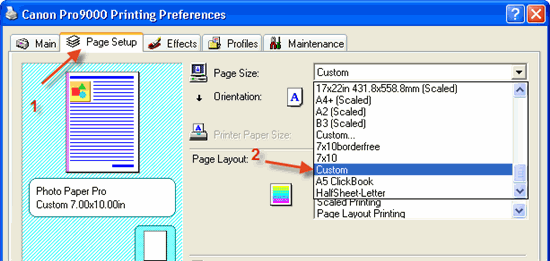
The Canon driver dialog box now appears. Click on the Page Setup tab Click on the Page Size drop down menu and scroll to the bottom of the list where you will see a selection "Custom..." - click it. |
 |
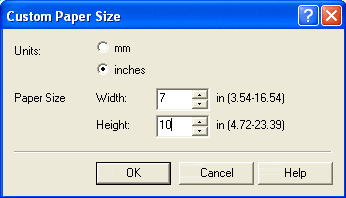
This dialog will appear. Using the chart below:
3) Click OK NOTE! Canon does not offer a feature to save custom paper sizes for future use. You will need to do this step each time you print custom cards. |
 |
|
After saving your custom size and clicking OK, you are back to this menu (or one similar). Make sure the new paper size is selected in the paper size menu, and click on Landscape orientation. Give all settings a second check for accuracy and click OK. You will now go back to the PictureIt screen where you can now click PRINT.  |
 |
Was this tutorial helpful to you. Let us know your thoughts or suggestions here.
Related Posts and Information
Last updated: February 03, 2020


