These instructions were produced using Microsoft
Publisher 2000. Older and newer versions of the program will have similar
layout procedures.
Now you will select an image
to go on the outside front of the card. From the Insert menu, choose
Picture » From File...
Search the hard drive for the image you want to use.
Image Tips: Try and have the image prepped in Photoshop or other
editing program before this step. This includes cropping any other
changes to the photo.
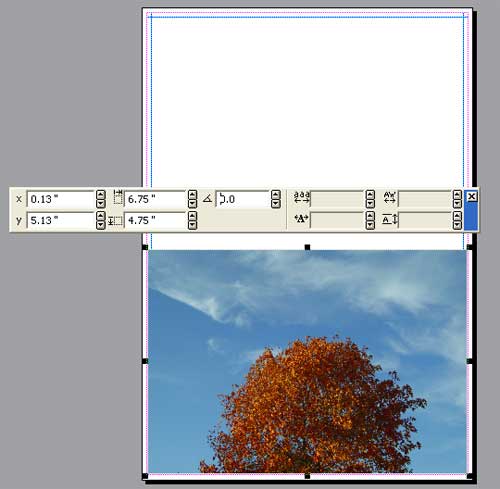
After you select an image and
click OK, it will appear on the canvas as a movable layer.
The menu with numbers at right is the Measurements toolbar. The
second column of numbers is the width and height of you image.
Use this table to determine the largest size you can make your
image:
Paper Size
Width
Height
7x10
6.75"
4.75"
6.25x9
6"
4.25"
5.5x8.5
5.25"
4"
Now, move your photo to the proper location on your canvas. See
the photo at right. Make sure the top border of the image is below
the mid point where the card will fold.
As long as you have sized the image within the limits mentioned
above, there should be no cropping when the card is printed.
At this point, you can add
text or more graphics to complete the card layout.
NOTE!
With vertical card layouts, the back of the card is at the top
of your canvas.
All images and text for the back of the card must be rotated 180
degrees (upside down).
You can rotate using the Measurements toolbar - located in the
middle column.
I use a lot of ink jet paper and my go-to brand is Red-River. The prices are very competitive and the quality is amazing. I also like the wide variety of papers available.
Papers with the Archival designtation can take many forms. They can be glossy, matte, canvas, or an artistic product. These papers are acid free, lignin free and can be made of virgin tree fiber (alpha cellulose) or 25-100% cotton rag. They are likely to have optical or fluorescent brightening agents (OBAs) - chemicals that make the paper appear brighter white. Presence of OBAs does not indicate your image will fade faster. It does predict a slow change in the white point of your paper, especially if it is displayed without UV filter glass or acrylic.
Archival Grade Summary
Numerous papers - made from tree or cotton content
Acid and lignin free base stock
Inkjet coating layer acid free
Can have OBAs in the base or the coating
Museum Grade Paper
Papers with the museum designation make curators happy. They are made from 100% cotton rag content and have no optical brightener content. (OBA) The base stock is acid and lignin free. The coating is acid free. This type of offers the most archival option in terms of media stability over time.
Museum Grade Summary
100% cotton rag content
Acid and lignin free base stock
Inkjet coating layer acid free
No OBA content
Photographic Grade Paper
Photo Grade products are designed to look and feel like modern photo lab paper. Most photo grade media are resin coated, which means they have a paper core covered by a thin layer of polyethelene (plastic) . Plastic gives the paper its photo feel, stability (flatness), water resistance, handling resistance, and excellent feed consistency.
Prints on photo grade media are stable over long periods. With pigment inks in a protected environment, you can see up to 80 years on-display life. All RC papers are Photo Grade for two reasons. Plastic content is not technically archival by museum standards. Also, the inkjet coating of all RC papers is slightly acidic. It facilitates instant drying and does not actually change the stability of your inks over time. Virtually all RC papers have optical brightening agents (OBAs).