Click File > Print to begin
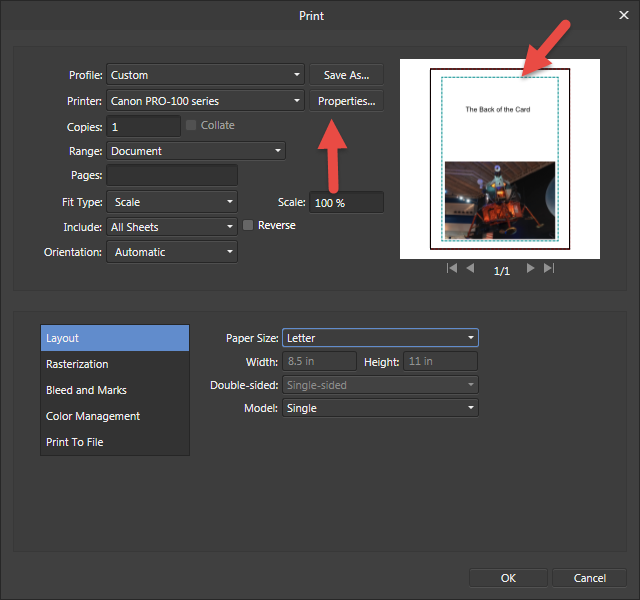
The Print dialog will appear.You will notice the preview looks incorrect. The margins are too large.
Verify your printer is selected and click Properties. This will launch the printer driver.
When the Printer Properties (print driver) dialog appears, click the Page Setup tab.
1 - Verify that "Normal-Size" is selected.
2 - Click the Page Size drop down.
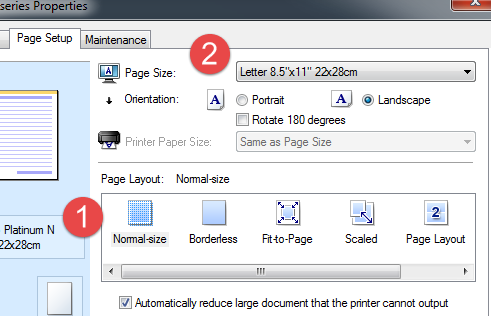
Scroll to the bottom of the paper sizes and click on Custom

This will launch the Custom Paper Size dialog
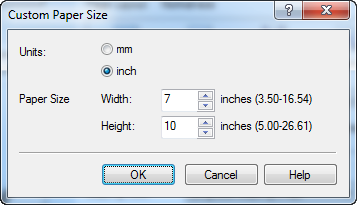
1 - Enter the width and height using the table below.
| Card Size | Set Width To | Set Height To |
|---|---|---|
| 7 x 10 (A7) | 7" | 10" |
| 6.25 x 9 (A6) | 6.25" | 9" |
| 5.5 x 8.5 (A2) | 5.5" | 8.5" |
| 5.25 x 5.25 (Square) | 5.25" | 10.5" |
| 8 x 9 Pano | 8" | 9" |
Click OK
Next click on the Main tab. Here you set important items like:
Media Type - Recommendation in each box of Red River Paper
Paper Source - Rear Tray
Print Quality - Standard is recommended
Color / Intensity - These are a function of your color management preferences and settings.

When you are satisfied with these settings, click OK
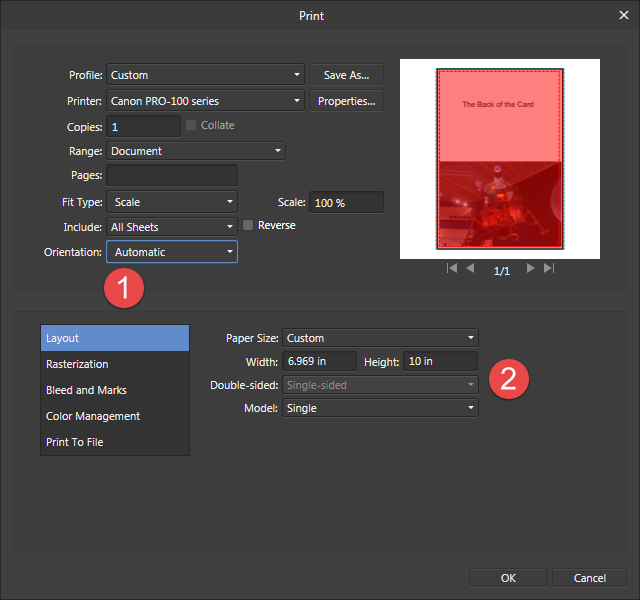
When you return to the Print dialog, the new paper size will be chosen. The preview will also have changed and look correct.
1 - Set orientation to Automatic
2 - You can verify the custom paper size is active by looking at the Paper Size information section
When you are satisfied with the preview and printer settings, you can click Print!
Congratulations! You have set up and printed a Red River Paper greeting card.
Trouble shooting questions? Click here
Related Posts and Information
Last updated: November 13, 2021


