For Red River Paper greeting cards, scrapbook 12x12 sheets, panorama printing, and other special projects, you need to define a custom paper size in the Canon printer properties. Below are instructions for setting a custom paper size starting in Photoshop.
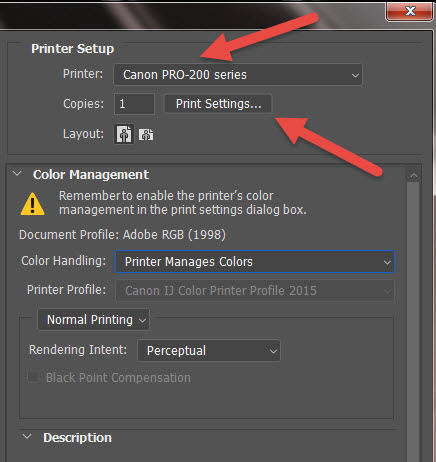
In Photoshop click PRINT. Choose your printer from the Printer drop down menu.
Now click the Print Settings button. This will launch your printer's property dialog.
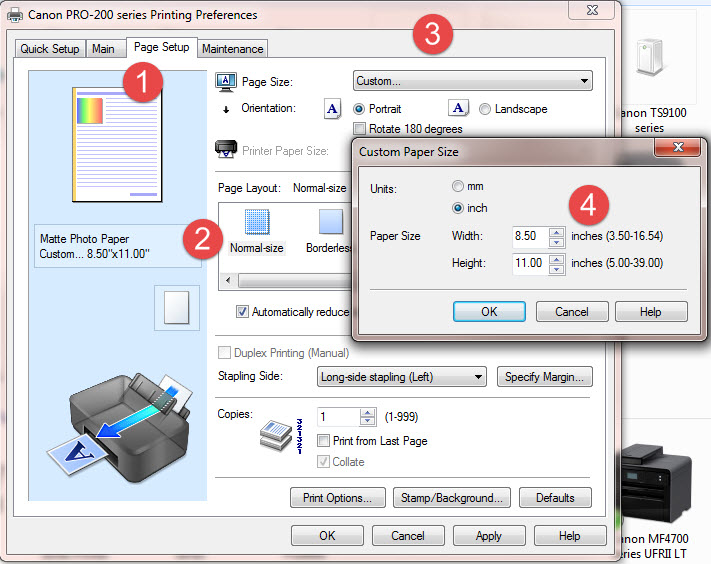
1 - Once in the Canon printer properties, click on the Page Setup tab.
2 - Verify that "Normal-size" is selected in the Page Layout section. You cannot print borderless custom sizes.
3 - Click the Page Size drop down, scroll to the very bottom of the list and choose "Custom..."
Don't see it? Scroll down on this page to Troubleshooting.
4 - In the Custom Paper Size pop-up, define the width and height of your paper.
NOTE! ALWAYS set your smaller sheet dimension to width and larger to height.
Most Canon drivers cannot save custom sizes. You will need to do this process each time you print a custom paper size.
FINALLY
Go back to the Main tab and set your media type, quality, and color controls. Click OK until you are back at the Photoshop Print Preview where you will click OK to begin printing.
Troubleshooting
Don't see the Custom option in your Page Size drop down?

Make certain that Normal-size and not Borderless is selected in Page Layout. If Borderless is selected you will not see a Custom option in the Page Size drop down menu.

Newer Canon? Some media types don't allow custom sizes?
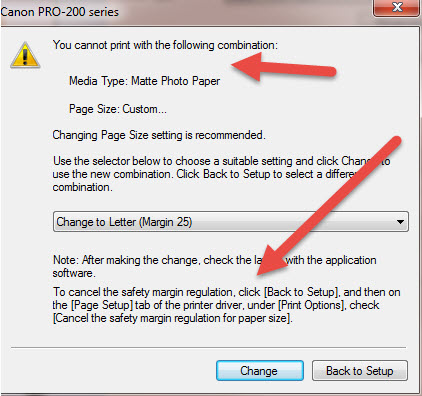
Some newer Canon printers have rules that block you from using a custom size with certain media types. Why? Who knows!
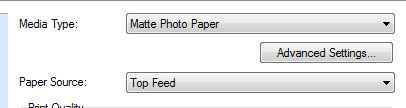
One example is the Matte Photo Paper media type:
If you have it selected and try to create a custom size, this error appears. Fortunately, how to work around it is listed on the pop-up.
To cancel the safety margin:
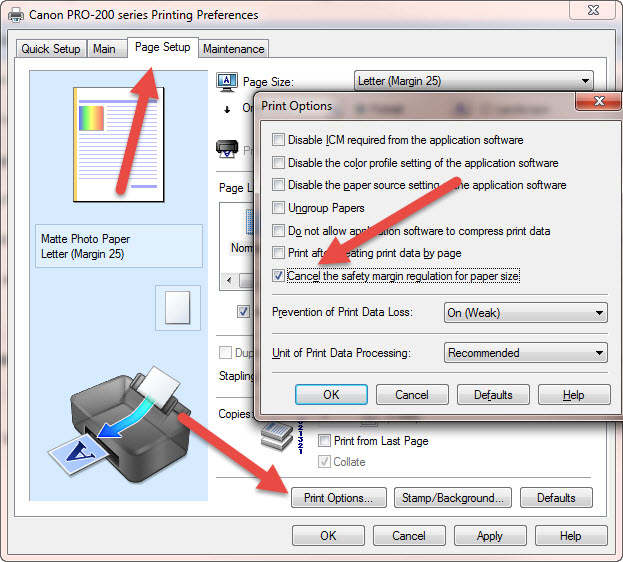
Go to the Page Setup tab
Click the Print Options button
In the Print Options dialog, click "Cancel the safety margin regulation for paper size"
Click OK
You will be able to create / choose a custom paper size, regardless of the media type.
NOTE
The Cancel regulations option is likely to return to its default setting the next time you start a print project.
Related Posts and Information
Last updated: November 14, 2024


