Color profiles are pieces of software that bypass your printer color management in an attempt to reproduce better color gamut and print quality for a specific paper, printer and ink set. If you are unfamiliar with profiles or Photoshop, read all support documents carefully before beginning.
This brief tutorial will show you how easy it is to properly use a printer color profile from Photoshop CC.
If you're not familiar, you can learn more about printer profiles and why they can be helpful.
To begin - File > Print or hit Ctrl + P on your keyboard.
The Photoshop print dialog with preview will appear. This dialog is important. Spend time to understand the available controls.
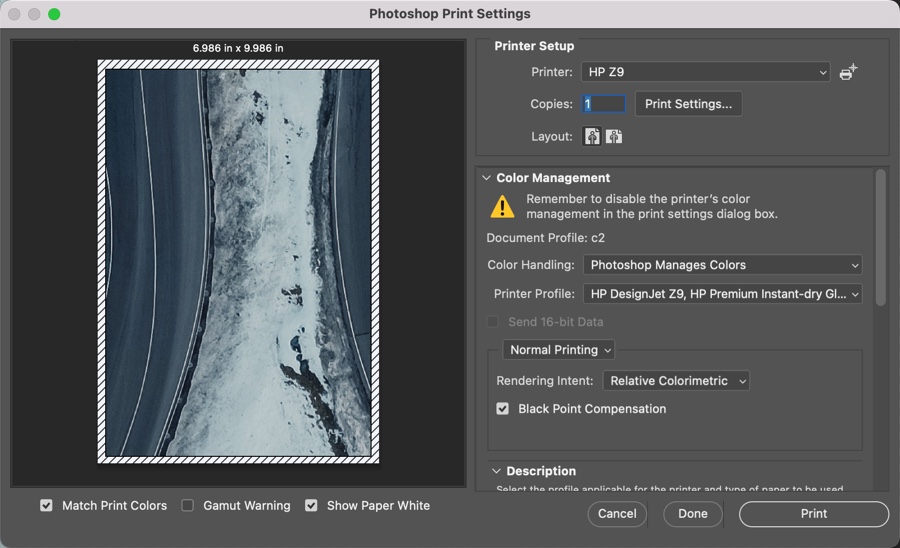
At the bottom left you will notice three check boxes. They activate a soft proof in the preview. The preview uses the paper profile you will choose in the steps below.
Match Print Colors - A basic soft proof showing how a print using the profile might look.
Gamut Warning - Will highlight in gray areas of an image where the colors are out-of-gamut for the paper profile.
Show Paper White - Simulates how the tone of the paper will affect the print.
Photoshop Print Dialog Setup

What to do in this dialog
1) Ignore this warning from Adobe. Printer color management is automatically disabled when you accomplish step two, below.
2) Set Color Handling to Photoshop Manages Colors
3) Choose your paper’s profile from the Printer Profile drop down
4) Select rendering intent – Relative Colorimetric or Perceptual. We recommend Relative Colorimetric.
5) Check Black Point Compensation
6) Click Print Settings
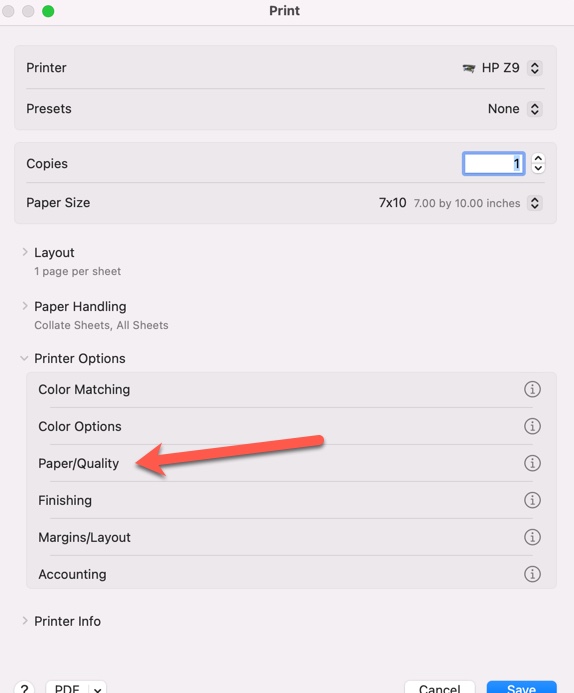
OS13 and Later
These instructions show the controls that need to be set when using a color profile. Your screen may look slightly different but should include all of the same controls seen below.
Each printer driver may be set up with different drop down menus and even different control options. However, HP printer drivers should come with the functions you need - set the media type, print quality, and verify color management is turned off at the driver level.
Under the PRINTER OPTIONS heading, locate and click on Paper / Quality
The Paper / Quality dialog will look similar to the below.
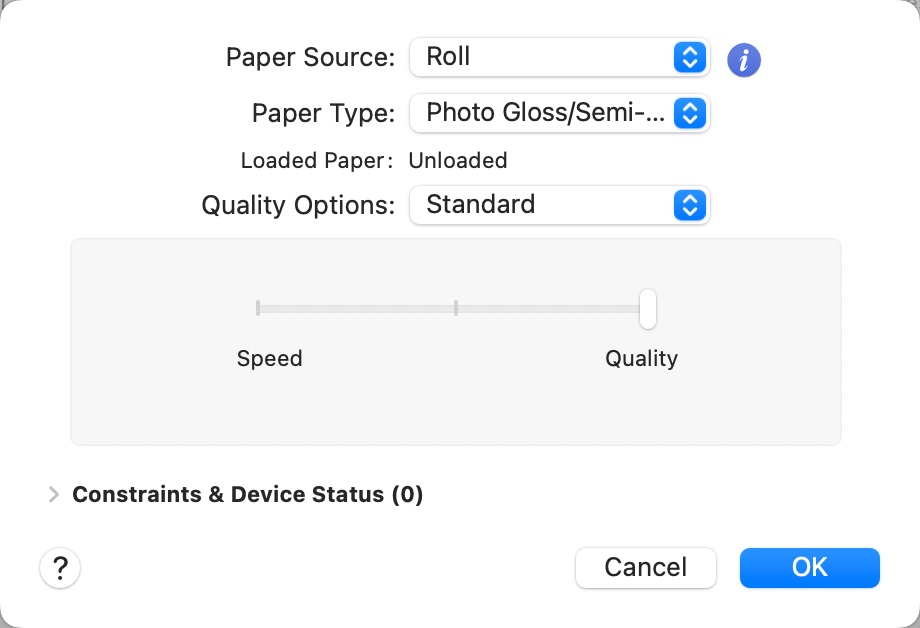
What do to in this dialog
1) Set the Paper Type media type based on your profile’s instructions.
Note: The name of the Red River paper you're using will not show up in this drop down menu unless your printer supports creating OMS files.
2) Set print quality - usually the highest available for printing photos and artwork
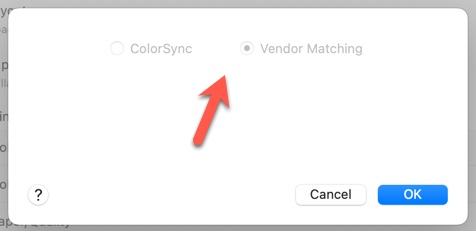
Verify printer color controls are turned off.
Click on the Color Matching tab (see below).

On the Color Matching tab, all controls should be grayed out. This indicates that Photoshop is managing the colors.
Verify your other quality settings and click Save. When back at the Photoshop print menu you can click the Print button.
Related Posts and Information
Last updated: May 19, 2023


