This tutorial looks long, perhaps even complex. Let us assure you that it is not complicated and once you do the process a few times you will be setting up and printing cards in under a few minutes. We include many screenshots and extra detail so you will get it right the first time. Let's begin!
Get Started - Template Download
Red River Paper offers free blank templates for Lightroom here. The templates are required to setup and print folded cards from Lightroom. Install instructions are included with the download.
STEP 1a - Pick an Image for Your Card
Start in the Library or Develop module and choose an image for your card. Complete any editing and cropping before moving onto the next steps.
Example - If your image is in Portrait (vertical) orientation, you will use the Portrait orientation templates below.
STEP 1b - Print Module - Define Custom Paper Size
Once you have picked an image for your card, go to the Print Module.
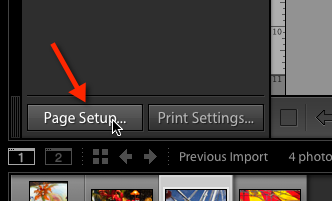
Click on the Page Setup button at the lower left.
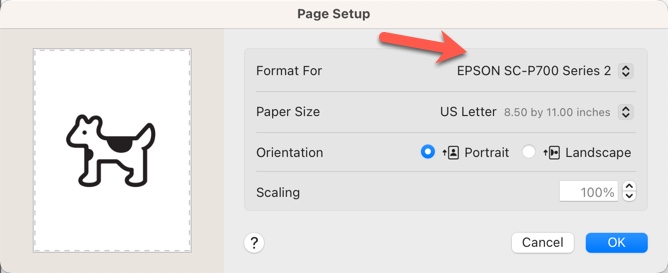
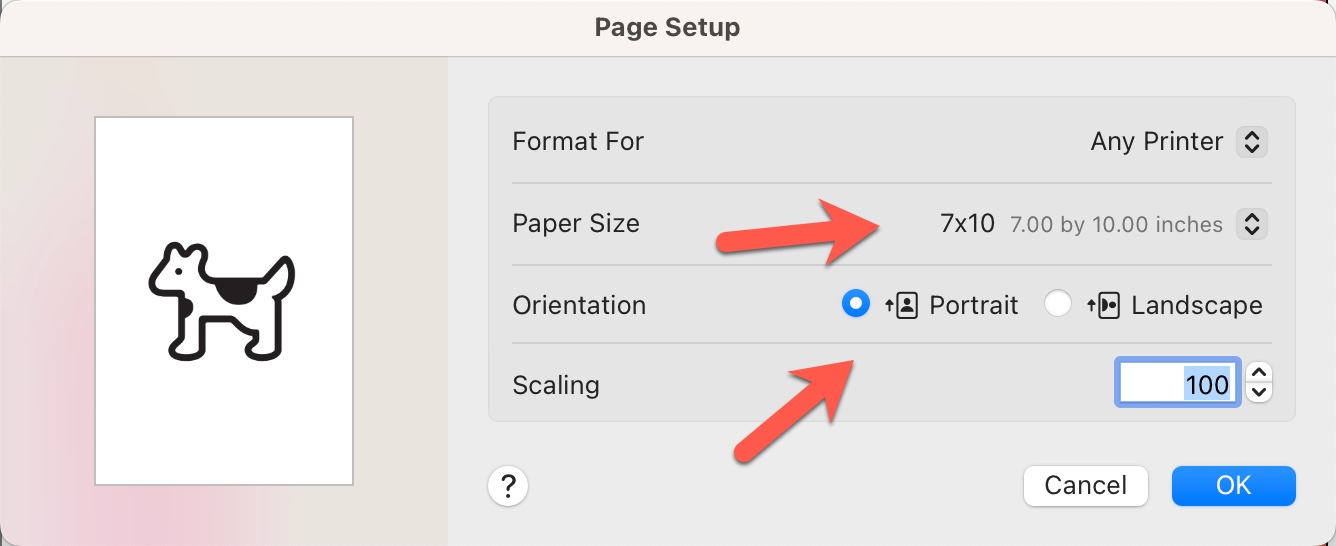
At the Page Setup dialog, choose your printer in the Format For drop-down.
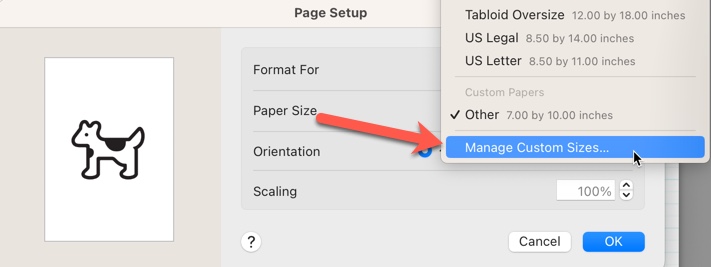
Click the Paper Size drop-down and choose Manage Custom Sizes.
Note: You may notice that the OS populates your card size automatically as "Other". See screen grab below. This is a nice new feature in OS13. However, it does not set the optimal margins that we need for card printing. This is why we recommend you define and save card sizes as shown below.
Follow these steps to define and save a custom paper size:
1 - Locate and click on the "+" sign to create a new size.
2 - A new size will appear labeled "Untitled". Single click on it and it becomes active. Use your keyboard to rename the size.
3 - Define the size using the chart below.
4 - Set Margins to 0.2" on top, bottom, left, and right.
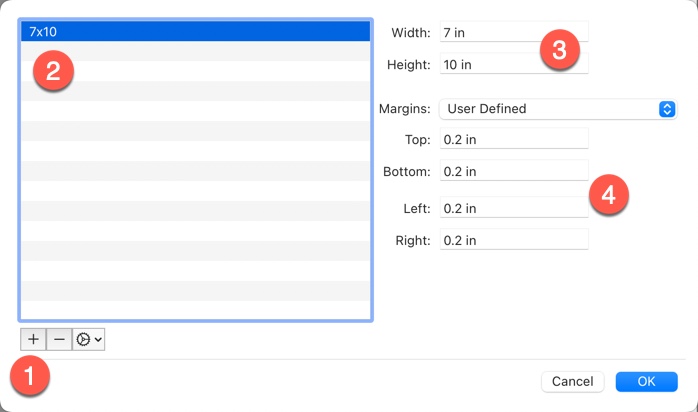
Set Width and Height using the chart below.
| Card Size | Width | Height |
| 7 x 10 (A7) | 7" | 10" |
| 6.25 x 9 (A6) | 6.25" | 9" |
| 5.5 x 8.5 (A2) | 5.5" | 8.5" |
| 5.25 x 5.25 (Square) | 5.25" | 10.5" |
| 8 x 9 Pano | 8" | 9" |
You will see your new size chosen in the Paper Size section. See below.
Click OK.
STEP 2a - Template Introduction
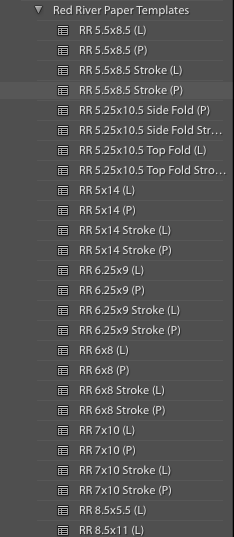
Still in the Print Module, look on the left side of your screen for the Template Browser. If you installed your print templates according to the instructions, you will see a sub-category of templates labeled "Red River Paper Templates". If necessary, click on the triangle to the left of the label to open the full template selection.
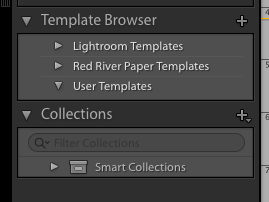
Once the template selection is open, you will see all of the available templates.
All of the templates start with "RR".
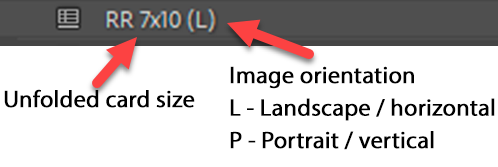
After "RR", you will see the card size - this is the unfolded card size.
After the card size you will see (P) or (L), which refers to the orientation of your image.
P = Portrait / Vertical
L = Landscape / Horizontal
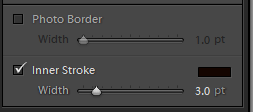
Stroke - Choosing a stroke template will put a line around the outside of your image.
You can control the color and size of the image using the "Inner Stroke" panel on the right of your screen.
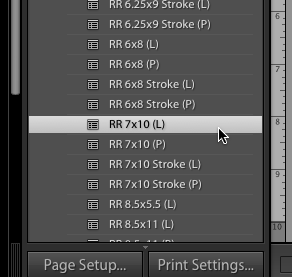
STEP 2b - Template Selection, Card Creation.
Referring back to Step 1a, your image orientation will determine the template orientation, P or L. Choose a template by clicking the name once.
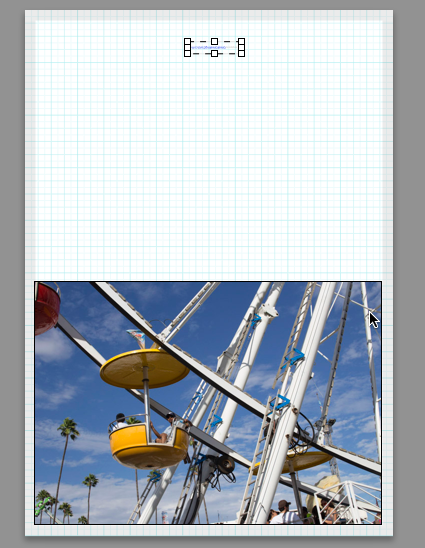
When you choose an orientation, see below, the Print Module preview will update and show a complete card.
Notice the light gray areas around the border. These represent unprintable margins. The template will make your image as large as possible for the printable area. You can resize any part of the template by clicking and dragging a corner.
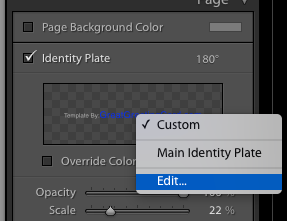
STEP 2c - Identity Plate (the back of your card)
The templates use Lightroom's Identity Plate (IP) to place text on the outside back of your card. The IP is editable in a few ways.
1. A single line of text
2. A JPEG (image) file that you import as the IP.
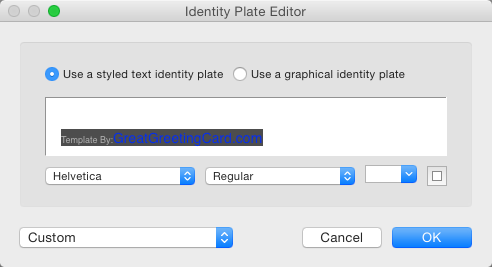
Start by locating the Identity Plate control on the right of your screen. Click anywhere on the IP and a menu will appear. Click "Edit".
Identity Plate as Text
Setting the IP for text is easy. Type your text into the editor. You can chage the font, font format, font size, and color. You can then save it as a IP template for later use (see below).
Identity Plate as Image
Click the "Use a graphic identity plate" radio button as shown below. Then click the Locate File drop down and find the image you would like to use.
This feature supports JPEG, GIF, BMP, and TIFF image format.
At this point you are, more or less, on your own to experiment with how the image looks as an Identity Plate. You can resize it and move it around the back of the card. The great part is you can easily change the IP in a few clicks or return to a text IP.

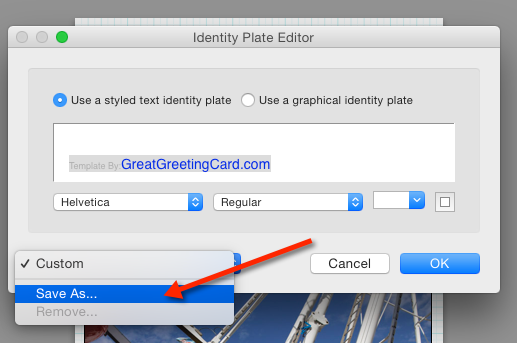
Saving the Identity Plate
When you are ready to use the text or image IP, click "Save As" as shown below and follow the on-screen instructions. The IP will be available for use in future projects.
STEP 3 - Print
Start by double checking the Page Setup.
Verify the Format For menu is set to your printer and Paper Size is still set to the custom size for your card.
Next, set Lightroom's color management options - choose either Printer Manages Colors or a printer color profile.
Click the Printer button on the bottom left.
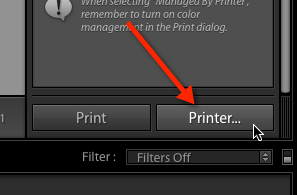
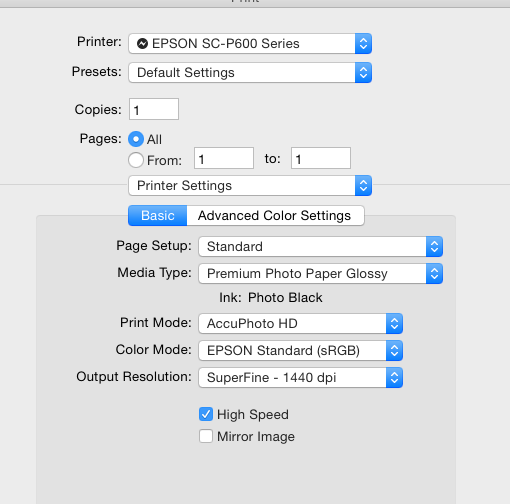
This will launch the Print dialolg.
Set the Media Type, Output Resolution, and other relevant options. When you have double checked the settings click Print.
Congratulations! You have set up and printed a Red River Paper greeting card.
Top Tip - Cut plain copy paper to your card size for printing practice before using the good stuff.
Related Posts and Information
Last updated: February 01, 2024


