Now that you have a completed greeting card layout in Photoshop, its time to print.
First you must define and save a custom paper size. Red River's greeting card papers are NOT standard sizes, so you will not find them in the list of paper sizes set by your printer manufacturer.
Go to the File menu and select Print
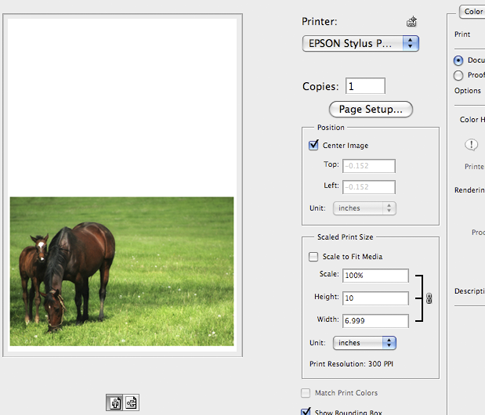
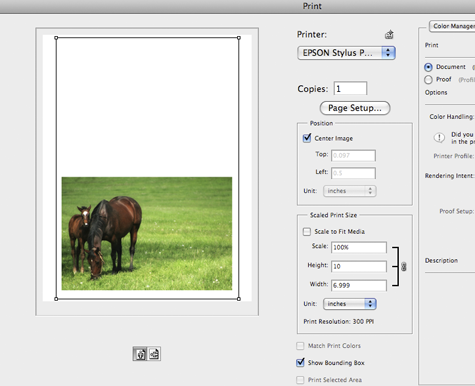 | Notice the excessive white space around the layout. This is because we have not defined a custom paper size. Make sure the Center Image checkbox is checked in the Position area near the top of the dialog box. Check to see that Scale is set to 100% and do not check the Scale to Fit Media box. Click Page Setup |
Choose your current printer in the Format for dialog. In the Paper Size drop down menu choose Manage Custom Sizes | 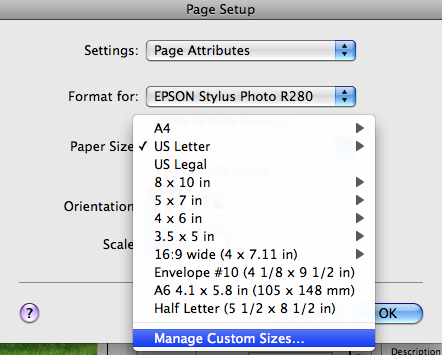 |
Define a Custom Page Size Click the + button to begin Fill in the Paper Size using the chart below Name the new size Set margins to a MINIMUM of 0.15" on all sides Verify the information and click OK You now have a permanently saved custom paper size that will appear in your list of paper sizes. | 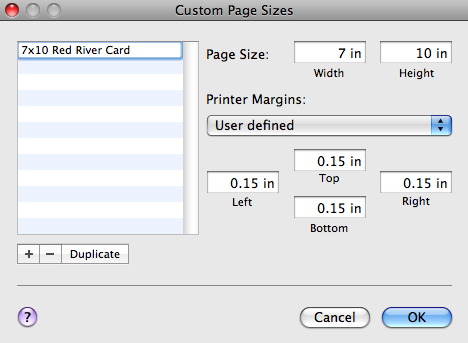
|
When you click OK from the custom size menu, you will arrive back at the Page Setup dialog box. Verify
Click OK | 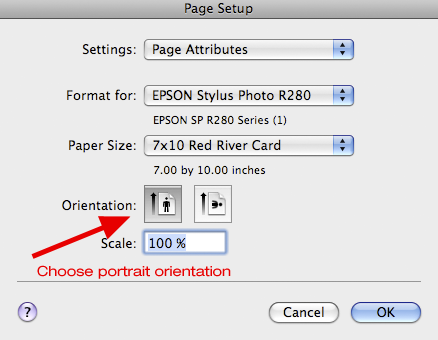 |
 | Back at the Print dialog notice how the preview image now looks correct with no excessive white space or cropping around the image layout. From here you set any color management preferences then click Print. You may see this dialog box - click Proceed to begin the printing process. 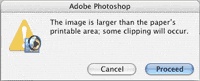 |
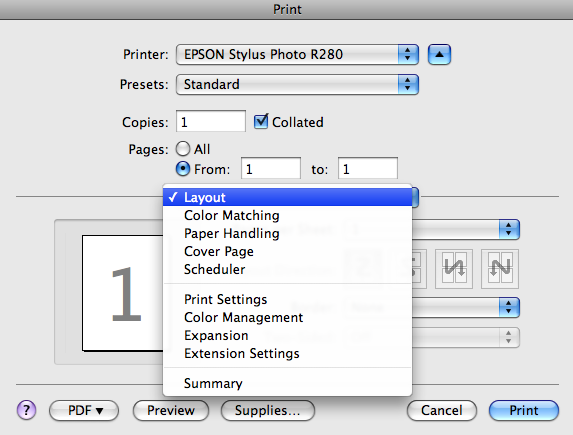
In the Print dialog set media type, set any color management preferences, and set how many cards you wish to print.
 |
Congratulations! You have set up and printed a Red River Paper greeting cards.
Related Posts and Information
Last updated: February 04, 2020


