Now that you have a completed greeting card layout in Photoshop, it's time to print.
First, you must define and save a custom paper size. You will not find Red River Paper's greeting cards in the list of paper sizes set by your printer manufacturer.
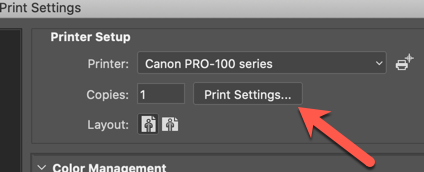
Go to the File menu and select Print

You will notice that the preview screen does not look correct. This is because we have not defined the size of our card stock.
Click Print Settings
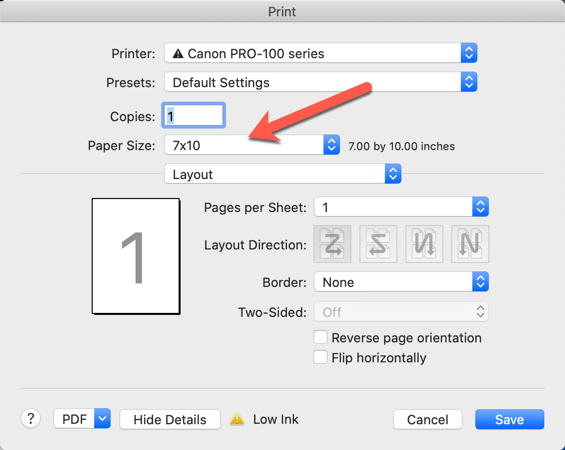
The Print dialog will appear. Verify your printer is chosen in the Printer drop-down menu.
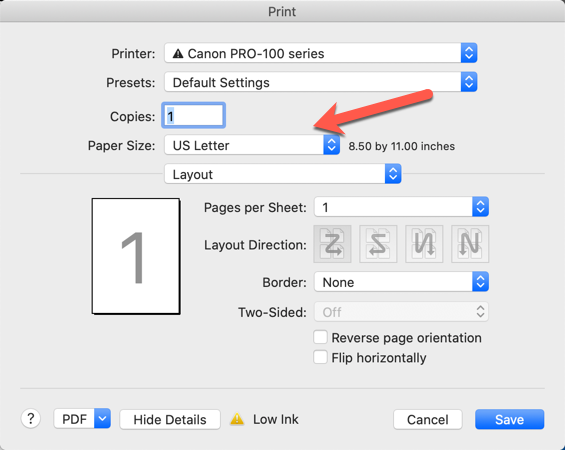
Locate and click on the Paper Size drop-down menu.
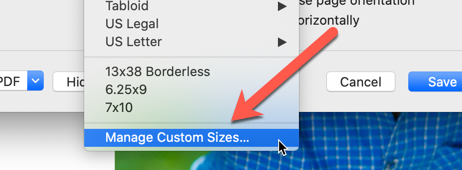
At the bottom of the paper size menu, locate and click Manage Custom Sizes.
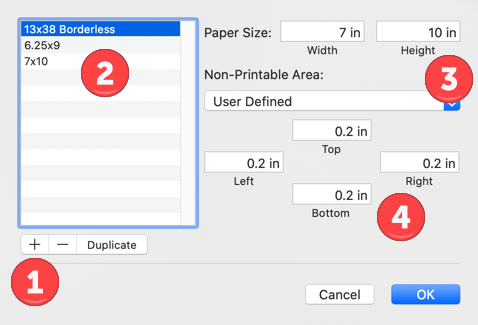
The Custom Paper Sizes dialog will appear.
1. Click the + button to begin
2. Double click in this area and name your size.
3. Fill in the width and height using this chart:
| Card Size | Set Width To | Set Height To |
| 7 x 10 (A7) | 7" | 10" |
| 6.25 x 9 (A6) | 6.25" | 9" |
| 5.5 x 8.5 (A2) | 5.5" | 8.5" |
| 5.25 x 5.25 (Square) | 5.25" | 5.25" |
| 8 x 9 Pano | 8" | 9" |
4. Set your margins.
Verify the information and click OK.
When you click OK from the custom size menu, you will arrive back at the Print dialog.
You will see the user-defined size you just created is now selected.
Complete your other printer settings now.
While in the Print dialog, set your media / paper type, print quality, and any other printer settings you normally adjust before making a print.
Click Save.
You will be back at the Print dialog.
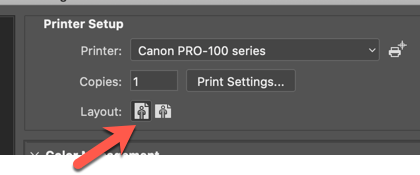
Locate and click on the Portrait orientation button, shown above.
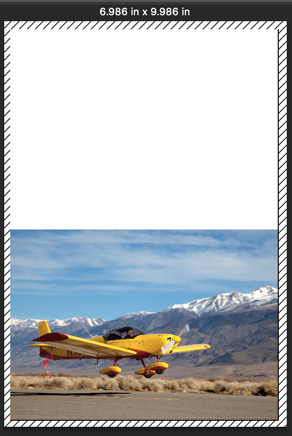
Once you change orientation to portrait, the preview will change to reflect your card layout and the custom paper size.
The shaded area around the layout represents the unprintable margin. Every printer is different, and some may have larger unprintable margins than others. You will need to make a few prints and adjust your layout accordingly.
If the preview does not look correct:
1) Verify your user-defined paper size matches with your card layout size.
2) Check the Position and Size settings as referenced below.
3) Make sure you are using the right size template or layout for your card.
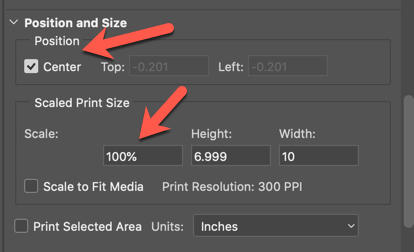
Scroll down the right column of the Print dialog until you come to Position and Size.
Check the "Center" box.
Verify Scale is 100% and Scale to Fit Media is unchecked.
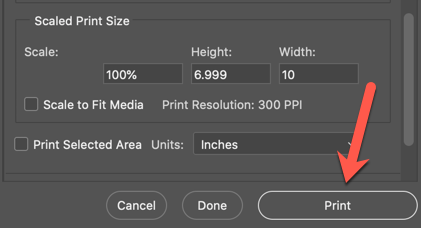
When you are satisfied with all settings and your preview click Print.
Congratulations! You have set up and printed a custom Red River Paper greeting card.
Related Posts and Information
Last updated: June 12, 2020


