Epson Card Printing
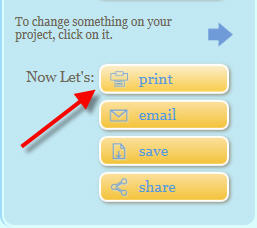
Start by clicking the Print button as seen below.
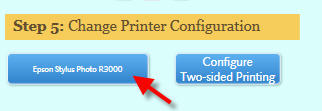
Click on the printer button under Change Printer Configuration as seen below.
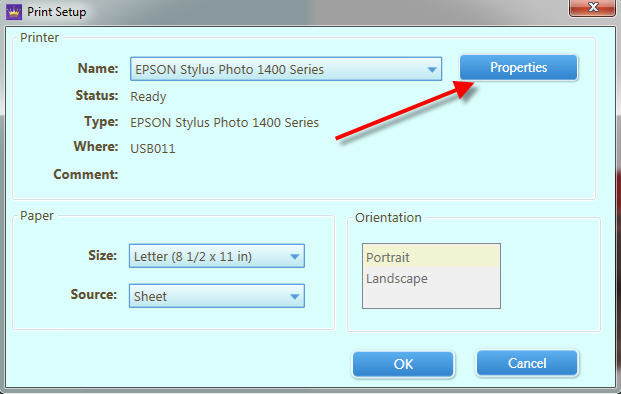
If your printer is not chosen in the Name drop down menu please select it now.
Next click the Properties button.
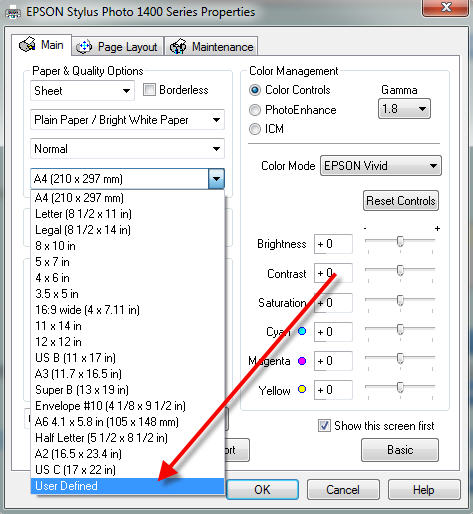
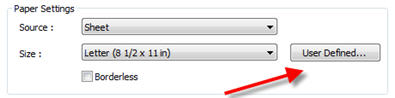
In the printer properties dialog find the paper size drop down menu. Scroll to the bottom of the paper size listing and choose the User Defined option. Some printer properties may have a User Defined button as seen below at right.
 |
 |
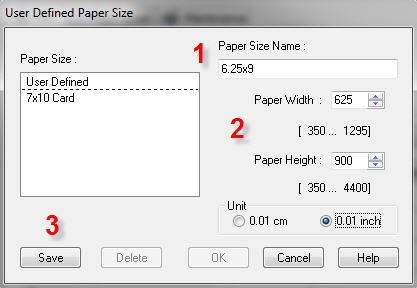
In this dialog you will: 1) Name the User Defined Size 2) Define the size. Rules for size definition Always set the smaller paper dimension as the width Always set the larger dimension as the height Note: Some Epson driver versions ask for the dimensions in .01 inch increments. Example = 9 inches will be entered as 900. 3) Click Save then click OK |
 |
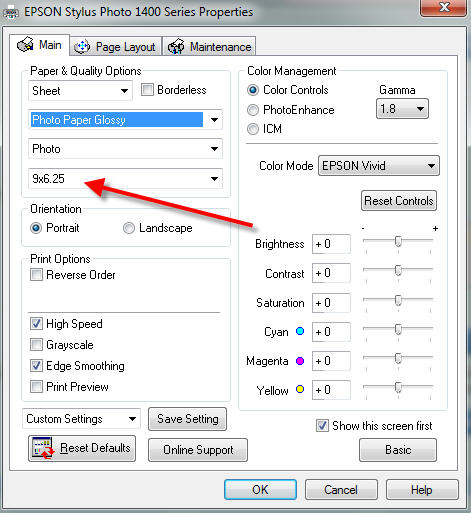
Back at the main properties menu, set your paper type, print quality, and verify that the user defined paper size is selected as seen below than click OK.
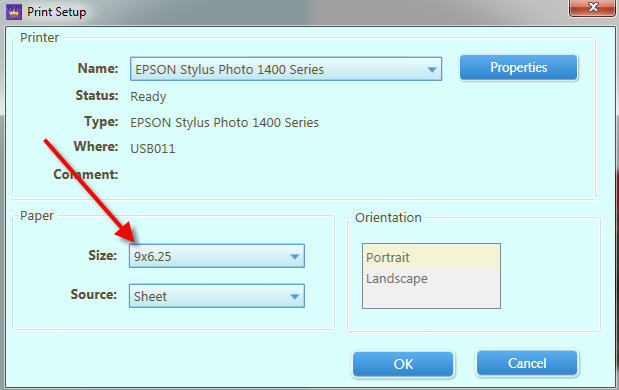
Back at the Print Setup menu, you should see the new paper size selected in the Size drop down menu as seen below. If not, go back to Properties and make sure you choose the new size as seen above.
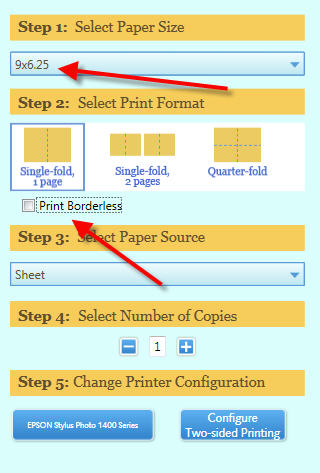
Next, verify that the custom size is selected in the Select Paper Size drop down menu.
Uncheck the Print Borderless box.
You can now click the Print Now button. If you have not printed a card yet, the program will probably ask you to do a print configuration. Make sure to load plain sheets of paper before proceeding. Once completed you should not be asked to do this task again.
Special Note About Saving Custom Sizes
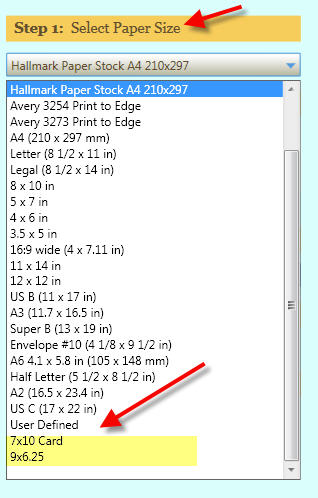
Once you're user defined size is saved, you will be able to select it from the Select Paper Size menu as shown below. On future printing projects just choose the size here. It will be sent to the printer when you're ready to print.
TROUBLE SHOOTING
If your card is not coming out correctly take a look at the following:
1) Go back into the printer properties and check your user defined paper size. It is critical this be set to the exact note card size you are using. The smaller dimension is the width. The longer dimension is the height.
2) Go back to the card setup menu. Make sure that you have left at least a 1/8" margin on all sides of the card. You will have to eyeball the distance. We recommend more space, not less, to make sure your card is not cut off by the printer's margins.
More questions? Contact us via the support center
Related Posts and Information
Last updated: January 27, 2021


