
If you are looking for the simplest way to create a basic note or greeting card in Corel Paintshop Pro, this is the place. You will start with an image and in a few steps end with a card layout - a photo on the outside front and a line of text on the back.
First, let's have a quick talk about Corel. If you are learning photo editing from scratch, it is a fine choice. However, if you are like us and have been steeped in Photoshop for 20+ years, Corel's tools and processes, and keyboard shortcuts may be slightly disorienting. You will see below some steps that are different from Photoshop in meaningful ways. If you are moving from Photoshop to Corel, READ THESE DIRECTIONS at least one time fully before starting work on a card.
Get Started - Open Your Image
Open the image you want for the outside front of your card. For this tutorial, you will need to choose an image in the horizontal (landscape) orientation.
In Paintshop Pro, go to File > Open to begin.
STEP 1 - Image Size Rules
Refer to the table below for the maximum size you can make your image by card size.
Make your photos this size or smaller using the crop tool or image resize feature.
| Card Size | Set Width To | Set Height To |
| 7 x 10 (A7) | 6.75" | 4.75" |
| 6.25 x 9 (A6) | 6.25" | 4.5" |
| 5.5 x 8.5 (A2) | 5.5" | 4.25" |
| 5.25 x 5.25 (Square) | 5.25" | 5.25" |
| 8 x 9 Pano | 9" | 4" |
STEP 1b - Create Card Layout
We recommend the CROP TOOL because it gives you precise control over the width and height of your card image. Yes, you will likely lose a part of your original image in the process.
To activate the Crop Tool, click on the crop icon in the tool pallet on the left side of your screen or press the "C" key on your keyboard.
The Crop Tool control bar appears at the top of your screen.

CROP TOOL NOTES AND WARNINGS
The Corel crop tool does not function like Photoshop! Specifically, you cannot set a crop dimension AND a resolution target. Put another way, you cannot open an image and tell Corel to crop it to 6.75" x 4.75" at 300ppi resolution. Corel will do one or the other, not both.
This results in cropped images with variable resolutions. In the example below, you see that the crop dimensions result in 505.48 pixels per inch. For the purposes of this tutorial, we have to live with this oddity and move on.
If your images stay above 240ppi, print quality will be fine.

1 - Click SPECIFY PRINT SIZE.
2 - Set units to INCHES.
3 -Set your crop width x height.
Corel's documentation on the Crop Tool is sparse. Click here should you want to take a look.
Size and move the crop tool to your preferred portion of the image.
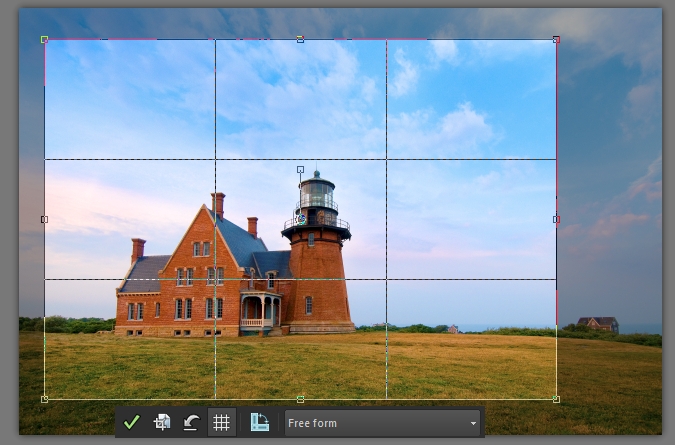
Click the GREEN CHECK MARK. The image will update to show the cropped area only.
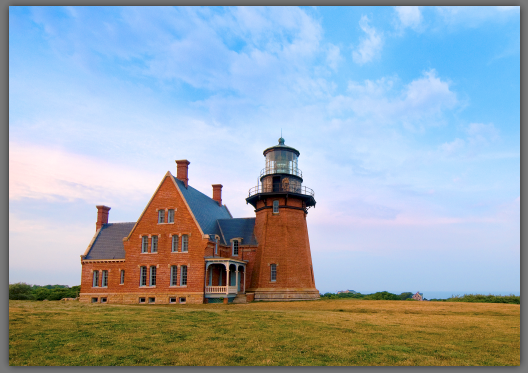
The result:
STEP 2 - Create Card Layout
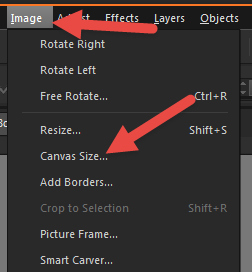
You will now create the card layout using the Canvas Size tool.
Go to the Image menu. Choose Canvas Size.
STEP 2a - Front Panel
Go to the Image menu. Choose Canvas Size.
The Resize Canvas dialog will appear showing the current image size as the canvas size.
Set canvas size based on this table:
| Card Size | Set Width To | Set Height To |
| 7 x 10 (A7) | 7" | 5" |
| 6.25 x 9 (A6) | 6.25" | 4.5" |
| 5.5 x 8.5 (A2) | 5.5" | 4.25" |
| 5.25 x 5.25 (Square) | 5.25" | 5.25" |
| 8 x 9 Pano | 9" | 4" |

1 - Verify units are in inches
2 - Set width and height according to the table above
3 - Click the MIDDLE SQUARE on the anchor as shown above
Click Resize. You will notice the image now has a white border on all four sides.
What just happened? You added space around the existing image to expand the total canvas size.
STEP 2b - Complete Card Layout
Go to the Image menu. Choose Canvas Size.
Set the canvas size based on this table:
| Card Size | Set Width To | Set Height To |
| 7 x 10 (A7) | 7" | 10" |
| 6.25 x 9 (A6) | 6.25" | 9" |
| 5.5 x 8.5 (A2) | 5.5" | 8.5" |
| 5.25 x 5.25 (Square) | 5.25" | 10.5" |
| 8 x 9 Pano | 9" | 8" |
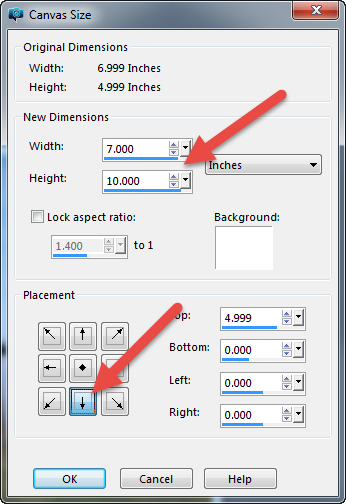
1 - Verify units are in inches
2 - Set width and height according to the table above
3 - Click the BOTTOM MIDDLE square anchor as shown above
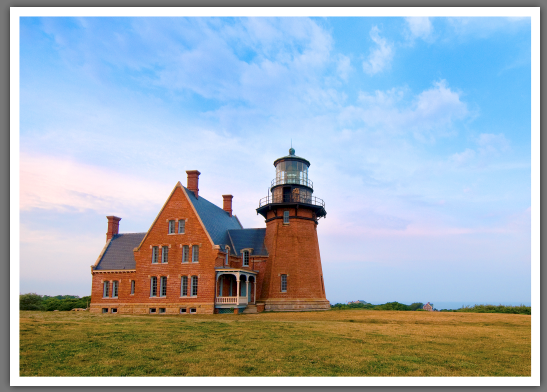
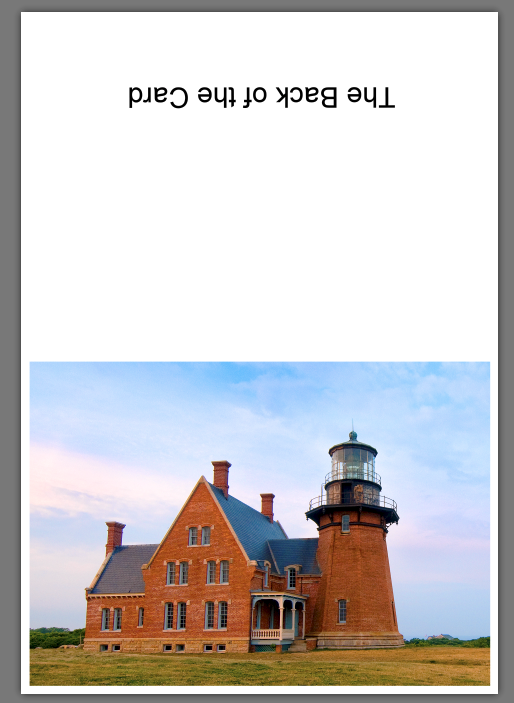
Click Resize. The canvas now expands and you have a finished card layout.
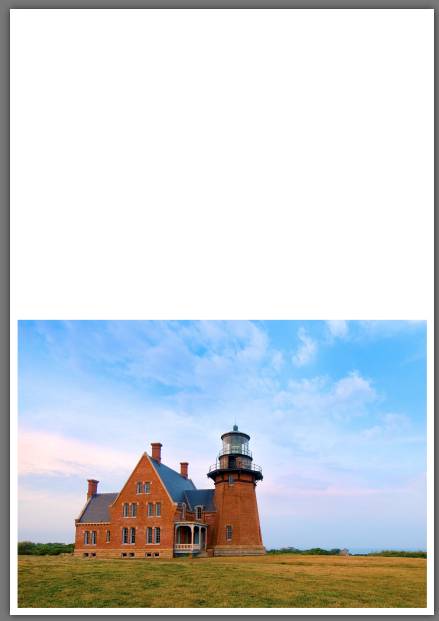
The top white section is the outside back of the card.
The image will become the outside front of the card.
NEXT - The Text Tool
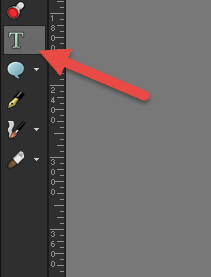
You take this opportunity to add text with the Text Tool. Click the "A" icon on the tool pallet as shown below. Or you can press "T" on your keyboard.

The text toolbar appears at the top of the screen. It contains numerous controls and works just like text tools do in Photoshop, Photoshop Elements, and many other editing products.

When you begin typing, text appears on the screen and will be a new layer.
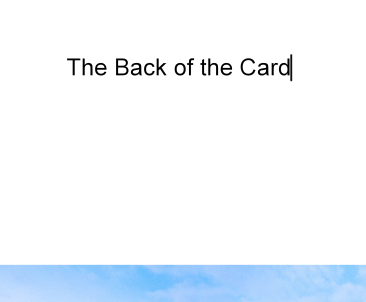
If you select the Move tool, see below, you can now click and drag the text around the layout. Remember to stay at least 1/4" from the edges.

For text and other images to print properly on this layout, items on the back panel of the card must be turned upside down.
To rotate the text, start by activating the text tool:
Next click on the text layer:
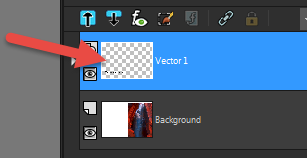
This will activate the text resize, move, and rotate controls.
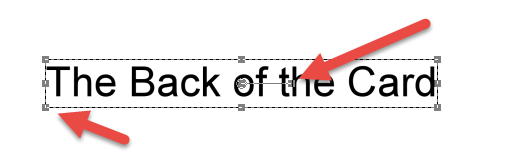
Click the rotate anchor, the right arrow above, and drag until the text is upside down.
The card layout is now complete.
NEXT - Printing Your Card
Related Posts and Information
Last updated: August 31, 2023


