This printer driver tour takes you through all of the tabs in the Window Printing Preferences for the Canon PRO-300. We'll cover all the controls, features, and hidden extras you need to know to get the most from your printer.

Look for this icon as you read - it indicates driver controls you need to understand.
Quick Setup
This tab contains all the basic settings required for printing with or without ICC profiles.
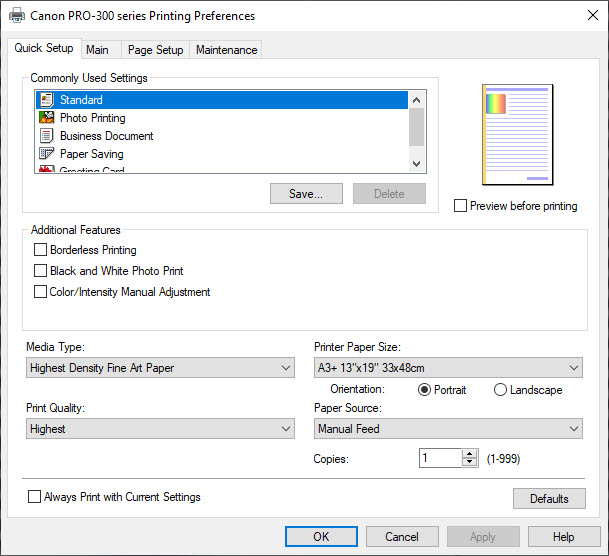
You can save setting combinations for favorite paper types, sizes, color management options, and more.
Clicking the Save button under Commonly Used Settings will get you started. See below.
Click the Options button for some important check boxes. You should check both, shown below, to get the most of saved settings.
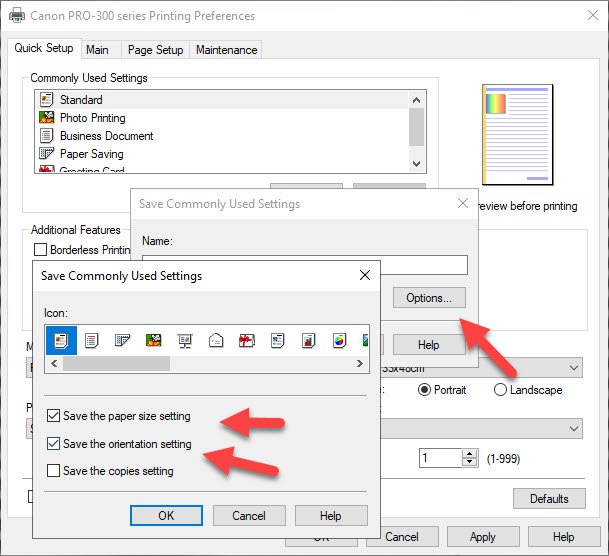
Name the setting something you will understand and remember in the future, and click OK.

The next time you print, you will see the saved setting in the Commonly Used Settings.
Main
We spend most of our time in the Main tab when using Canon printers. It gives quick access to the most important controls and access to important Advanced Settings.
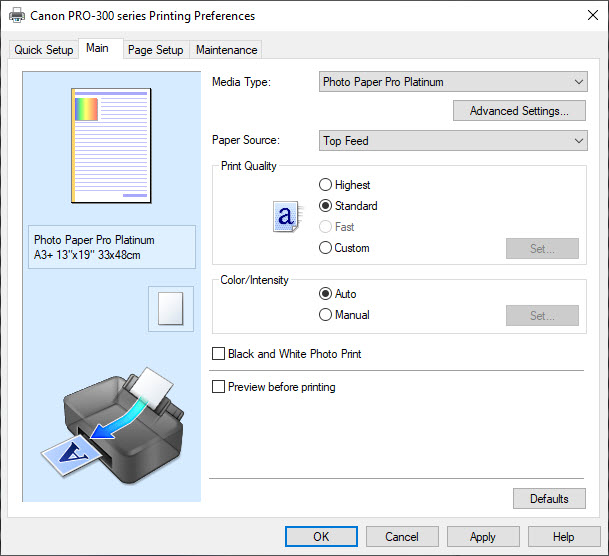
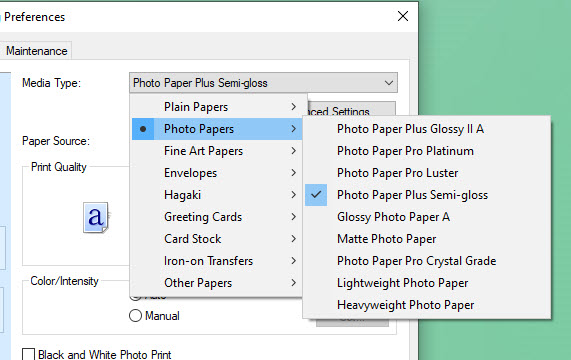
Media Type
The Media Type is a top three most important setting. It tells the printer important information and acts as part color profile, part ink throttle, and controls which black (photo or matte) is used. Always double check this setting before beginning a print.
The Media Type options are by default Canon branded papers. You will find the recommended setting in every box of Red River Paper brand inkjet media.
Advanced Print Settings

Print Head Height - Avoid Paper Abrasion
This is the setting for thick papers. Use for papers 12mil and thicker.
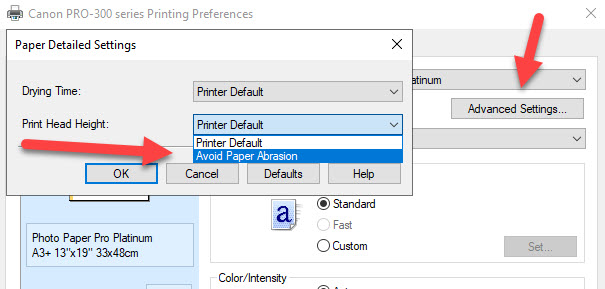
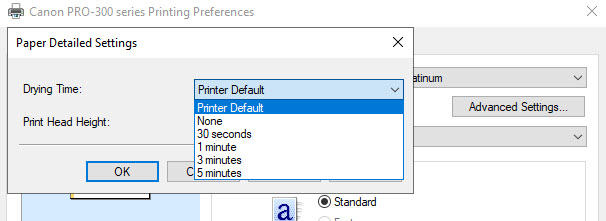
Drying Time - When active, the printer will hold a print for the chosen time before releasing it onto the output tray. Most papers will not require this option. Use if you are printing on slow dry media like inexpensive films, vinyls, or t-shirt transfers.
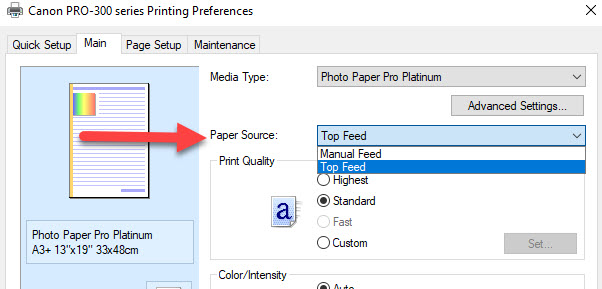
Paper Source
The PRO-300 has two paper feed paths.
Top Feed - The top tray where you can load up to 50 sheets of paper, depending on thickness. All sizes from 4x6 up to 13x19 can go in this path.
Manual Feed - The rear single sheet path for thick media. You will use this path for papers 8x10 and larger, 14mil and thicker.
NOTE - If you have paper that is smaller than 8x10 and thicker than 14mil, it can go through the Top Feed. Remember to set the thick paper option.
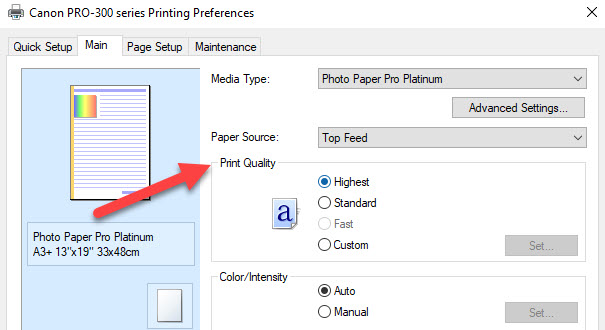
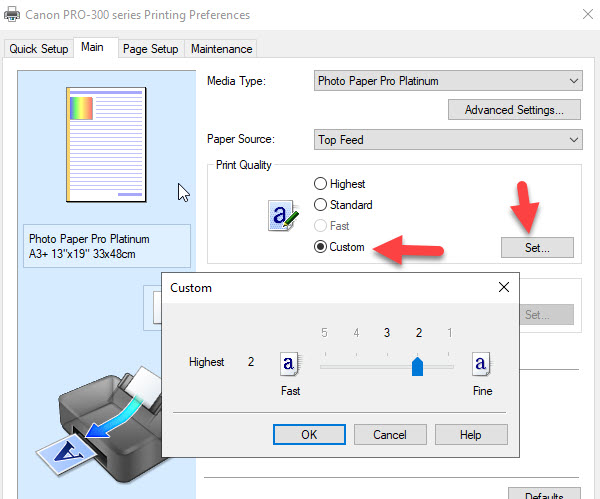
Print Quality
The PRO-300 has a number of print quality options. The available options are based on the media type selected.
Quality is controlled by the radio buttons, shown below.
For photo and art printing, we recommend High print quality.
A Custom print quality option is available. When active, you will set quality using a slider, seen below. Setting 1 is best down to setting 5, which is draft mode. Again, available print quality levels are based on the media type chosen.
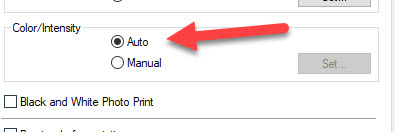
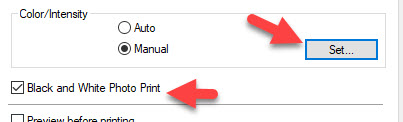
Color / Intensity
This controls the printer's color management system.
The Auto setting allows the driver to fully manage color using default settings.
Manual setting allows you to make adjustments and more.
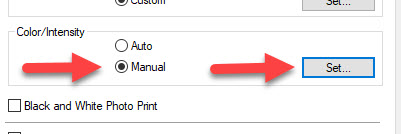
The Color Adjustment tab allows you to make color, brightness, and contrast.
It's important to note that adjustments are only apparent when you make a print.
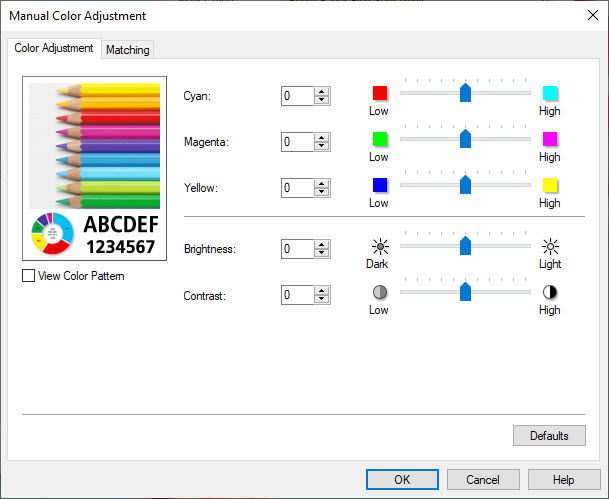
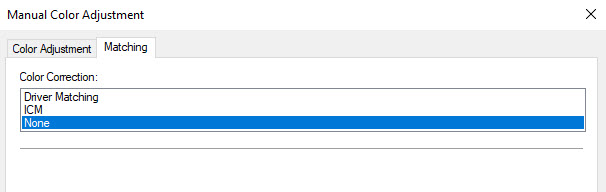
The Matching tab reveals these options. Driver Matching is the default mode.
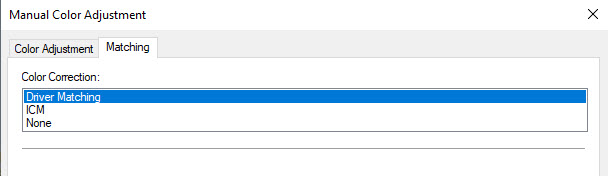
ICM is the Windows ICM color management system. You are unlikely to need this option. If you do, you will already know what it is and how to use it.
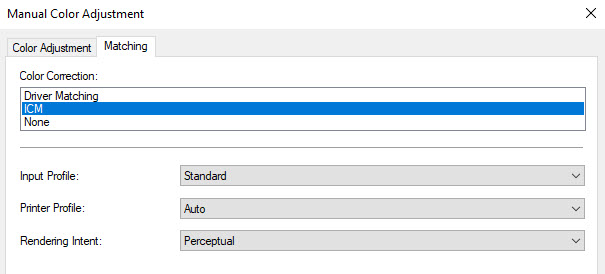
Matching None turns the printer's color management system off. You have to do this when using a paper profile.
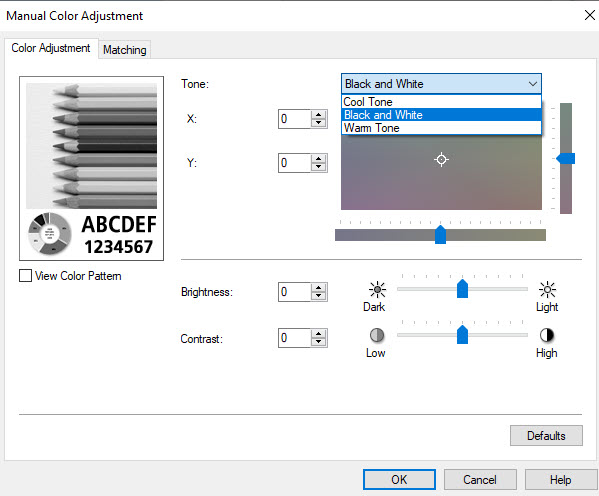
Black & White Photo
Most Canon printer have a printer driver option for black & white photo printing.
Manual adjustments are available. Presets for Black and White (neutral tone), Cool Tone, and Warm Tone are available.
A rather perplexing manual adjustment option is also available. If you figure it out, let us know!
It's important to note that, like driver color adjustments, you need to make a print to see the results of black & white adjustment.
If you are interested in black & white photo printing, we recommend trying this system and printing B&W via a paper profile through Photoshop, Lightroom, etc.
Page Setup
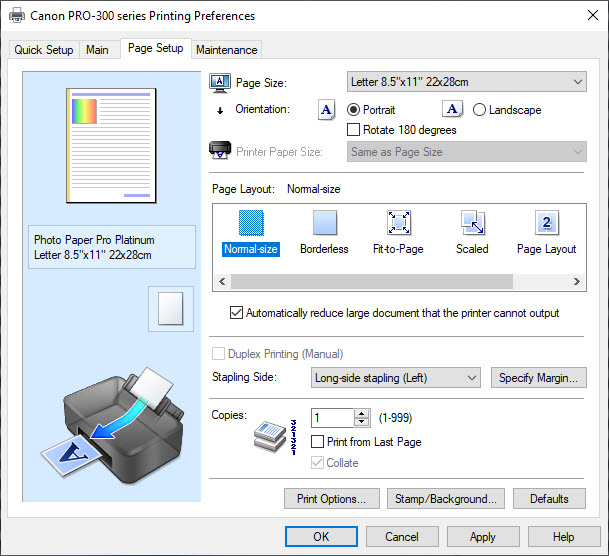
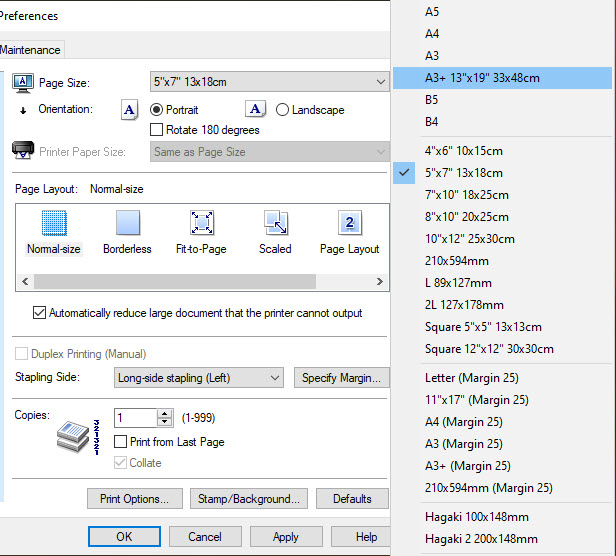
Page Size
The Page Size drop-down contains all of the paper sizes included in the driver.
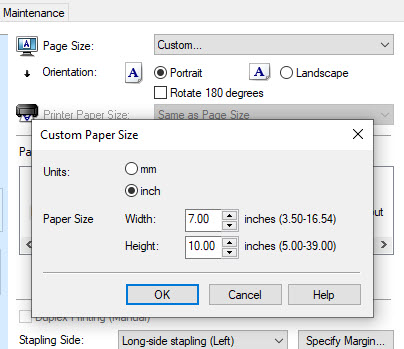
Custom Paper Size
For paper sizes not included in the above list, you can create them using the Custom Paper Size dialog.
You will see Custom Paper Size at the bottom of the Page Size drop-down menu.
Custom sizes can be defined in inches or millimeters.
The numbers in parentheses represent the minimum and maximum width or height.
When you define a custom paper size remember:
Width is ALWAYS THE SMALLER DIMENSION OF YOUR PAPER
Height is ALWAYS THE LARGER DIMENSION OF YOUR PAPER
If this does not make sense at first, think about how you feed a sheet of 8.5x11 paper. The printer is expecting paper to be fed in that orientation.
Margin 25
You will see a number of sizes listed as Margin 25. The number 25 refers to a 25mm unprintable margin at the top and bottom of the paper. As a rule you will not use these sizes.

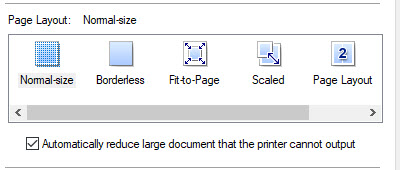
Page Layout

The Normal-size and Borderless options are the most important to understand.
Normal-size will print using the printer's default unprintable margins. You can expect 1/4" unprintable area on most paper sizes.
The Borderless option will print out to the very edge of your paper size.
When selecting Borderless, an alert box will appear to let you know about possible problems. The problems they mention happen rarely if ever.

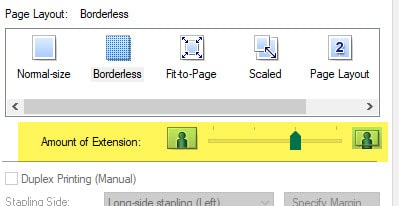
You will notice that the list of available paper sizes gets smaller when you choose Borderless.
These are the only options you have for borderless printing. Custom size borderless printing is not possible.

Amount of Extension - To ensure the image prints without borders, the driver expands the image size slightly. You can control the amount of extension with this slider.
You should only adjust this slider if you see obvious print quality degradation on the edges of your print.
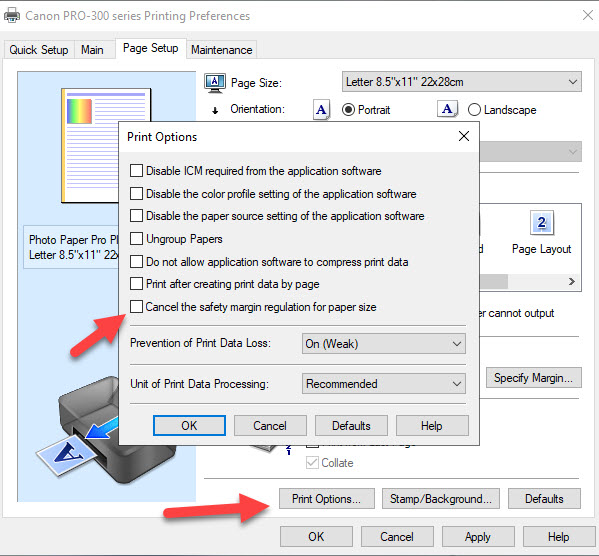
Print Options

The Cancel the safety margin regulation for paper size is a key control that you'll want to understand.
For ease of use, we'll call this the "Cancel Safety Margin" control going forward.
Recall the Margin 25 paper sizes above. Like we said, you'll probably never choose them. However, certain media settings on the Main and Quick Setup tab **require** you use them unless you click the Cancel Safety Margin.
A good example is the Matte Photo Paper media setting.
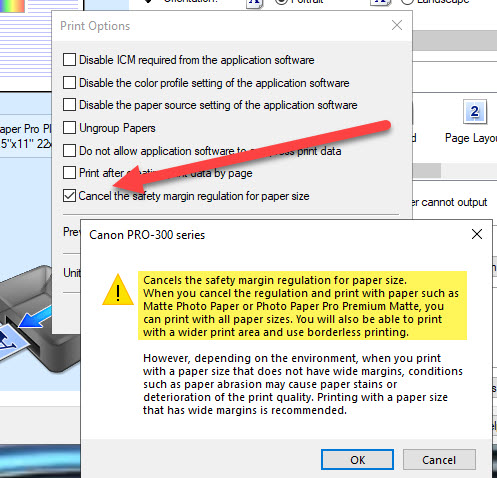
Once you click Cancel Safety Margin and click OK, you'll see this wordy alert box.
Take a moment and read the highlighted portion below. It explains what is going on.
As for the warnings, here's what Canon is thinking. The want the printer to stop printing before the print head gets too close to the paper edge. They are worried about head strikes on matte and fine art papers. The way to avoid their worry is to follow the instructions:
- For fairly thick papers - up to 13mil - turn on Prevent Paper Abrasion.
- For thick papers - 13 mil and up - feed using the Manual Feed path if possible.
Maintenence
The Maintenance tab is your access to important maintenance and printer test features.
Update Media Information - Syncs the media options on the printer's control panel with the ones in the printer driver. It's rare you'd need to use this option because the driver overrides the settings on the printer itself.
If you feel like you are missing media settings, you can do a firmware update on the printer and then do this option. Or, you can download the latest driver from Canon's website.
Maintenance and Preferences - See below.
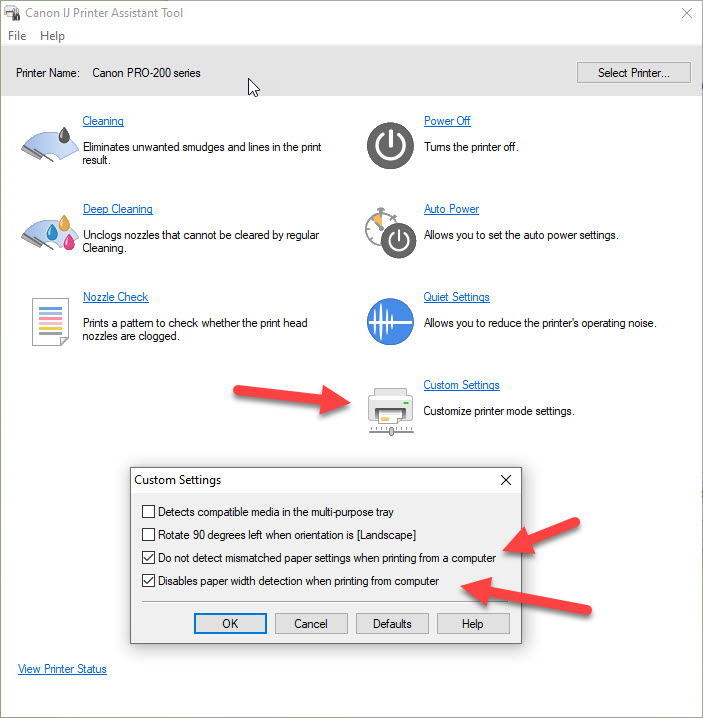
Clicking Maintenance and Preferences launces the Canon IJ Printer Assist Tool.

Important features are print head cleaning, nozzle check, and custom settings.
If you encounter a decline in print quality, we recommend running a nozzle check first! It takes a few moments and uses very little ink.
Custom Setting - Two are important for daily print needs.
Do not detect mismatched paper settings - This allows you to skip the printer control panel setup. It just means that you don't have to worry about setting the printer's control panel options each time you print. The driver settings will be treated as primary.
Disable paper width detection - This turns off printer sensors that measure paper width. It is a well-intended system with too many false errors that slow down the print process.
Related Posts and Information
Last updated: February 28, 2023


