This article shows you how to add a printer in the Apple OS using the actual driver from your printer manufacturer. We provide this article because Apple customers are reporting new printing problems. In many cases, the cause is the Airprint driver took over after an OS update. Or, the printer was added using Airprint instead of a full-function driver. Airprint should not be used if your printer has a driver from the manufacturer. Airprint is like a duck that cannot swim. It's a duck, but it's not good at being one. Does that make sense?
If you have not downloaded the driver from the printer makers website, do so now. Once downloaded, run the install process.
Now, go to System Preferences > Printers & Scanners.
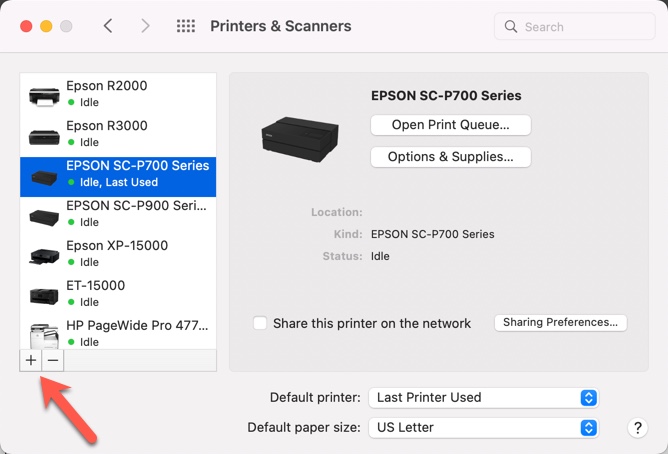
Click the "+" button, shown above.
This dialog starts the process of adding a printer to your system. It's important to understand that the driver should already be installed. This part is the act of telling your computer you want to use the printer AND tell it what driver to use.
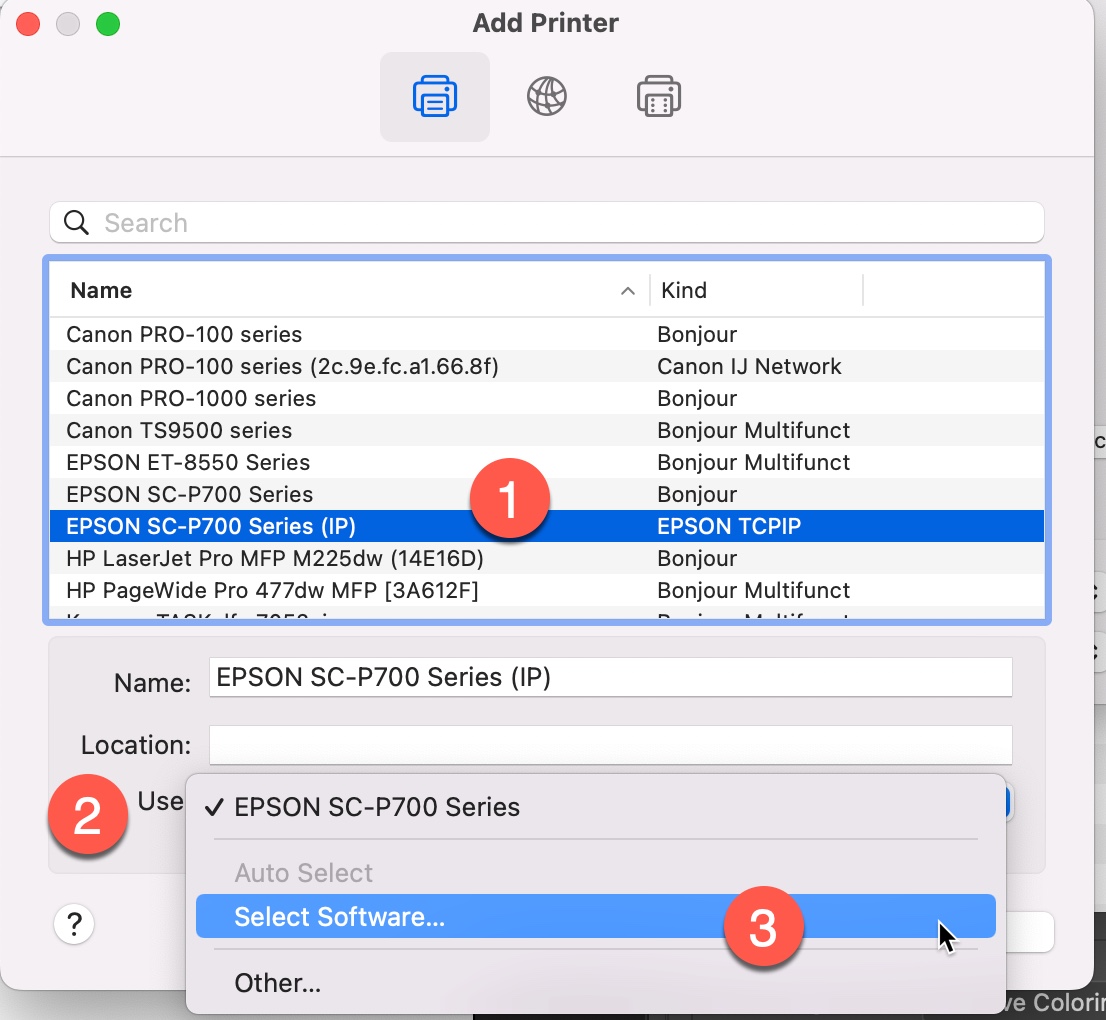
1 - Single-click the printer you want to install from the list. Note the above has many printers because we have lots of printers at RRP.
2 - Click the USE dropdown menu.
3 - Choose Select Software...
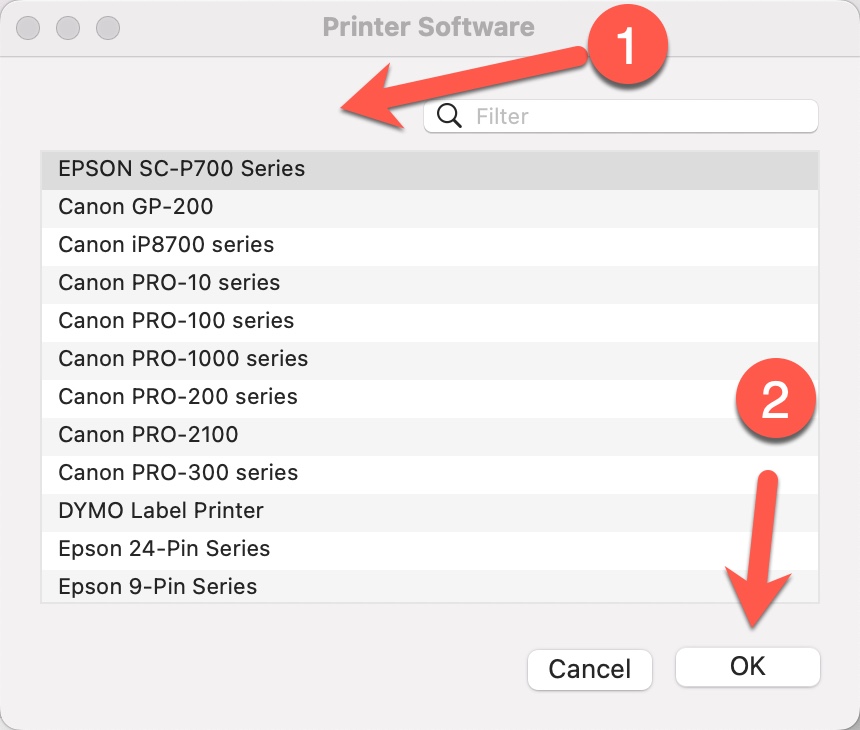
In this dialog, you're telling the computer what DRIVER you want to use for this printer.
If you installed the driver as instructed above, you will see it in this list.
Single-click it and click OK.
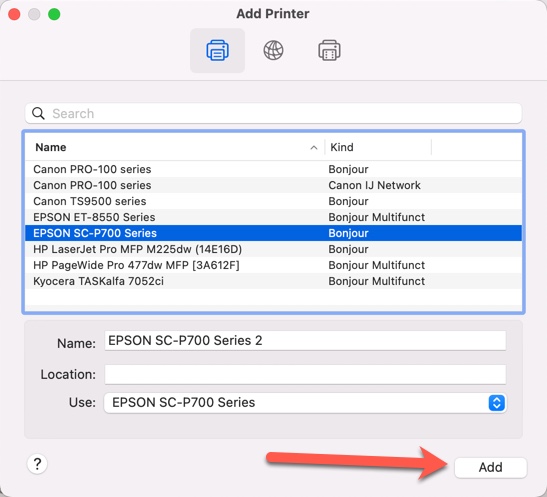
Click the Add button and Continue if the computer warns you that the printer is already exists.

You will probably see a dialog like the above as the computer adds the printer and driver.
When you go to print, you will see the correct media selections are now available. These are manufacturer branded media names, not generic one word descriptions.
Related Posts and Information
Last updated: December 20, 2022


