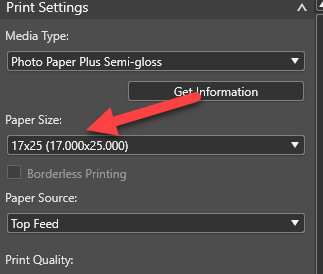
For Red River Paper greeting cards, scrapbook 12x12 and 17x25 sheets, panorama printing, and other special projects, you need to define a custom paper size in the Canon printer properties. Below are instructions for setting a custom paper size starting in Photoshop.
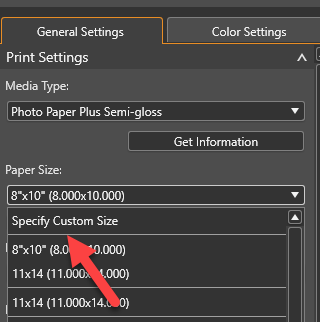
Click on the Paper Size dropdown menu.
Choose Specify Custom Size.
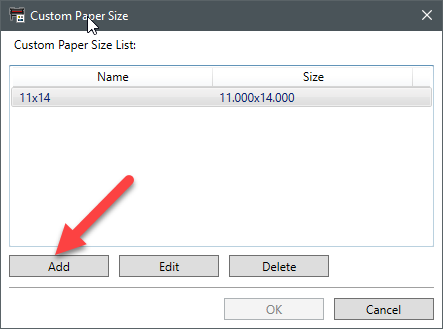
In the Custom Paper Size dialog, click Add
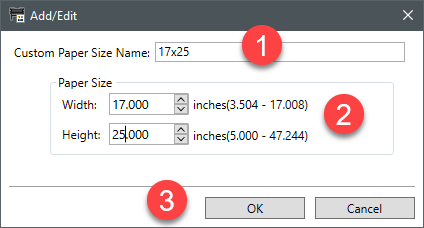
In the Add/Edit dialog, name and define the custom size then click OK.
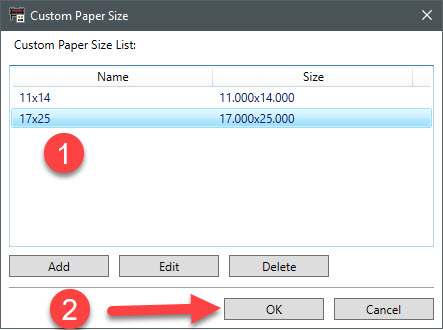
To complete the process, click Click on the new custom size and then click OK.
The custom size will now be listed in the Paper Size dropdown menu. Choose it when you want to print on that size.
Setting the Image Size
Once you choose the custom paper size, the layout will update to reflect the new size.
You will then open an image and drag it into the layout.
You can let the app adjust the image to fit the default size or you can manually adjust the image size.
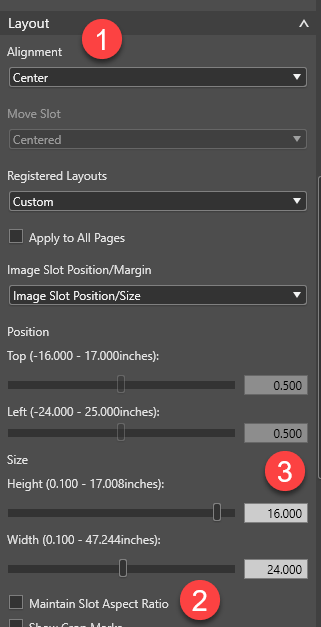
Go the the LAYOUT section on the right panel.
If you want the image area to be totally custom, uncheck the Maintain Slot Aspect Ratio.
Set the Size height and width.
In this example, we're printing on the 17x25 paper size and we want the image to be 24" wide and 16" high.
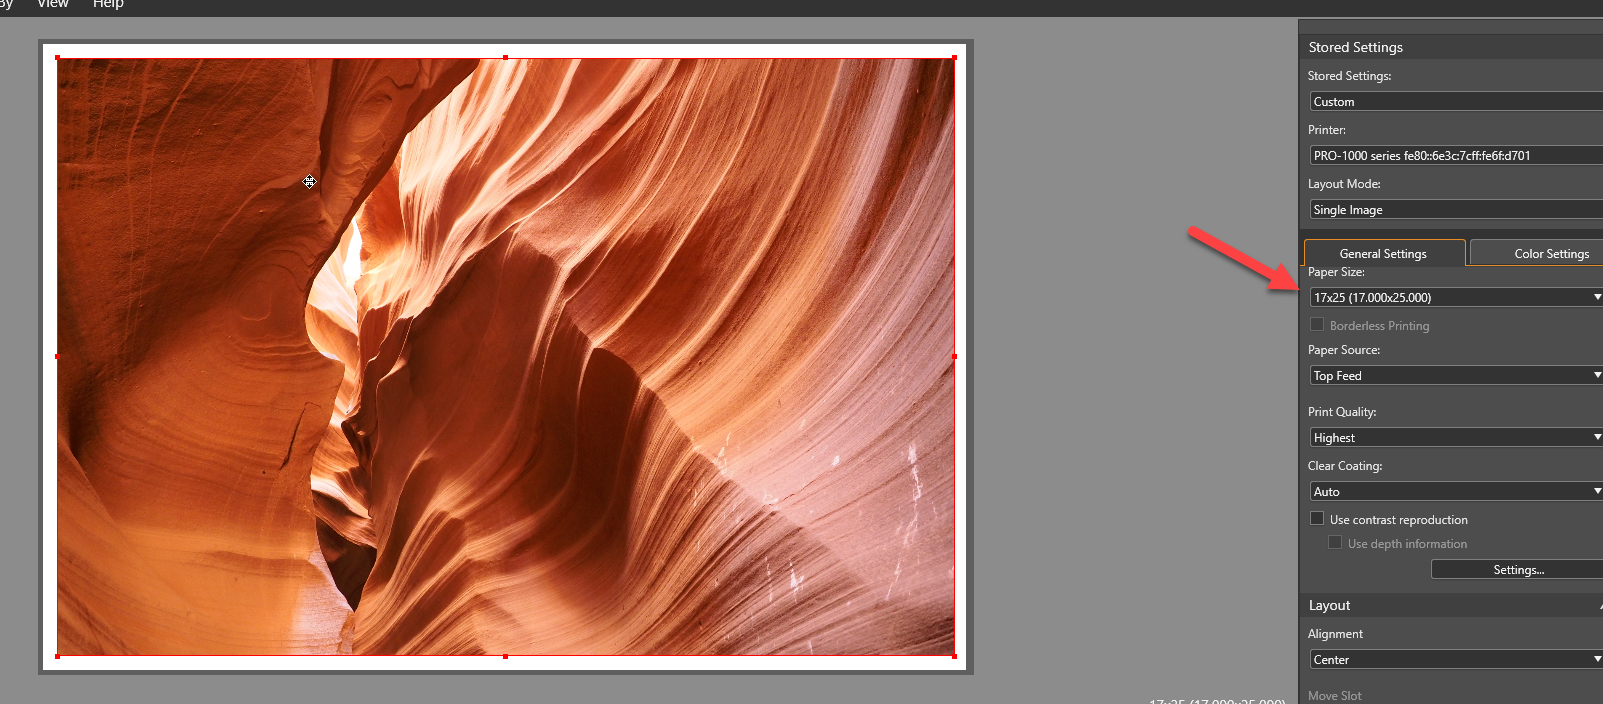
Continuing from the example above, this is how the image will look:
Related Posts and Information
Last updated: January 18, 2024


