AirPrint is the name of Apple's generic print driver. It works with almost every printer, but it doesn't support special features of any one printer and it doesn't support using ICC color correction profiles. Despite the name "AirPrint", its just the name of the generic printer driver even when using USB or Ethernet to connect your printer.
PROBLEM - Apple AirPrint driver in use and not the printer specific driver from Epson, Canon, or HP
SYMPTOM - Media Type may show generic names such as Glossy Paper or Photo Paper.
SYMPTOM - Color accuracy is poor.
SYMPTOM - Paper sizes missing or custom paper sizes not working.
SYMPTOM - Borderless printing may not work.
SYMPTOM - Can't properly center the image
SYMPTOM - Magenta cast or colors too red
FIX - Remove the AirPrint driver and replace with the driver from your printer's manufacturer.
Even if you installed the proper driver when setting up the printer, Apple will sometimes silently uninstall the official driver for your printer and replace it with their generic "AirPrint" driver. This most often happens when your OS receives updates.
We call this the "AirPrint Hijack". Why? Apple did not ask your permission to install the AirPrint driver. They just did it. And that's not very nice. The AirPrint driver removes critical printer capabilities and controls, such as the media type, paper feed adjustments, and the ability to use ICC color profiles. This results in poor print quality and unnecessary frustration. The tutorial below helps you diagnose and solve the problem.
Diagnosis
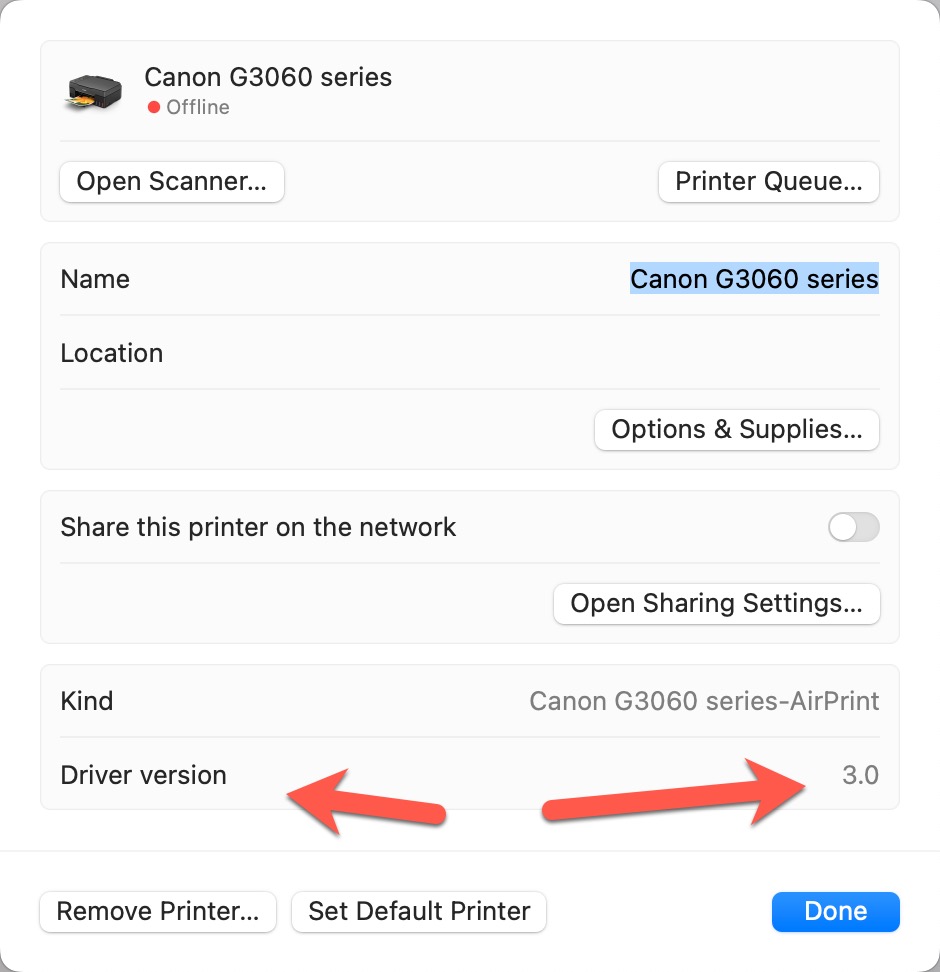
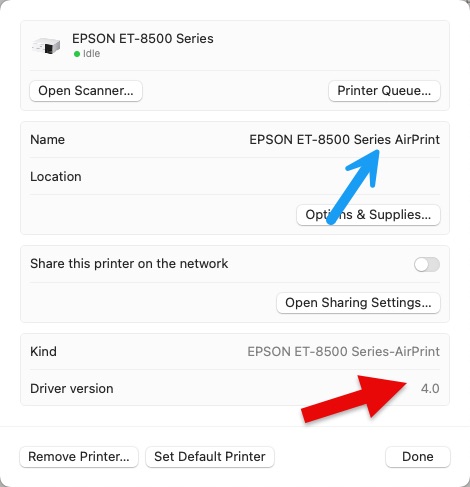
The primary way is to look at your printer's driver version. If the number is 2.0, 3.0, or 4.0 the AirPrint in the assigned driver.
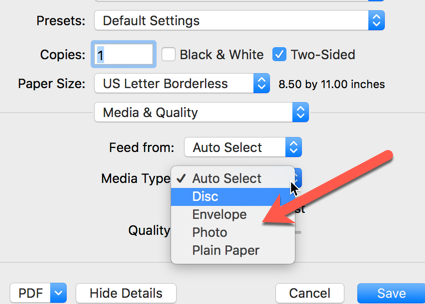
Another tell-tale sign is with the media type selection is only generic names like "Photo" or "Glossy Paper". Epson, Canon, and HP always populate this list with their brand name papers. If you do not see brand names like "Premium Photo Paper Glossy" and "Photo Paper Plus Semigloss II", AirPrint is likely the assigned driver.
Correcting the Problem
Step 1 - Download and install the driver from your printer maker's website.
To fix this issue, you have to install the correct driver from Epson, Canon, or HP. If you are certain you have already done so, go to the next step. If you are not so sure, do it again.
To find the driver, go to the web and search. An example is " Canon PRO-200 printer driver".
Be sure that you land on the printer maker's website. There are many sites that look legitimate but contain malware or may even try to charge you for the driver.
Step 2 - Add the Printer in Printers & Scanners Dialog
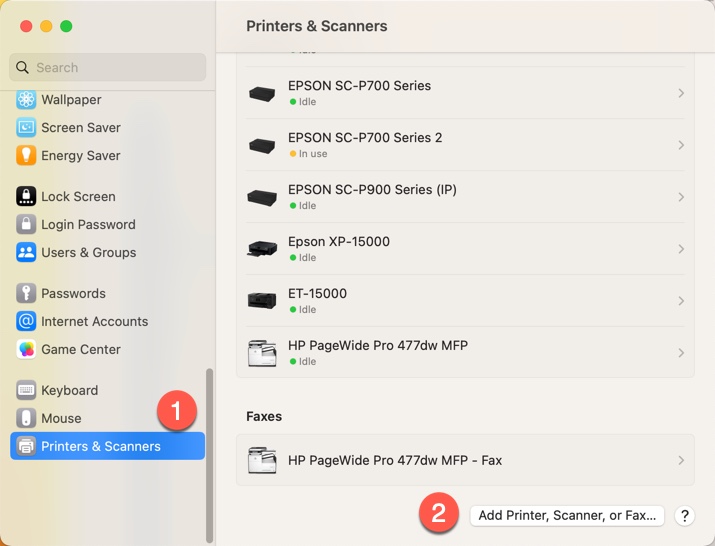
Mac OS 13 and Later
Start at Apple Menu > System Preferences > Printers & Scanners
Locate and click "Add Printer, Scanner..." button as shown below.
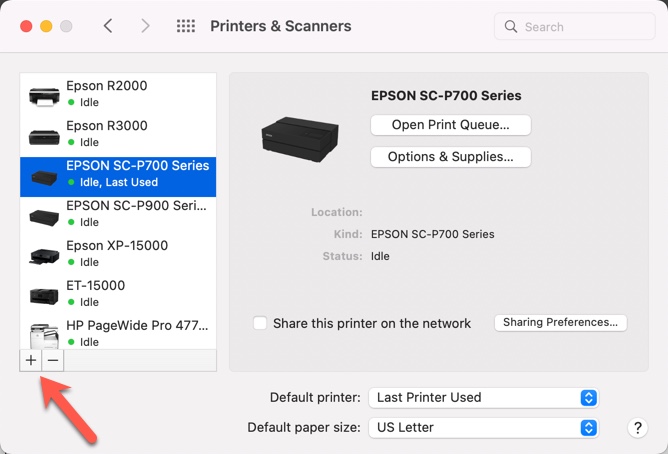
Mac OS 12 and Earlier
Start at Apple Menu > System Preferences > Printers & Scanners
Locate and click "+" button as shown below.
Continuing...below applies to all MacOS versions.
This dialog starts the process of adding a printer to your system. It's important to understand that the driver should already be installed. This part is the act of telling your computer you want to use the printer AND tell it what driver to use.
1 - Single-click the printer you want to install from the list. Note the above has many printers because we have lots of printers at RRP.
2 - Click the USE dropdown menu.
3 - Choose Select Software...
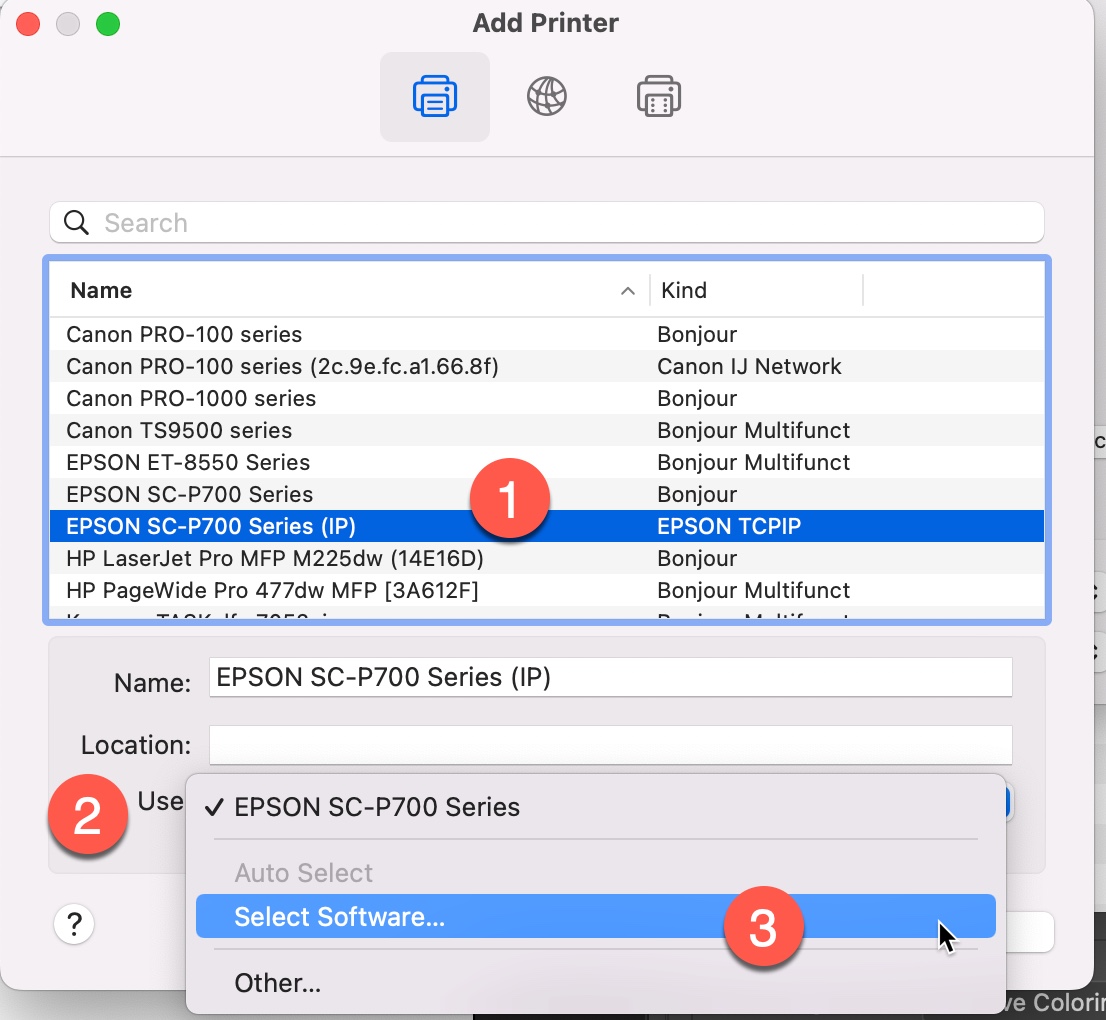
NOTE - You MUST select Select Software... in the Use dropdown menu, even if the dropdown menu already says the name of your printer. Yes this is weird and confusing. If you don't do this step, it will just re-install the AirPrint driver instead of the driver that you are trying to install.
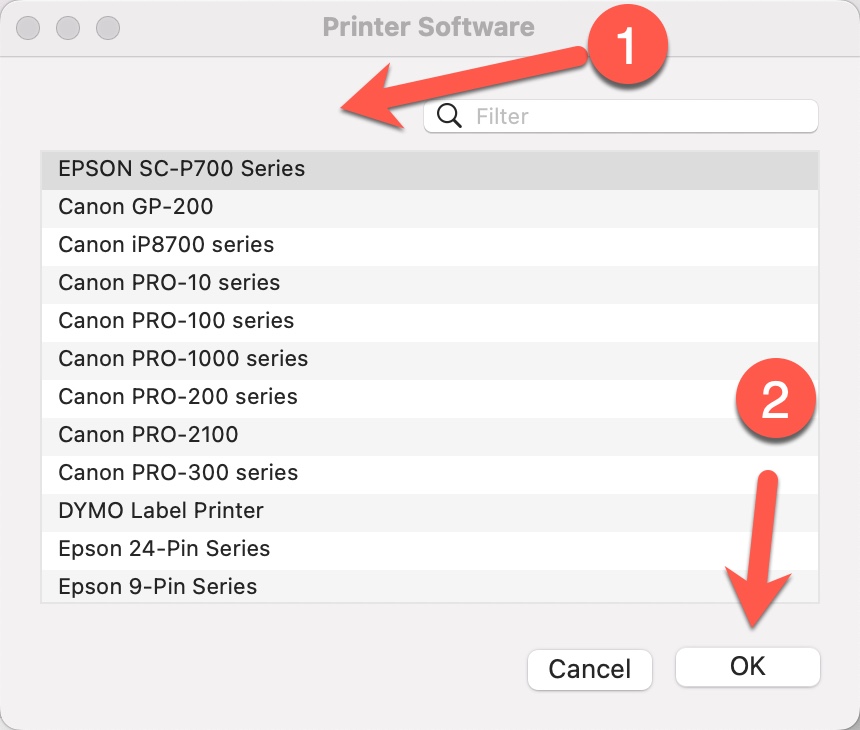
In this dialog, you're telling the computer what DRIVER you want to use for this printer.
If you installed the driver as instructed above, you will see it in this list.
Single-click it and click OK.
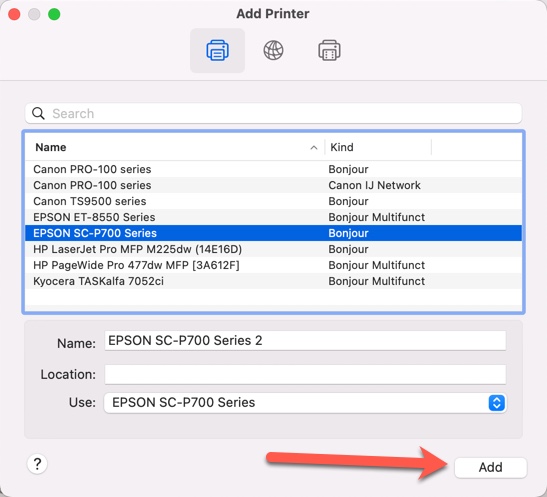
Click the Add button and Continue if the computer warns you that the printer is already exists.
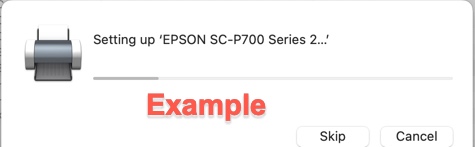
You will probably see a dialog like the above as the computer adds the printer and driver.
When you go to print, you will see the correct media selections are now available. These are manufacturer branded media names, not generic one word descriptions.
Checking Your Work
After installing the driver, be sure to double check that it installed correctly. There are several possible missteps in setting up the correct printer driver that can result in it silently installing the AirPrint driver instead of the one you are trying to install.
You can check your work by viewing the driver version. Remember - Single digit driver version is Airprint. Double digit driver versions are the ones intended for your printer.
Sometimes you will end up with two copies of the printer installed, like this:
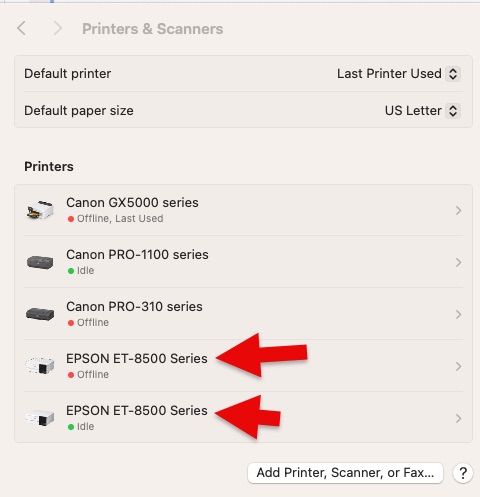
that is usually an indication that you have both the official driver and the AirPrint driver both installed. This is fine, but can be confusing. So we recommend doing the following:
1. Click the > arrow to open the details of the two printers and find which one is the AirPrint driver
2. Rename the AirPrint one so that it says AirPrint in the name of the printer, you do this by highlighting the name of the printer and typing:
3. Hit Done and you should see one with AirPrint in the name and one without
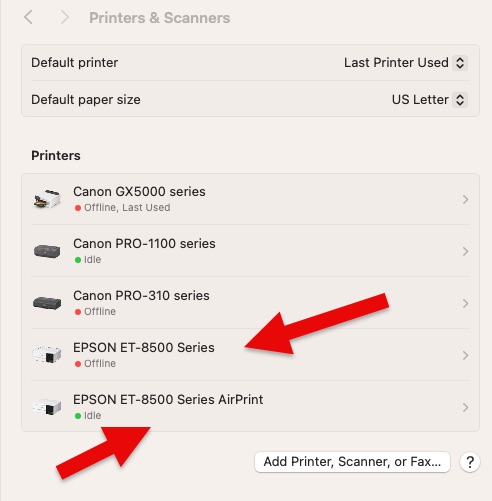
This way, when you are selecting the printer in your printing application (ie Photoshop, Lightroom, Affinity Photo, etc) you don't accidentally select the AirPrint one.
Related Posts and Information
Last updated: October 29, 2025


