How to create user defined paper sizes - Epson and Photoshop Elements
For Red River Paper greeting cards, scrapbook 12x12 sheets, panorama printing, and other special projects, you need to define a custom paper size in the Epson printer properties. Below are instructions for setting a custom paper size in Photoshop CS5.

In Photoshop Elements choose File > Print. The Print dialog will appear. Choose your printer from the Printer drop down menu.

Locate and click Page Setup on the lower left of the Print dialog. This will launch your printer's property dialog.
Newer Epson Printer Driver Versions (scroll for older driver help)
On the Main tab of the printer's properties, locate and click the "User Defined..." button.

This brings up the User Defined Paper Size dialog.

Name your new paper size something easy to understand. Enter it in the dialog at the top of the menu.
Now enter the paper's width and height.
ALWAYS set the smaller sheet dimension to width and larger to height.
When you are done click OK.
The custom size will now be available for your use in the paper size drop down menu.
Finally
Set the media type, quality, and color controls in the printer driver and click OK to go back to the Photoshop print dialog and preview.
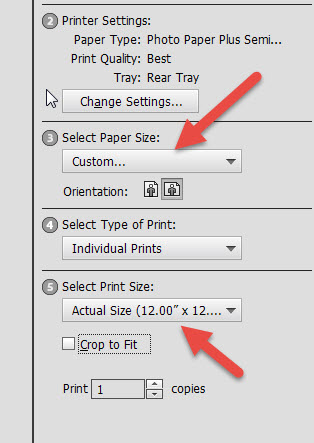
Triple check that Select Paper Size is set to "Custom..." and Select Print Size is set to "Actual Size...", where the actual size is the custom size you just defined.
Once you verify the above you can proceed and make a print.
Older Epson printer driver versions
From the media size drop menu choose USER DEFINED.


Name your new paper size something easy to understand. Enter it in the dialog at the top of the menu.
Enter the paper's width and height.
SPECIAL NOTE:
When defining width and height, ALWAYS set your smaller sheet dimension to width and larger to height.
Example - on a 7x10 greeting card 7" is the width and 10" the height regardless of the print orientation.
Set your paper width and height. Notice how Epson defines the dimensions - the numbers are .01 inches. So for a 7x10 card you would assign width as 700 and height as 1000.
When you are done click OK.
The custom size will now be available for your use in the paper size drop down menu.
Note for 13x38 panorama users - the max paper width will be set to 1295.
Related Posts and Information
Last updated: June 12, 2021


