Print Studio Pro is plug-in software for Photoshop and Lightroom provided by Canon. It is primarily for quick print jobs and has limited layout ability. This article shows you how to define and then use a custom paper size. This is important for sizes like Red River Paper's 17x25, 11x14, 12x12, and greeting card sizes.
These instructions are valid for Windows and Mac. The screen shots are Windows.
Begin by starting Canon Print Studio Pro. Choose your printer, if not already chosen, from the Printer drop-down menu.
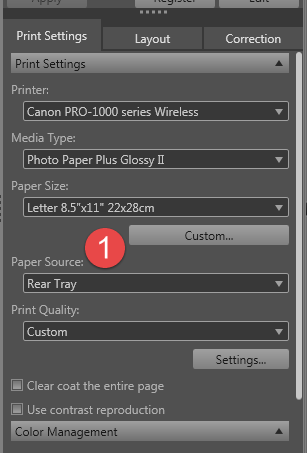
Next, locate and click on the "Custom..." button directly below the Paper Size drop-down menu. See #1 above.

The Custom Paper Size dialog will appear. Click the "Add" button.
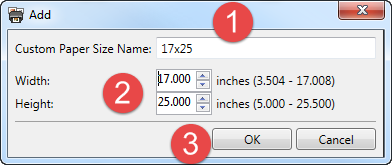
The Add dialog will appear.
1 - Name your custom size
2- Enter the dimensions.
When defining a custom size, the width is always the smaller dimension and height is always the larger. The orientation of your image or layout does not change this rule!
3 - Click OK
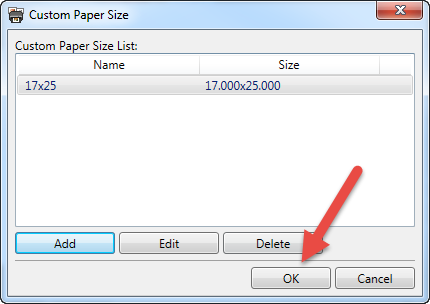
You will now see your custom size listed as above. Verify the dimensions and name and click OK.
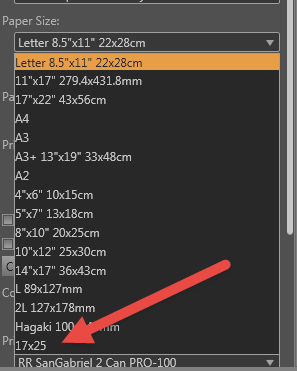
Back in the main screen, click the Paper Size drop-down menu. Your custom size will appear at the bottom of the list.
To use the new size, click it. The preview will update and show your image on the new size. You are ready to finalize settings and print.
Related Posts and Information
Last updated: February 10, 2025


