A guide to using ICC color printer profiles in Photoshop Elements 10 for Windows
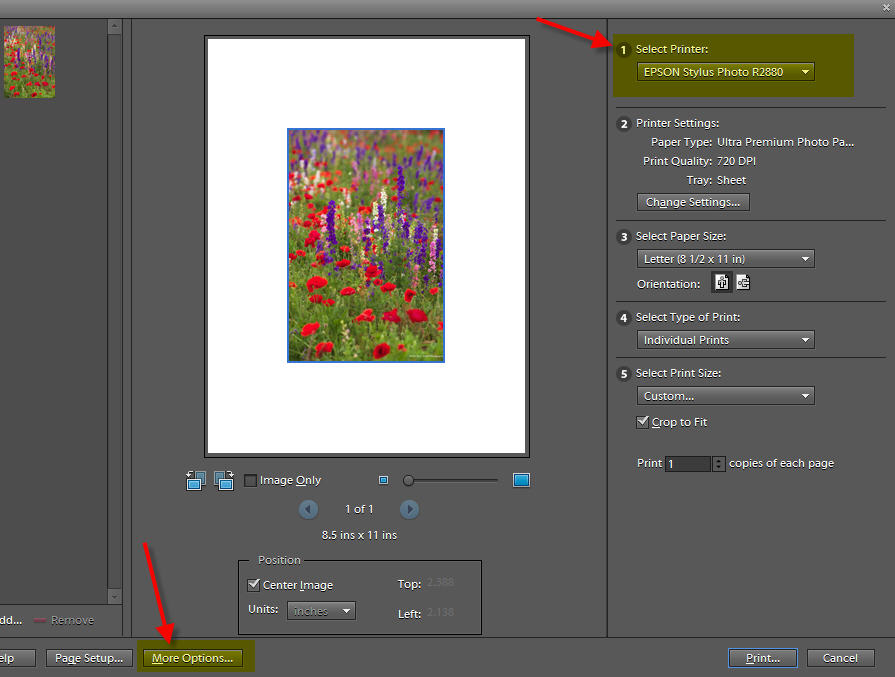
To begin the print process, go to the File menu and select PRINT. This dialog will appear.
1) Select your printer from the drop down menu
2) Click the MORE OPTIONS button at the bottom left
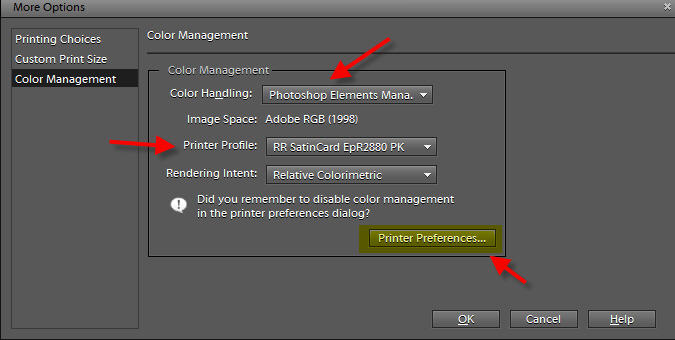
This dialog will appear.
1) Choose Photoshop Elements Manages Color.
2) Select the ICC profile from the drop down menu - The profile should have the name of your paper and printer.
3) Rendering Intent - Either Relative Colorimetric or Perceptual. We recommend Relative Colorimetric for most images.
4) Now click the Printer Preferences button - this will launch your printer's preference dialog.
Next Steps:
In this next section, you'll set your printer drivers to use the printer profile you just chose in the above menu. This includes choosing a media type, print quality, paper, size, and turning off color management.
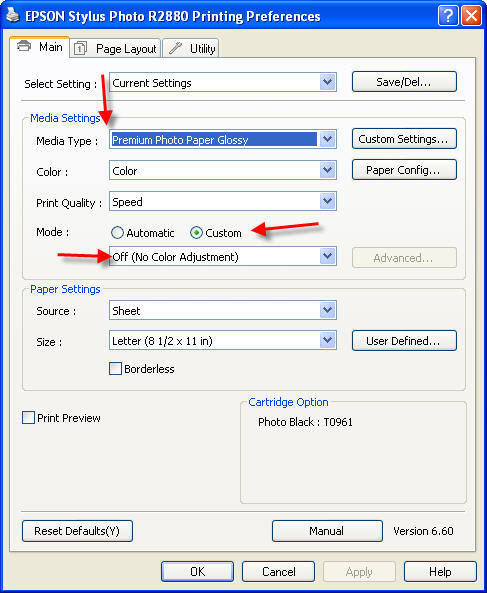
Epson Printer Instructions
Epson printer properties have slight variation from model to model but the concept is the same.
1) Choose the Media Type recommended by the profile's instructions.
Note! The Red River paper name will not appear in this box.
2) Set quality to level recommended by profile's instructions.
3) Set color management to Off (No Color Adjustment).
4) Pick your paper size.
Once you verify the settings you can click OK.
 |
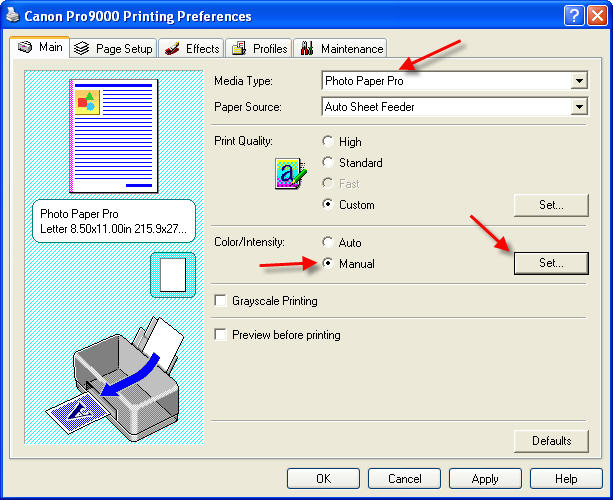
Canon Printer Instructions
Choose the Media Type recommended by the profile's instructions.
Note! The Red River paper name will not appear in this box.
We recommend the highest print quality for most print jobs on your Canon printer.
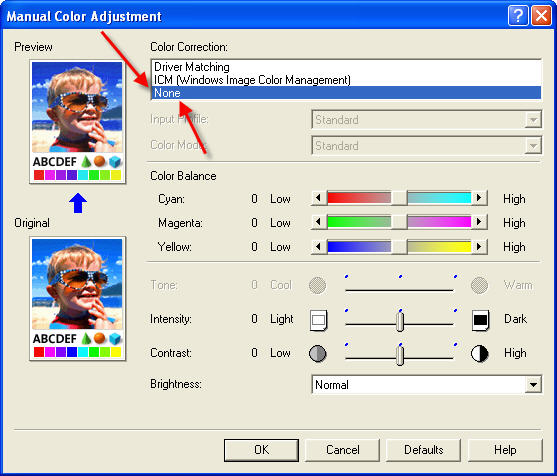
Under Color / Intensity click the Manual radio button and click Set .

The Manual Color Adjustment dialog appears. Click None under the Color Correction menu.
Once you verify the settings you can click OK.
HP Printer Instructions
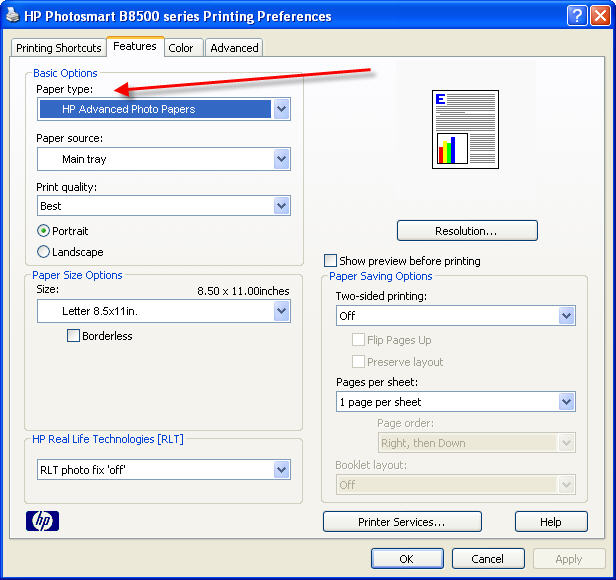
On the FEATURES TAB choose the Paper Type (Media Type) recommended by the profile's instructions.
Note! The Red River paper name will not appear in this box.
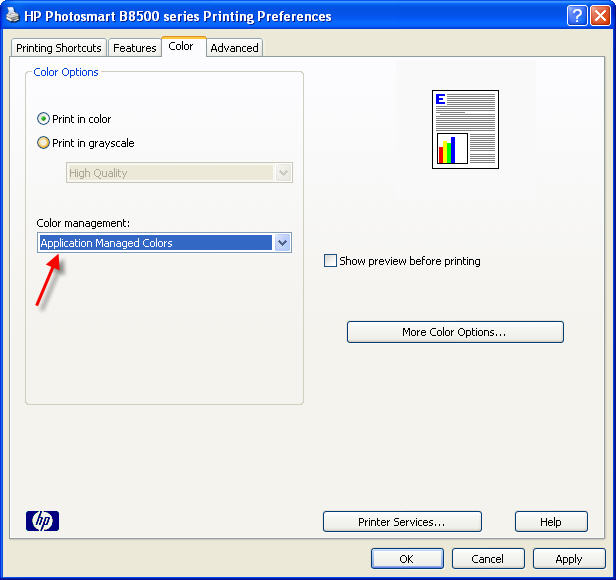
On the COLOR TAB choose Application Managed Colors at the Color Management drop down menu.
Once you verify the settings you can click OK.
Finally
Once you click OK on the printer properties dialogs above, you will click OK until you are back at the main Photoshop Elements print dialog.
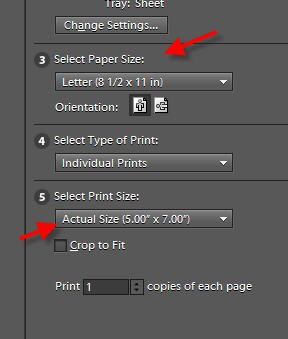
Verify that your paper size matches the size you set in the printer properties.
Verify that you have Select Print Size set to "Actual Size".
You can now click print, confident you'll have a great looking color managed inkjet print.
Related Posts and Information
Last updated: January 14, 2020


