Color profiles are pieces of software that bypass your printer color management in an attempt to reproduce better color gamut and print quality for a specific paper, printer and ink set. If you are unfamiliar with profiles or Photoshop, read all support documents carefully before beginning.
This brief tutorial will show you how easy it is to properly use a printer color profile from Photoshop CC.
If you're not familiar, you can learn more about printer profiles and why they can be helpful.
To begin - File > Print or hit Ctrl + P on your keyboard.
The Photoshop print dialog with preview will appear. This dialog is important. Spend time to understand the available controls.

At the bottom left you will notice three check boxes. They activate a soft proof in the preview. The preview uses the paper profile you will choose in the steps below.
Match Print Colors - A basic soft proof showing how a print using the profile might look.
Gamut Warning - Will highlight in gray areas of an image where the colors are out-of-gamut for the paper profile.
Show Paper White - Simulates how the tone of the paper will affect the print.
Photoshop Print Dialog Setup
When you are ready to print, choose File > Print (Command +P) and the Print dialog will appear.
What to do in this dialog
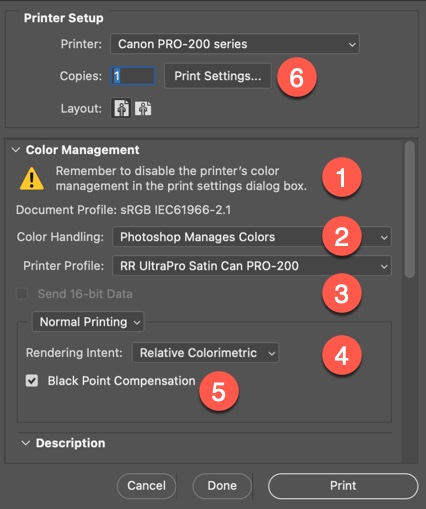
1) Ignore this warning from Adobe. Printer color management is automatically disabled when you accomplish step two, below.
2) Set Color Handling to Photoshop Manages Colors
3) Choose your paper’s profile from the Printer Profile drop down
4) Select rendering intent – Relative Colorimetric or Perceptual. We recommend Relative Colorimetric.
5) Check Black Point Compensation
6) Click Print Settings
OS13 Ventura and Later
(Scroll down for OS12 Monterey and earlier)
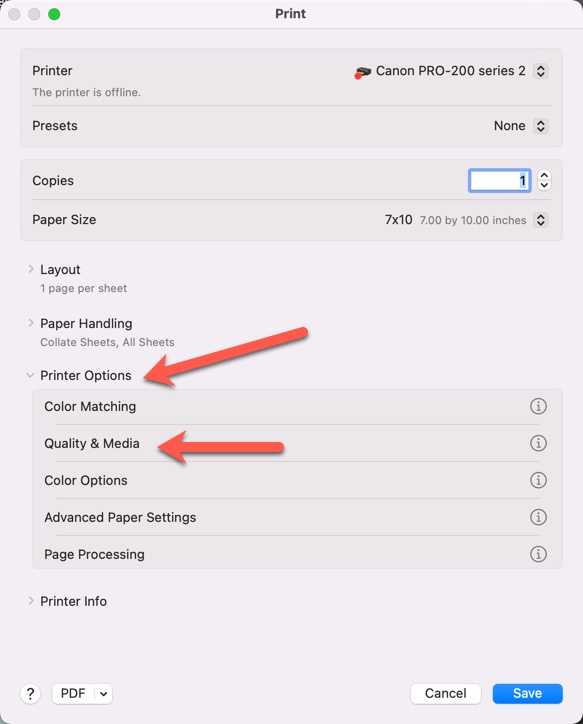
These instructions show the controls that need to be set when using a color profile. Your screen may look slightly different but should include all of the same controls seen below.
Each printer driver may be set up with different drop down menus and even different control options. However, all Canon printers come with the functions you need - set the media type, print quality, and verify color management is turned off at the driver level.
Under the PRINTER OPTIONS heading, locate and click on PRINTER SETTINGS.
Below is the Printer Settings menu:
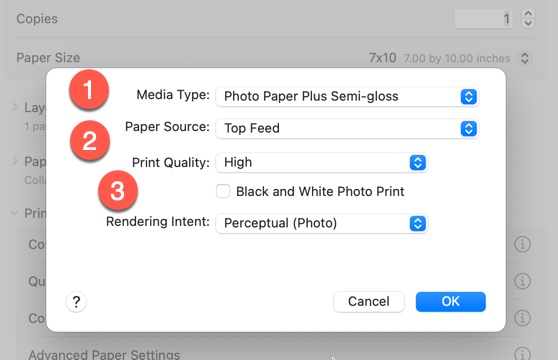
Note: The name of the Red River paper you're using will not show up in this drop down menu.
Verify Paper Source is correct.
Print Quality - We like to choose Quality Options for the most control over this setting.
Verify your setting above are correct and click OK.
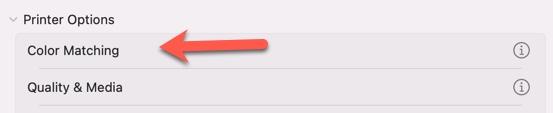
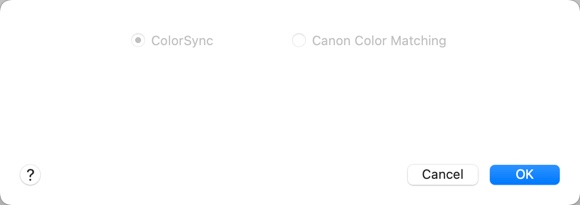
Above, we mentioned that the printer's color management will be automatically disabled. If you're curious, you can see what this looks like in the driver.
Click Color Matching. You will see that ColorSync and Canon Color Matching are grayed out. This is your indication that the printer's color management is disabled.
Verify other settings, such as paper size, and click Save, then back to Photoshop where you can click Print.
OS12 and Previous
Your screen may look different!
Each printer driver may be set up with different drop down menus and even different control options. However, all Epson printers come with the functions you need - set the media type, print quality, and verify color management is turned off at the driver level.
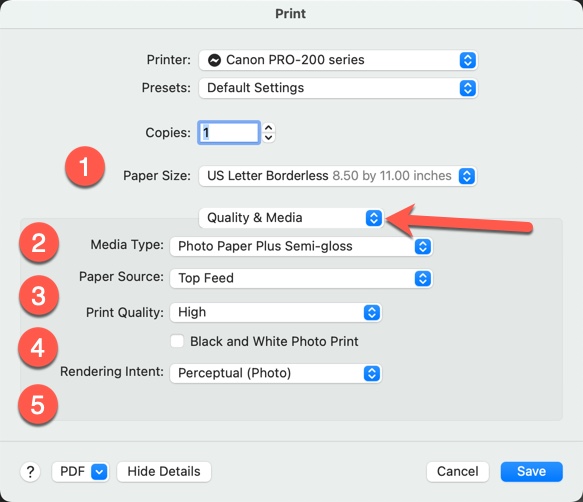
What to do on this dialog
1) Verify the correct paper size is selected
Select the QUALITY & MEDIA menu - see arrow above.
Note: The name of the Red River paper you're using will not show up in this drop down menu.
3) Verify Paper Source is correct.
4) Print Quality - We usually select High when printing photos and artwork.
5) Rendering Intent - Match the setting you chose in the Photoshop print dialog.
Click Save and return to Photoshop. Verify those settings again and click Print.
A Superior Canvas For Your World Awaits — Shop By
LEARN MORE
Inkjet paper from inkjet paper experts. Red River Paper, founded in 1997, is a team of photo and fine art paper experts with many years of combined experience in printing and printer technology. We hand-pick fine inkjet media from sources around the world. At our plant in Dallas, Texas, we convert the paper to an unmatched range of sheet and roll sizes and then add special features available only from Red River. You get access to direct wholesale pricing and the convenience of over 30 inkjet papers under one roof. We guarantee compatibility with your inkjet printer and back that up with free color management tools and technical support. Call or email us for expert help finding the right paper and tips for getting better prints.
Related Posts and Information
Last updated: February 05, 2024


