This brief tutorial will show you how easy it is to properly use a printer color profile from Photoshop Elements.
If you're not familiar, you can learn more about printer profiles and why they can be helpful.
KEY CONCEPT:
When using a printer profile, Photoshop Elements is in charge of color management by using the profile. This means you will turn off the color management controls of your inkjet printer in the process.
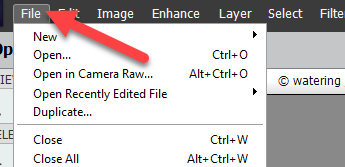
To begin the print process, go to the File menu and select PRINT.
The Photoshop Elements Print dialog will appear - see below.
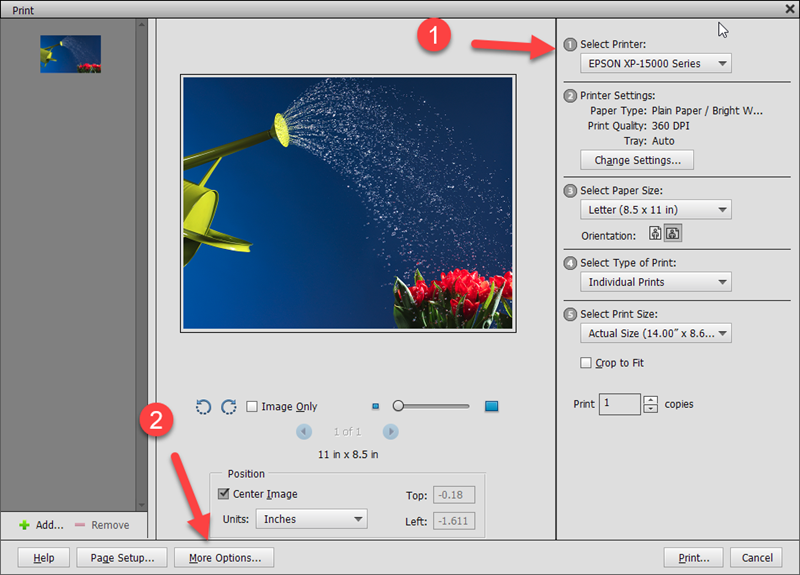
1) Select your printer from the drop-down menu
2) Click "More Options..." button at the bottom left
The MORE OPTIONS dialog will appear.

1) Click the COLOR MANAGEMENT tab.
2) Set Color Handing to "Photoshop Elements Manages Color."
3) Select the printer profile - Red River Paper profiles all start with the letters RR. The profile dropdown menu should be sorted alphabetically.
4) Rendering Intent - Choose Relative Colorimetric or Perceptual. We recommend Relative Colorimetric for most images.
5) Click the Printer Preferences button - this will launch your printer's preference dialog.
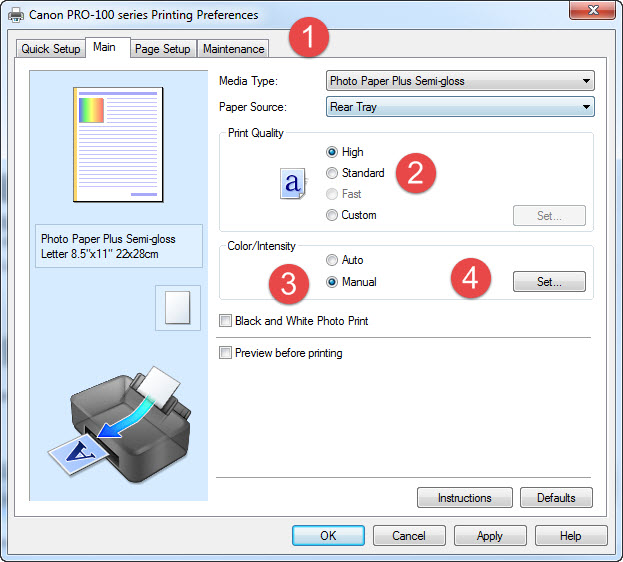
Canon Printer Instructions
1 - Choose the Media Type recommended by the profile's instructions.
You will only see Canon paper names in this box. Choose the setting based on the profile's instructions.
2 - We recommend High print quality for photo and art printing.
3 - Color / Intensity - Click the Manual radio button
4 - Color / Intensity - Click Set .
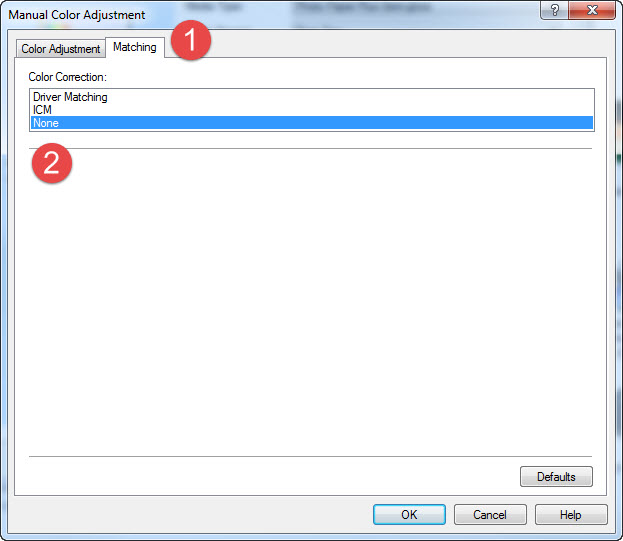
The Manual Color Adjustment dialog appears.
1 - Click the Matching tab
2 - Click None
Click OK.
Final Steps
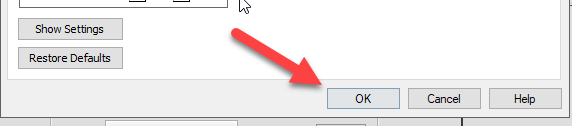
Click OK to exit the Printing Preferences
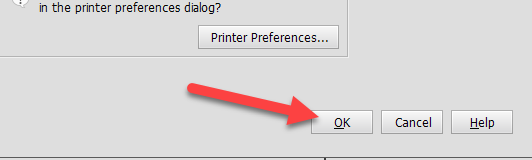
Click OK to exit More Options
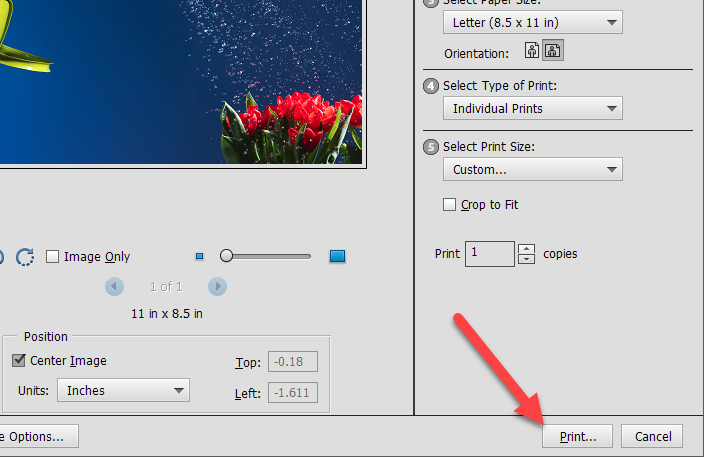
Verify the setup in the Print dialog is OK and click Print
Related Posts and Information
Last updated: December 14, 2023


