These instructions are based on using Photoshop CS or 7.0.
There are many ways to set up and print a greeting card using Photoshop. This tutorial offers the basics of how to turn an image into a greeting card using Red River Paper's line of pre-scored inkjet papers.
Red River Paper sells three different card sizes. The table below shows each size and the maximum image you can fit on each:
| Card Size | Max Image Size |
| 7x10 | 4.75" w x 6.75" h |
| 6.25x9 | 4.25" w x 6" h |
| 5.5x8.5 | 4" w x 5.25" h |
Note that these image sizes will give you a small white border around the image on the front of the card. Borderless greeting cards are possible in only certain instances. You must use a 7x10 card and have a 13" wide printer. Read here more information on the topic.
Start by opening the image you wish to use with your card. Resize the image using the above chart. When you are done with that, move to the next step.
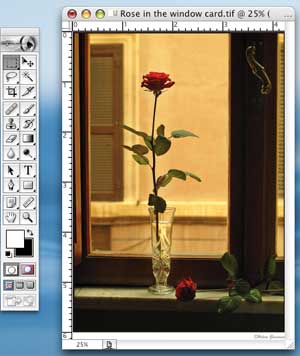
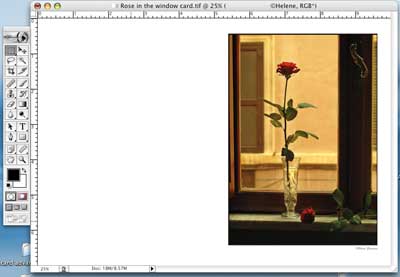
To the right is an image example, opened in Photoshop and resized based on these rules:
| 
|
| Now, go to the Image menu and select Canvas Size as shown at right. | 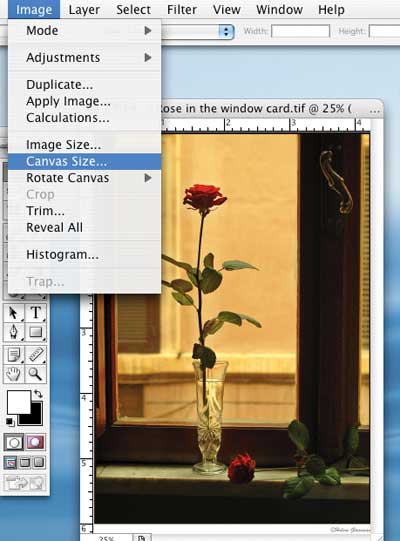
|
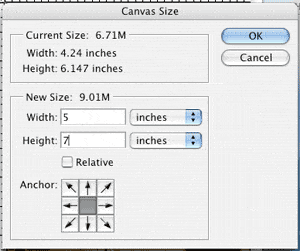
| Before beginning - set your background color to white. Click here if you need help. In this step, you will establish a border around your image, making the space the same size as your folded card. For example, a 7x10 sheet folds to 5x7 - we will start be making canvas size of your image 5x7 (or other appropriate size. Use this table to set your canvas size properly:
Click the OK button |
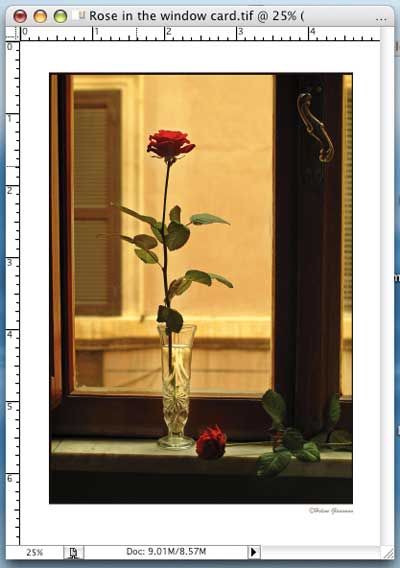
| Notice how your image now has a white border. The canvas size you a looking at should be the size of your folded card. |
The next step is to change the above canvas into the size of your unfolded card.
Go back to the Image menu and choose Canvas Size again. Set width and height according to this chart:
IMPORTANT! Look at the Anchor boxes right below the canvas size. This tool anchors your current canvas to a particular side of the new canvas. For the landscape card layout, always click the middle right box. Click OK | 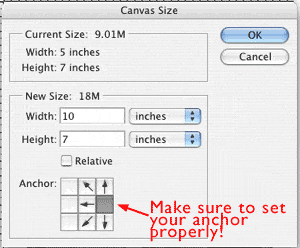
|
Your new canvas will look like this:
|
Related Posts and Information
Last updated: February 23, 2020


