
Introduction
The Epson SureColor P800 became available in June 2015. It is the successor to the Epson Stylus Pro 3880. The P800 is a 17" wide professional and prosumer-level photo / fine art inkjet printer. It features nine individual ink cartridges using the "UltraChrome HD" pigment ink system. Like the venerable UltraChrome K3 system, the new ink set uses five color ink cartridges and three black ones. It is interesting to note that outside of the United States, Epson still uses the "UltraChrome K3" name in association with this model. A switching mechanism allows you to choose matte or photo-black ink, depending on the media type. Pigment inks are designed to be stable over long periods of time, allowing prints to be displayed (under proper conditions) for many decades. The Epson P800 is a descendant of a long line of top-quality pigment-based photo printers. Building on that lineage, Epson claims that the P800 offers the best black density to date from a pigment printer by using "Resin Encapsulation Technology."
Just the Facts
17" Wide photo & fine art quality inkjet printer
Can print 3.5" x 5" up to 17" x 550" banners (actual length depends on file size)
Nine Colors - Cyan, Yellow, Vivid Magenta, Vivid Light Magenta, Light Cyan, Light Black, Light Light Black, Photo or Matte Black
Printing Technology - Advanced Micro Piezo® AMC print head with ink-repelling coating technology, 8-channel, drop-on-demand, inkjet print head
MSRP $1295
Ink Cost - About $58 per tank (80 mL capacity)
Rating - A "strong buy" for photo & fine art printing needs. Being both sheet and roll-fed is a big bonus for users who need production-level performance at a consumer-level entry price.
Unpacking and Prep


The P800 ships in a large, robust box. The printer is well-protected with packing material, and the contents are well-organized.
The Epson P800 shipping box includes:
- printer
- starter ink cartridges - filled to 64 mL
- manual
- power cord
- driver CD
The printer ships wrapped in plastic sheets, and anything that opens or moves is secured with tape.
Physical Specs
26.93"(W) x 14.80"(D) x 9.85"(H)
Printer weight: 43 lbs
Ink Install on Epson P800 Printer

The P800 comes with a starter set of ink cartridges filled with 64 mL of ink. Full tanks contain 80 mL.
The cartridges fit into a bay on the front left of the printer. Like the Epson Pro 3880 and other wide-format Epson printers, the P800's inks are connected to the print head via hoses.
Epson P800 Ink Cartridges
- Cyan (T8502)
- Vivid Magenta (T8503)
- Light Cyan (T8505)
- Yellow (T8504)
- Vivid Light Magenta (T8506)
- Photo Black (T8501)
- Matte Black (T8508)
- Light Black (T8507)
- Light Light Black (T8509)
Epson SureColor P800 Driver Install

Driver installation and setup were straightforward in Windows and the Mac OS. We used the included CD driver for Windows and had to download the drivers for Mac from Epson's website. The installation included drivers, utilities, and a P800 online user guide link.
Hidden Photo Software Awaits!

Epson Japan's website refers to imaging software called Epson Print Layout. The software is not yet available from Epson America, but we did find downloads for Win and Mac from Epson Japan. Print Layout is a free-standing program and an export plugin for Photoshop and Lightroom.
Epson Print Layout includes remarkable functionality. The program offers a lot for free from print layout and templates for multiple images on a page to gallery wrap and panorama setup. Printer color management is integrated into the main control panel, and it even features automatic soft-proofing based on the print profile. That feature extends to the ABW system and will soft-proof your images based on ABW settings.
UPDATE: This program is now available from the Epson North America website.
Connectivity

The P800 can connect using these methods:
- One Hi-Speed USB 2.0 port
- One Ethernet port (10/100Base-T)
- Wireless-n 2.4 GHz, Wi-Fi Direct
- Apple AirPrint and Google Cloud Print support
Paper Feed Option


The P800 has three paper feed options.
- Top auto-feed tray
- Front "fine art feed" and front "straight paper path."
- Optional roll adapter - $199 MSRP
Watch a brief video on the P800 paper feed systems
For Epson 3880 and 3800 users, the removal of the rear single sheet path might come as a surprise. However, the front path has been redesigned for double duty. The path becomes the "fine art feed" for heavy and thick products like canvas and cotton fine art media by opening a rear door on the printer. Close the rear door and the front path becomes the "straight paper path", suitable for board thickness media.
Top Tray
The top tray can hold 20 to 100 sheets of paper, depending on the thickness of your media. It P800 seems to share the same feed mechanism as its 13" cousin, the P600. The mechanism is more robust than expected and fed Red River's fine photo and art media.
Front Single Sheet Path
The front single-sheet path is designated for fine art papers and poster boards. More specifically, use this path for media that is 13mil or thicker. Please note you can put the paper up to 18mil thick through the top auto-load tray if you want. Always remember to Set the Platen Gap and Paper Thickness if you use media over 12mil. New to the P800, this path will accommodate sheets up to 17" wide. The front feed was limited to 16" wide on the Stylus 3880 and 3800 models.
Push on the gray bar above the paper output tray to activate the single-sheet path. This will cause the tray to lower and extend. Follow the printer's on-screen instructions to load poster boards and fine art papers.
The front path has two "modes" - poster board and fine art paper.
Fine Art Paper - In this mode, you will be instructed to open the door on the back of the printer. The paper will feed into the front and arc upwards and out through that door.
Poster Board - In this mode, the back door remains closed. Media feeds through the front and straight out the back of the printer. Make sure you have plenty of clearance between the printer and anything behind it.
Front Path Paper Sizes - The driver only allows these sizes for the front path.
A2, A3, A4
8x10
8.5x11
8.5x14
10x12
11x14
11x17
12x12
14x17
13x19
16x20
17x22
B4, B3
Custom sizes wider than 8"
WARNING - The front feed in fine art mode is a bit unpredictable. The internet is peppered with reports of misfeeds and problems getting it to work. The root cause is a plastic lip near the back of the feed path as the paper curves up and out through the back door. Heavier, stiffer paper crashes into the lip instead of going over. Chaos ensues.
AVOIDING THE TROUBLE - Use the front feed in poster board mode, which is flat and avoids the plastic lip mentioned above. Print performance is the same. Media type selection remains the same. Follow the printer's on-screen instructions for loading in board mode. Set your driver so it knows you are using the board mode front feed.
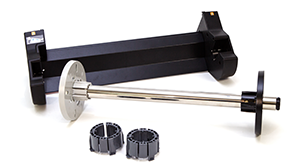
Roll Feeding
An optional roll adapter is available for $199. With the adapter, the P800 can use 13" to 17" wide rolls with a 2" or 3" diameter core.
- Media thickness range - 9 mil to 27 mil
- Maximum roll media width - 17 Inches
- Minimum roll media width - 13 Inches
- Top minimum margin - 1.97 Inches (50mm)
- Bottom minimum margin - 0.55 Inches (14mm)
- Left and right minimum margins - 0.12 Inches (3mm)
- Available borderless printing widths - 13", 16", 16.5", 17"
- Borderless expansion modes - Retain Size, Auto (fixed at max)
- Roll media length - Manual Cut to Desired Length
Epson states that the maximum printable length may be limited by software application, OS, available media and RIP.
Printer Driver Tour

Get an in-depth view of the software-based controls for the Epson P800.
Printer Screen Displays

New to the P800 is a touch screen display which can be angled for easy viewing while standing. A number of features can be controlled via the panel. If you purchase a P800, spend time to step through each menu of the control panel. You will be glad you did. Among the features:
- Paper loading guide
- Ink level display
- Black ink change control
- Printer settings and maintenance
- Wi-fi setup and control
You will find a number of useful settings and tools. Here are some highlights:

Media Load Guide

BK Ink Auto Change

Paper Skew Check
Media Load Guide
The media loading guide is helpful when using the roll and single sheet paper paths. It also allows you to specify the media type and size at the printer. Bear in mind that these settings are overwritten by your driver settings during the print process. All in all, we would use this particular control only for loading rolls and specialty media. Leave the media setting and paper size selections to driver settings.
BK Ink Auto Change
Turning this feature off prevents the printer from automatically switching black inks based on your media setting. Instead, you will get a notice on the printer panel when a swap is required. You can confirm or cancel the swap.
System Admin > Printer Settings > Paper Source Settings > BK Ink Auto Change Off
Paper Skew Check
If you use the front fine art or roll feed path, you should consider turning off the paper skew check. The printer has sensors that stop a print if the paper is not "square" in the machine. In our opinion, the sensors are a bit too sensitive. They will register an error even when you may not be able to perceive any skew.
System Admin > Printer Settings > Paper Source Settings > Paper Skew Check Off
Paper Setup
Turning these settings off can prevent media and size mismatch errors which interrupt printing. The vast majority of these errors are themselves an error that happen when the driver fails to override the printer setting. We want the driver in full control of your workflow and prefer the printer settings to be secondary.
System Admin > Printer Settings > Paper Source Settings > Paper Setup Display Off
System Admin > Printer Settings > Paper Source Settings > Error Notice Off
Black Inks and Swaps

The P800 uses Photo Black (PK) or Matte Black (MK)plus Light Black and Light-Light Black. Rules of their use:
- Photo Black ink - media with any reflective properties (glossy, semigloss, satin, luster)
- Matte Black ink - all non-reflective media (matte papers, most cotton fine art papers)
Since the P800 print head has one set of nozzles for the primary black ink, it swaps between Matte Black and Photo Black based on media type selection in the printer driver. The swap takes some time and uses black ink in the process:
Black Ink Conversion Times
Matte to Photo Black - 3:30 (min:sec)
Photo to Matte Black - 2:30 (min:sec)
Ink Used during switch
Matte to Photo Black - Approx 4.6ml
Photo to Matte Black - Approx 1.6ml
Plan Your Prints, Save Time and Money.
We recommend that you print images in groups based on paper type. Gather all glossy, satin, luster, and photo metallic bound images as one batch and all matte (non-reflective) paper images into another. You will save considerable time and money following this procedure.
Turn off "Black Ink Auto Change"
At some point, you will hit the print button without double-checking the media selection. If you are in PK mode and accidentally choose an MK media type, the printer will swap inks automatically by default. You don't want this. Avoid the pain and turn off the feature.
Print Quality Options & Results

Quality Settings
As mentioned in the printer driver tour, print quality choices are:
- 2880 x 1440 dpi (Level 5)
- 1440 x 720 dpi (Level 4) - Lowest choice available for glossy, luster, fine art settings
- 720 x 720 dpi (Level 3) - Available for photo matte and plain paper media settings
- 720 x 360 dpi (Level 2) - Available for plain paper media setting
We recommend 1440x720 (Level 4) quality for most print jobs. It offers the best mix of quality, speed, and ink economy. It is difficult to detect significant quality improvement when comparing 2880x1440 to 1440x720 at normal viewing distance. For Windows users, you can create a noticeable difference by selecting the "Finest Detail" option. See print scans below.
Up Close and Personal
We made prints of the image at right using various quality settings on 68lb. UltraPro Gloss. Below are scans cropped to represent 200% magnification. They offer a detailed look at how the P800 lays down ink for different levels of quality. Please note that viewing images this close is only illustrates dot placement and how quality settings work. In practice, images should be evaluated at standard viewing distance, usually a bit less than arms length for snapshots up to 8.5x11.
You will see the difference between 2880x1440 and 1440x720 is not striking. However, the Finest Detail option (available in the Windows driver) improves print quality noticeably. We printed the same images from a Mac, which does not have the option. It appears that "Finest Detail" is the default at both the 1440dpi and 2880dpi quality settings when printing from OSX.
")
")
")
")
")
")
")
")
A reminder in case you missed it above - the Mac driver does not have a "Finest Detail" option. Testing has revealed that this option is on by default when printing from a Mac.
Print Speed
An 8" x 10" file at 240ppi (shown above) was printed using the above settings from Photoshop on a Windows computer. Print speeds using Photo Black and Matte Black are almost identical.
| Quality | High Speed | Finest Quality | 4x6 | 8x10 | 13x19 |
|---|---|---|---|---|---|
| 1440x720 | Yes | Yes | 1:00 | 1:56 | 4:28 |
| 2880x1440 | Yes | Yes | 1:49 | 3:23 | 7:55 |
| 1440x720 | No | Yes | 2:00 | 3:53 | 8:57 |
| 2880x1440 | No | Yes | 3:44 | 6:59 | 16:15 |
Borderless Capabilities

You can make borderless prints with the P800. Borderless sizes are preset at the factory and include:
3.5" x 5", 4" x 6", 5" x 7", 5"x8", 8" x 10", A4 (8.3" x 11.7"), letter (8.5" x 11"), 10"x12", 11" x 14", 11" x 17", A3 (11.7" x 16.5") and Super B (13" x 19"), 16" x 20", A2 (16.5" x 23.5"), 17" x 22"
Like the Epson R2000 and P600, the P800 offers some custom borderless print capability. Borderless widths are chosen from a fixed menu in the Windows driver. The Mac driver does not display the available sizes or clear instructions on their use. We explain the process in the Mac driver tutorial linked below.
Learn more about borderless size setup in the driver tours:
Black & White Performance

During our review of the Epson P600, we printed various images on every type of inkjet paper. It was not long before we confirmed that the P800 offers the same black & white performance. The following is a recap of the P600 black & white review.
The Epson P800 can print with three black inks - Photo or Matte Black plus Light Black and Light Light Black. Using the printer driver's Advanced Black & White (ABW) mode, the three blacks are used together, although not exclusively, to make a print. The ABW system can produce truly neutral grayscale prints. Since this is a driver-based system, no ICC printer profiles are required.
ABW also has choices for cool, warm, and sepia-toned prints. Using the ABW advanced feature allows for fine-tuning of tone, brightness, contrast, and more. However, any changes to these settings cannot be soft-proofed. As a result, test prints are required to perfect the output.
If you are printing a toned B&W image and want to replicate that tone easily, print the file using a printer color profile instead of the ABW system. Remember the file must be converted to B&W in your photo software before printing. Using a profile will more accurately reproduce the desired tonality when printed.

Above is an example of the ABW system and a printer profile at work. The original image file has a warm tone. The result using ABW (print on the left) is neutral and quite stunning. Using a printer profile (print on the right) maintains the image's warmth and is more accurate to the file.
Learn more about the ABW system and features in the driver tours:
Conclusion
After making many prints with the SureColor P800, we found it to be a fine replacement for the venerable Stylus Pro 3880. The new printer offers more features and slightly better print quality and color gamut, most likely due to improved software. The bold combination of an auto-sheet feeder, specialty media feed, and roll capability will make the P800 an easy choice for anyone serious about making prints. We cannot say enough about the importance of a top-loading auto-feed tray. This is critical for users who want maximum flexibility and production capability. Load it with sheets from 3.5" x 5" up to 17" x 25" and get started.
The P800's larger ink tanks are a two-fold bonus. Epson discounts the ink cost per milliliter as you buy more at once. This leads to a lower cost of operation - some 30% lower than a typical desktop model. Second, you can print more with fewer tank changes, saving time.
Positives
- Better than lab quality output on luster, gloss, photo metallic, matte, fine art, and baryta-fiber based inkjet papers
- Bold and true-to-life color saturation
- Minimum gloss differential and almost no bronzing
- Good ink economy and cost of operation
- Touch screen control panel
- Custom borderless options are available - excellent for 13x38 and 8.25x25 pano sheets and pre-scored card stock offered by Red River Paper.
Quibbles
- Fully customizable borderless printing would be nice
- At some point, we'd like to see Epson printers in this line without the black ink swap and ensuing ink loss
Epson P800 Compatibility with Red River Paper Products
Red River Paper offers over 25 premium inkjet papers for use with the Epson P800. We make prints on each paper to verify the print quality and offer custom profiles for more consistent and accurate results. See Our Recommended Photo Paper for the Epson P800.
Related Posts and Information
Last updated: March 05, 2026


