Get an in-depth view at the Mac driver and controls for the Canon PRO-300.
Printing options we recommend you set before using the PRO-300, and are important to a smooth and confusion free printing experience are marked with this icon:
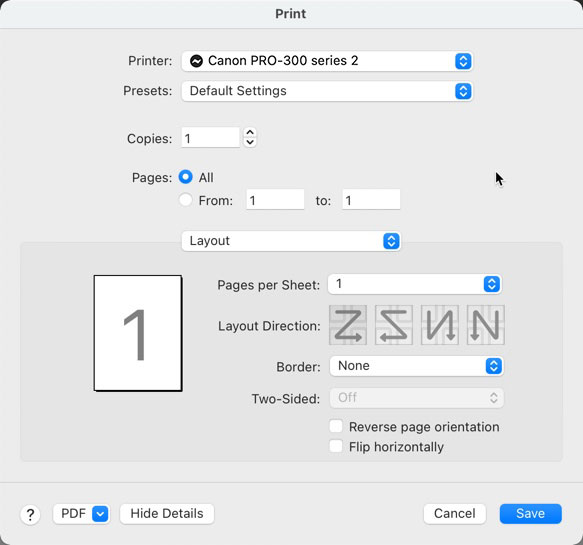
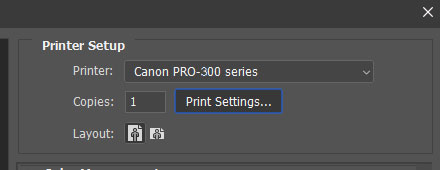
When you click "Print Settings" from most applications, this is the first driver screen you see.
It usually starts on the "Layout" tab, shown above.
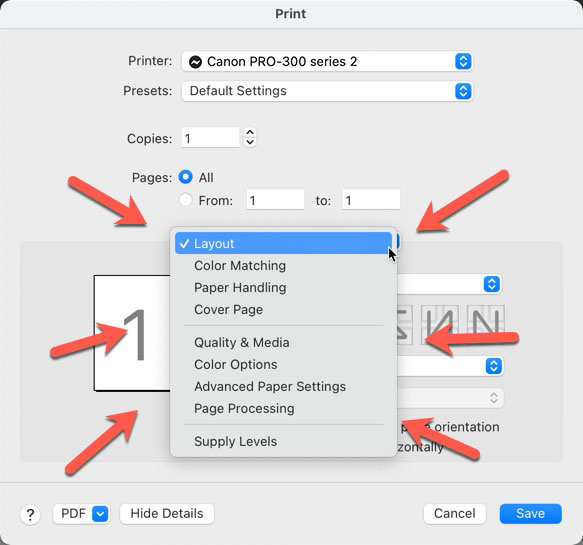
Click on Layout to reveal the menu options that we explore below.
If you click on this drop down menu and DO NOT see all of the above options, STOP HERE.
If you do not see Quality & Media and Advanced Paper Settings in particular, it is likely that the AirPrint driver is installed.You can confirm this by reading our AirPrint article.
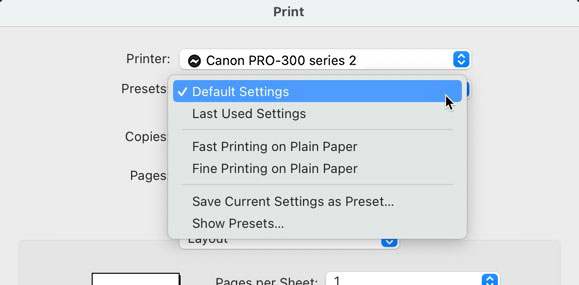
Presets
The print dialog and all of the potential settings can be complex. Because getting them right is important to good quality results, creating a Preset is a good idea. Once you have a certain group of settings complete, they can be saved as a preset for future use. It can be named and called upon during future print jobs to save time and prevent error.
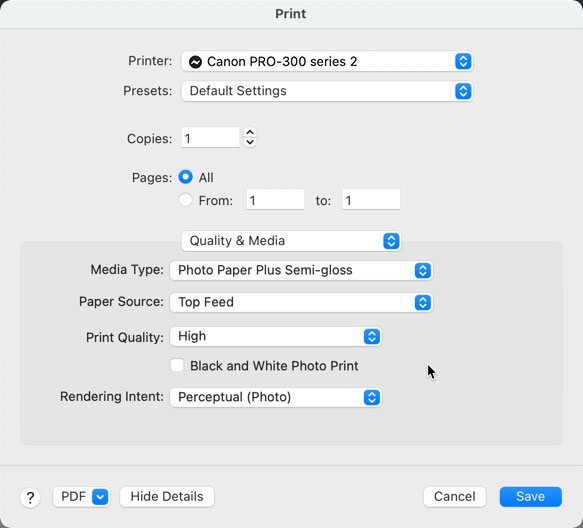
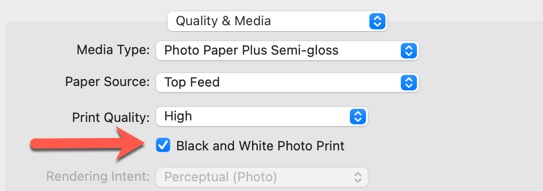
Quality & Media
You will spend a good deal of time on the Quality and Media tab.
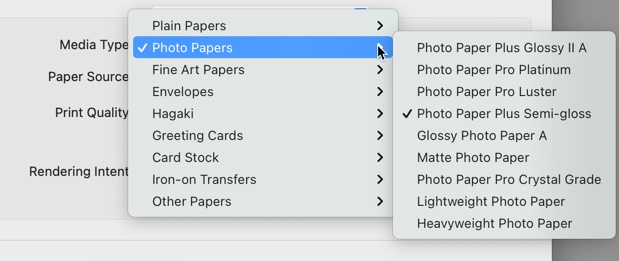
Media Type is a top three most important setting. It tells the printer important information and acts as part color profile, part ink throttle. Always double check this setting correct before beginning a print.
The Media Type options are Canon branded papers. You will find the recommended setting in every box of Red River Paper brand inkjet media.
TOP TIP!
If you see generic media types, see below, AirPrint has taken over as primary driver. You need to replace it with the Canon driver to restore proper functionality. Read our guide to correcting the problem.
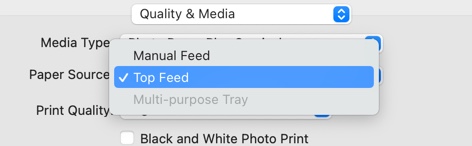
Paper Source controls the paper feed path. The Canon PRO-300 has two. The Rear Tray is the top auto-load tray that can handle between 1-50 sheets depending on paper thickness. It is intended for papers between 4 mil and 14 mil thickness.
The Manual Feed is a single sheet path located on the back of the printer. This path can accept papers from 4 mil up to 24 mil thickness.
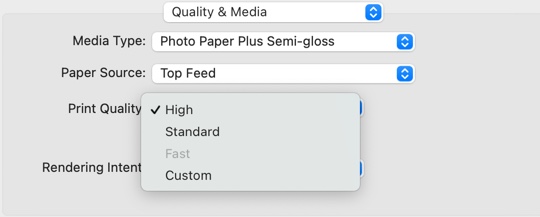
When printing photos and artwork, we recommend choosing the High print quality option. In the custom dialog, seen below, you can see all available quality choices. The choices are controlled by the media type you have selected.
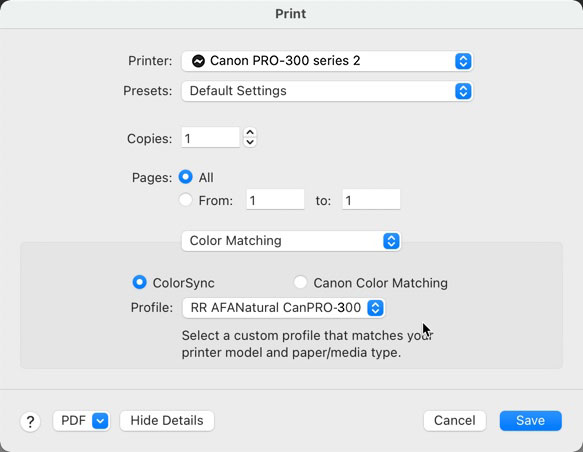
Color Matching
Color Matching controls the printer's color management software.
You have two options, Canon Color Matching and ColorSync.
NOTE - If you set application (Photoshop, Lightroom, etc) managed colors, both radio buttons on the Color Matching tab will be grayed out.
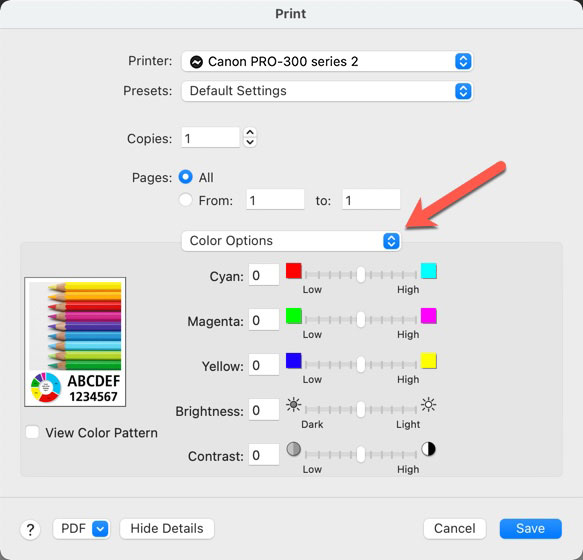
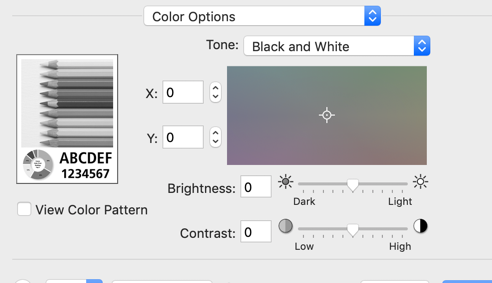
If Canon Color Matching is active, you will find these controls in the Color Options submenu. They allow for basic changes to hue, brightness, and contrast. The controls show you which color you are adding or subtracting with each slider.
ColorSync is Apple's color management system that allows for profile selection from the Print menu. You will not normally use ColorSync unless you are trying to diagnose a color quality problem.
With the Black & White Photo Print option checked, the Color Options menu changes to control the PRO-300's black & white print system.
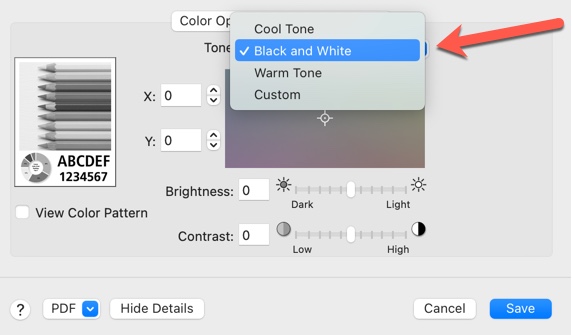
The Tone drop-down menu contains three presets. The default Black and White option is for neutal tone. Cool and Warm are available for selenium and sepia output, repectively. The X&Y cooridinate feature is complex and allows for fine control over tonality. Since there is no way to accurately preview the changes, trial and error are required to obtain specific results.
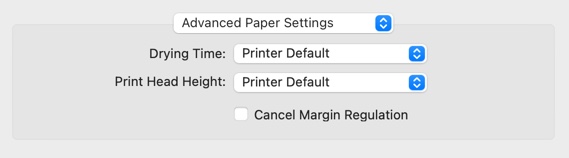
Advanced Paper Settings
Print Head Height is one of those key controls you need to understand. Set it to Avoid Paper Abrasion. Activate when using paper 11mil or thicker. It can also come in handy with with thinner media that has a slight upward curl.
Cancel Margin Regulation is another key controlyou. For the Matte Photo Paper, Photo Paper Pro Premium Matte, and other art media settings, the Canon limits the available paper sizes and sets larger than normal unprintable margins and deactivates the borderless option. Their goal is to avoid head strikes or ink smears. The result is your inability to use many sizes and paper types as you see fit. You can shut off these rules by activating Cancel Margin Regulations.
NOTE - If you make a print using matte or art paper and the print job fails, check Cancel Margin Regulation and if it is off, turn it on.
Drying time can be extended if you print on papers that are not "instant dry". They are rare and include plastics with little coating, sticker material, and others.
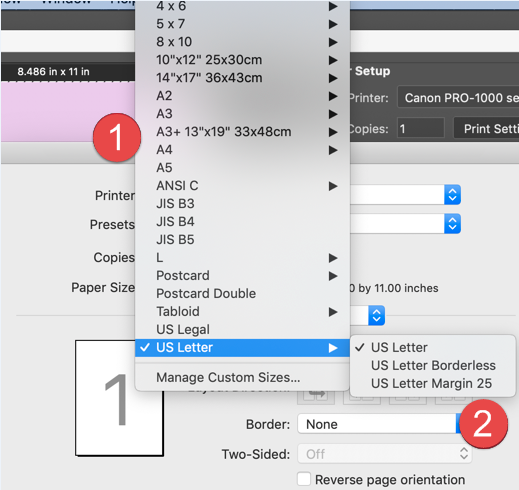
Paper Size
Paper Size is a key control that must be set before every print job.
The Paper Size menu contains two functions.
1. Paper size selection. All available sizes, including any custom sizes you have defined.
2. Controls to activate borderless printing. If the PRO-1000 can print a size without borders, it will be listed as shown above. If a size does not have a borderless option, you cannot print it as such.
Note - Margin 25 applies a 25mm margin to the leading and trailing edge of the paper. It is intended for use with thick media where one is concerned with head strikes. We avoid being forced to use this setting by clicking "Cancel Margin Regulation" above.
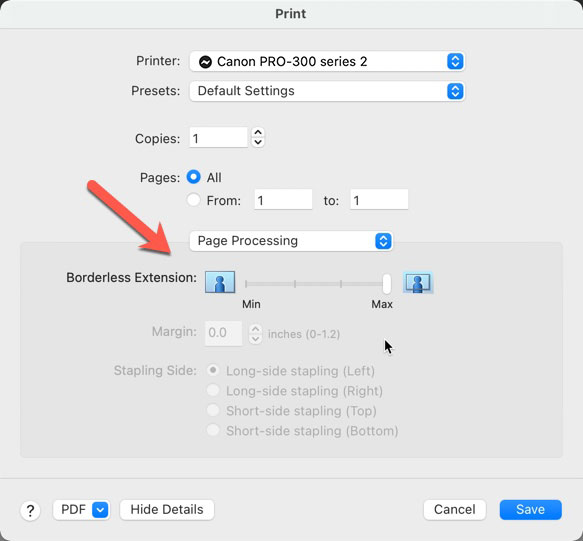
If you make a borderless print and ink does not extend fully to the border, increase the amount of extension, see below.
Once the borderless option is selected, the Page Processing menu updates and Borderless Extension control is active. Moving the slider to the right expands ink coverage farther past your paper's edge and ensures full coverage. The default setting is typically enough to successfully print without borders.
Utilities
Some utilities can be accessed from your computer. Many are only available via the printer's control panel or network access via a Canon app. We recommend using the printer's control panel.
The PRO-200 utilities can be accessed from Photoshop's print dialog.
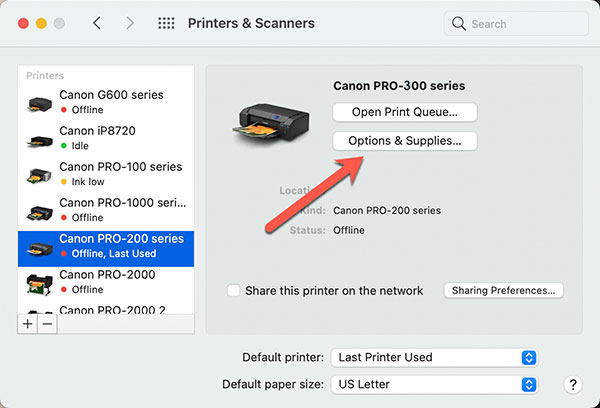
If you do not use Photoshop, access them via Apple Menu > System Preferences > Printers & Scanners > Your Printer > Options & Supplies
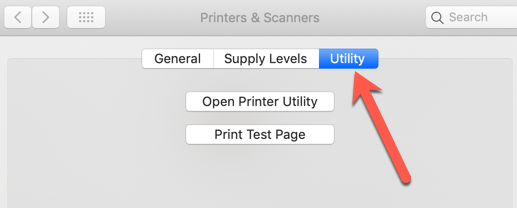
Click on the Utility tab then Open Printer Utility
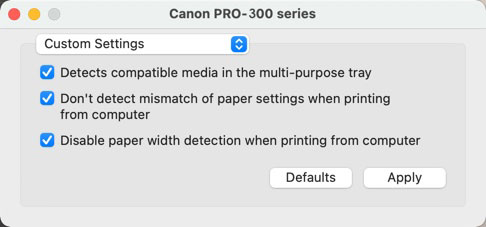
Custom Settings
We recommend checking all three options for a smoother printing experience over time.
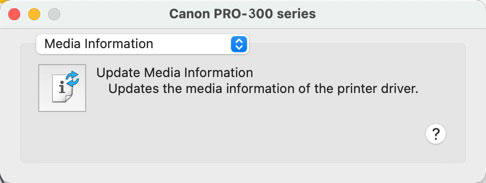
Media Information
This will update media settings from the driver to the printer's control panel. As a rule, you will not need to use this option.
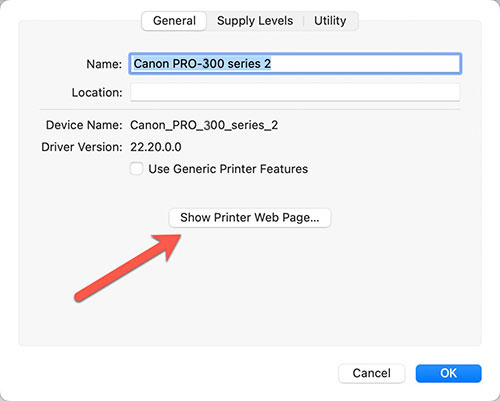
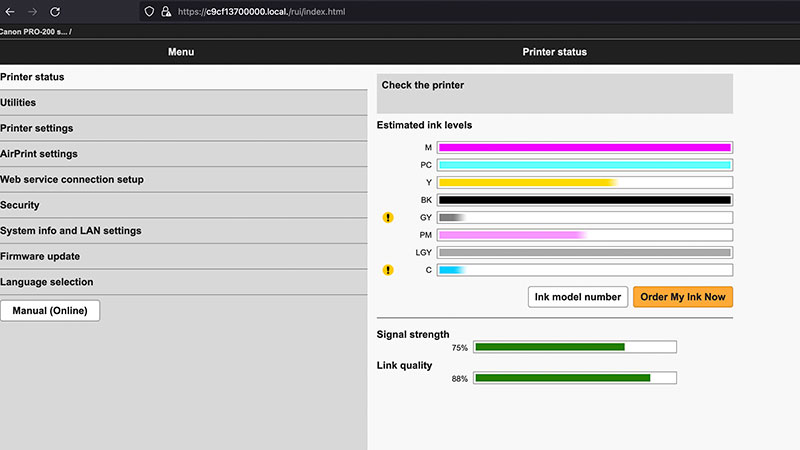
Printer Web Page
A few years back, Canon moved many utility and monitoring features to the "Printer Web Page". It uses a web browser like Chrome or Firefox to connect with and control a number of systems.
You can reach the page by clicking "Show Printer Web Page.." as shown below.
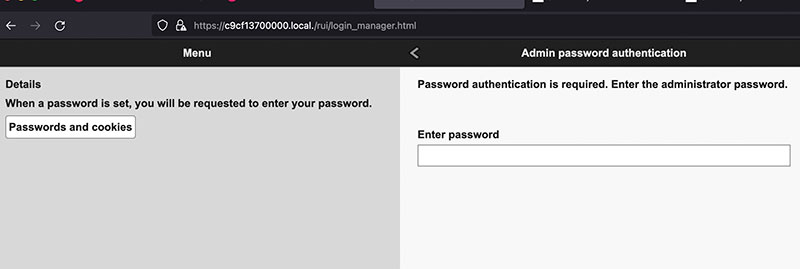
It should then launch your default web browser and display a login, as shown below.
NOTE - Your printer must be on and connected to the computer via USB or wireless.
Inkjet paper from inkjet paper experts. Red River was founded in 1997 and has over 40 years experience in fine papers. We hand pick fine paper from mills around the world and bring them to our plant in Dallas, Texas. From here, we convert the paper to various sheet sizes and rolls, as well as add special features available only from Red River. We offer wholesale direct pricing, and the convenience of over 30 different inkjet papers under one roof. Red River Paper invests the time and money to understand and test the latest inkjet technology from Epson, Canon, HP, Lexmark and others so you do not have too. Our client services representatives are well versed in our products and inkjet printing, and can give our clients helpful advice on which Red River papers will suit their needs.
Related Posts and Information
Last updated: July 16, 2024
WHAT CUSTOMERS SAY ABOUT US
Nothing Compares
I will never buy another brand of paper. I used Canon papers (in my Canon Pixma Pro printer) for years, and there is no comparison. Check out their UltraPro Gloss 2.0. Prints made on this paper looks for all the world like real photographic paper -- ferrotyped. Start off with their sampler pack -- two sheets of (I believe) 10 papers. (Just a note -- I don't work for Red River)
Papers with the Archival designtation can take many forms. They can be glossy, matte, canvas, or an artistic product. These papers are acid free, lignin free and can be made of virgin tree fiber (alpha cellulose) or 25-100% cotton rag. They are likely to have optical or fluorescent brightening agents (OBAs) - chemicals that make the paper appear brighter white. Presence of OBAs does not indicate your image will fade faster. It does predict a slow change in the white point of your paper, especially if it is displayed without UV filter glass or acrylic.
Archival Grade Summary
Numerous papers - made from tree or cotton content
Acid and lignin free base stock
Inkjet coating layer acid free
Can have OBAs in the base or the coating
Museum Grade Paper
Papers with the museum designation make curators happy. They are made from 100% cotton rag content and have no optical brightener content. (OBA) The base stock is acid and lignin free. The coating is acid free. This type of offers the most archival option in terms of media stability over time.
Museum Grade Summary
100% cotton rag content
Acid and lignin free base stock
Inkjet coating layer acid free
No OBA content
Photographic Grade Paper
Photo Grade products are designed to look and feel like modern photo lab paper. Most photo grade media are resin coated, which means they have a paper core covered by a thin layer of polyethelene (plastic) . Plastic gives the paper its photo feel, stability (flatness), water resistance, handling resistance, and excellent feed consistency.
Prints on photo grade media are stable over long periods. With pigment inks in a protected environment, you can see up to 80 years on-display life. All RC papers are Photo Grade for two reasons. Plastic content is not technically archival by museum standards. Also, the inkjet coating of all RC papers is slightly acidic. It facilitates instant drying and does not actually change the stability of your inks over time. Virtually all RC papers have optical brightening agents (OBAs).