Introduction
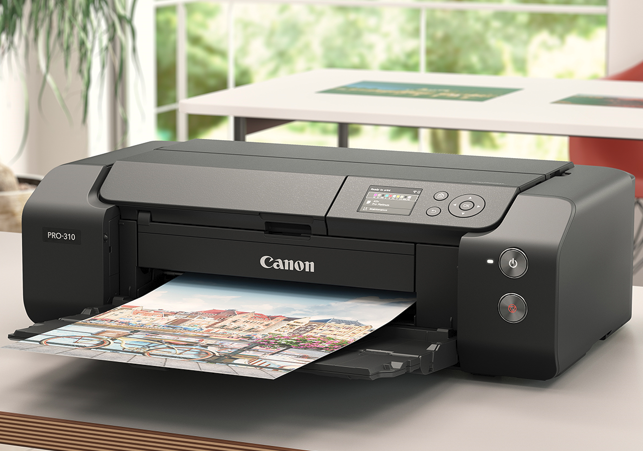
The Canon PRO-300 was released in June 2020. The Canon PRO-310 was released in January of 2025. They are 13" wide enthusiast-to-professional level photo and fine art inkjet printer featuring ten individual ink cartridges - 9-colors plus chroma optimizer ink that provides expanded color gamut and enhanced black density.
Quick Links
- Unpack and Prep
- Ink and Driver Installation
- Connectivity
- Paper Feed Options
- Printer Driver Tour
- Printer Control Panel Details
- Print Quality
- Print Speeds
- Borderless Options
- Black & White Performance
- Conclusion
- Bonus Videos
Points of Interest
- Pigment ink for long term fade resistance
- New matte black ink offering greater black density, smooth gradations and details in darker areas
- Technologies to help prevent print failures such as a nozzle recovery system and a skew correction function
- Paper feed via top auto-load tray and single-sheet path for specialty media
- Updated media compatibility and ability to print on sheets up to 39 inches long
- Borderless printing on the popular 7x10 greeting card size
Unpacking and Prep
The printer ships in a large, robust box. The printer is well protected with packing material and the contents were well organized.
The Canon PRO-300/310 shipping box includes:
- imagePROGRAF PRO-300 / PRO-310
- Setup CD, Manual, and Other Documentation
- Set of 10 Ink Tanks
- Print Head
- Multi-Purpose Tray
- Power Cord
The printer ships wrapped in plastic sheets and anything that opens or moves is secured with tape.
Physical Specs - W x D x H
Closed: 25.2" (L) x 15" (W) x 7.9" (H)
Trays Extended: 25.2" (L) x 33" (W) x 16.4" (H)
Printer weight: 32 lbs.
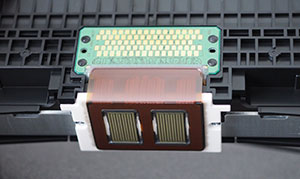
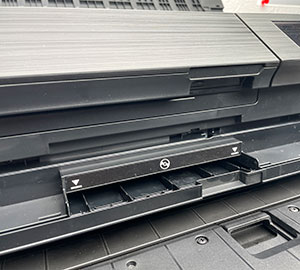
Ink Install
Installing the print head is part of the setup process. It's easy and takes perhaps 30 seconds. Ink cartridges are then installed onto the print head assembly.

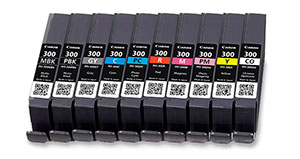
Canon PRO-300 / PRO-310 Ink Cartridges
- Cyan
- Photo Cyan
- Magenta
- Photo Magenta
- Yellow
- Red
- Photo Black
- Matte Black
- Gray
- Chroma Optimizer
Driver Install
Driver installation and setup were straightforward on both Windows and macOS. Drivers are downloaded from Canon's support website. In addition to drivers, you can download:
- Canon Professional Print & Layout Software
- Media Configuration Tool
Connectivity
The PRO-300 and PRO-310 can connect using these methods:
- AirPrint - Not recommended see here for details
- Mopria Print Service, Canon PRINT app, Canon Print Service (Android Only), Easy-PhotoPrint Editor app, Cloud Link
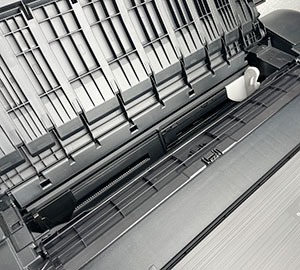
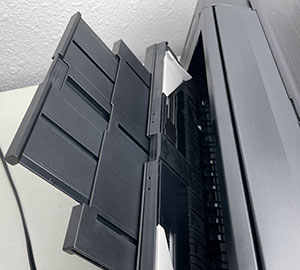
Paper Feed Option
The PRO-300/PRO-310 has two paper feed options.
- Main top tray - the "Top Feed"
- Rear single sheet - the "Manual Feed"
- CD print tray - located in the front above the output tray
Sheet Thickness Specs
Details on exactly what paper weight and thickness go into which path are sketchy in the Canon documentation. Here's what we recommend based on experience:
Top Feed - Thickness 3 mil - 13.9 mil
Manual Feed - 14 mil and up
Sheet Size Specs
Each path has minimum and maximum sheet widths:
Top Feed - 3.5" up to 13" wide
Manual Feed - 8" up to 13" wide
Do not get concerned about weight in this case. Papers in the thickness ranges above will be the correct weight for the paper path.
Printer Driver Tour
Get an in-depth view of the software-based controls for the Canon PRO-300 and PRO-310.
Printer Control Panel Details
The printer has an on-printer control panel for various functions.
Want the most from your Canon PRO-310 or PRO-300? Take a moment to review all the features and options on the control panel.
Among the features:
- Paper loading guide
- Ink level display
- Printer settings menu
- Maintenance processes - Nozzle check, print head cleaning
- Wi-fi setup and control
- Firmware updates
Print Margins
All printers are set at the factory with unprintable margins. Put another way, there is an area along the borders of your paper that cannot be printed.
The printer also has a borderless mode, available for select sizes (see below), where the margin rules are turned off.
Unprintable Margins - Non-Fine Art Media Setting
Top: 0.118"
Bottom: 0.197"
Left & Right: 0.135"
Unprintable Margins - Fine Art Paper Media Setting
All Sides: 0.98"
Print Quality Options
Canon publishes the printer's maximum print resolution and not print resolution for each setting you can select in the driver.
Because this technology is mature and print quality is near-continuous tone, we've suspended a detailed examination of print quality differences at the various quality settings. For best results, we recommend setting the print quality to the highest available setting for all paper types and images or artwork. You will be pleased with the results.
| Quality Level | Resolution (dpi) | |
| Maximum | 4800 (horizontal) x 2400 (vertical) |
Print Speed Examples
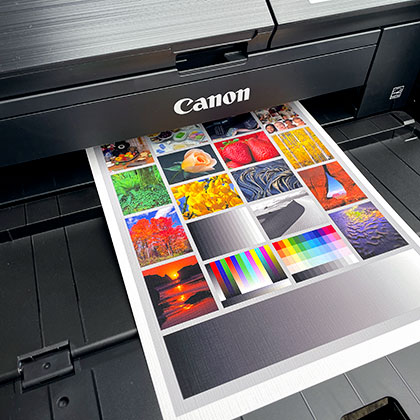
The image file, shown above, was printed from Photoshop on a Windows 10 computer connected via Wi-Fi connection. Print time was measured from the first print head pass laying down ink to the point the paper was ejected from the machine.
| Quality | 5x7 | 8x10 | 13x19 |
|---|---|---|---|
| Fine | 1:40 | 2:38 | 4:59 |
| High | 0:58 | 1:48 | 3:50 |
| Standard | 0:32 | 0:58 | 2:15 |
Borderless Capabilities
You can make borderless prints with the PRO-300 and PRO-310. Borderless sizes are preset at the factory.
Custom sizes can be defined and saved in the Mac OS. Windows users must define a custom size in the driver with each print job. The driver cannot save custom sizes.
- 4" x 6"
- 5" x 5"
- 5" x 7"
- 7" x 10" - Red River Paper Greeting Card Size
- 8" x 10"
- A4 (8.3" x 11.7")
- Letter (8.5" x 11")
- 10" x 12"
- 12" x 12"
- 11" x 14" - PRO-310 only
- 11" x 17"
- A3 (11.7" x 16.5")
- Super B (13" x 19")
Black & White Performance
The PRO-300 and PRO-310 are quite good at printing black and white. There are several ways to approach it.
Print a color image through the Black & White mode of the driver
In this situation, the driver will do black & white conversion. Controls include tonal presets (cool, neutral, warm), tonal sliders, and brightness and contrast sliders. Given the obscure X and Y sliders for custom tonal control, we typically use the tonal presets and for the most part leave it on the Black and White (neutral) setting. The downside of using the driver is lack of soft proof or preview of the results before making a print.
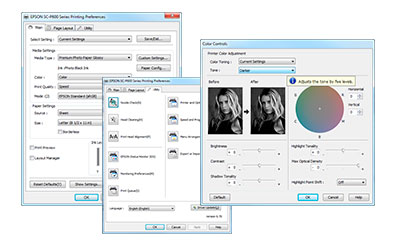
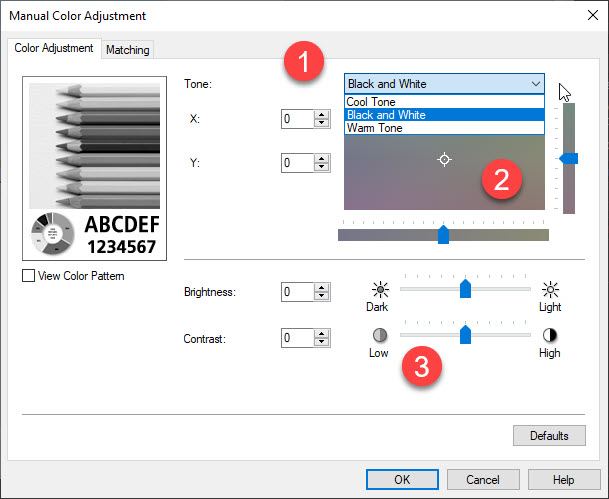
Driver - Black & White Adjustment Example
To the right is the Windows black & white manual adjustment for the Canon PRO-300.
1 - Preset tones for cool, neutral, and warm
2 - Sliders for manual tone control
3 - Sliders for brightness and contrast adjustments
Convert your image to black & white using an application, then print using a printer profile
The application can be Photoshop, Lightroom, and other photo editing software. The requirement is that you leave the image in the RGB color space while converting from color to black & white. Converting can be accomplished using the app's editing features or you can use a plugin such as Silver Efex.
Print and allow the application to manage colors via a printer profile. The advantage is that you have more control over the results because you're seeing the black & white conversion and edits on the screen in your app.
We encourage you to try both methods and pick the one that makes you happy.
Conclusion
Canon continues to improve its pigment ink technology. Print quality is excellent, featuring saturated colors, deep blacks, and sharp detail. The truth is that printers like the PRO-300 represent what we call the "end of history" for inkjet printers. They can exceed the quality of traditional print lab output while sitting on your desk. There is little room for improvement.
RED RIVER PAPER SUPPORTS THE CANON PRO-300 and PRO-310
Red River Paper offers over 30 premium inkjet papers for use with the Canon PRO-300 and PRO-310. We make prints on each paper to verify print quality and offer custom profiles for more consistent and accurate results.
See the Recommended Papers for the Canon PRO-300
See the Recommended Paper for the Canon PRO-310
Red River Paper supports your printer with free printer profiles and expert technical support.
Canon PRO-300 ICC Printer Profiles
Canon PRO-310 ICC Printer Profiles
BONUS VIDEOS
Keith Cooper produces a series of informative videos about inkjet printers and printing. Watch his PRO-300 related videos below!
Related Posts and Information
Last updated: April 06, 2025


