Main Tab
From the Main tab has settings you will interact with each time you print. Key settings include:
- Paper Source
- Document (paper) Size
- Borderless printing
- Image Orientation
- Paper Type
- Color and Quality
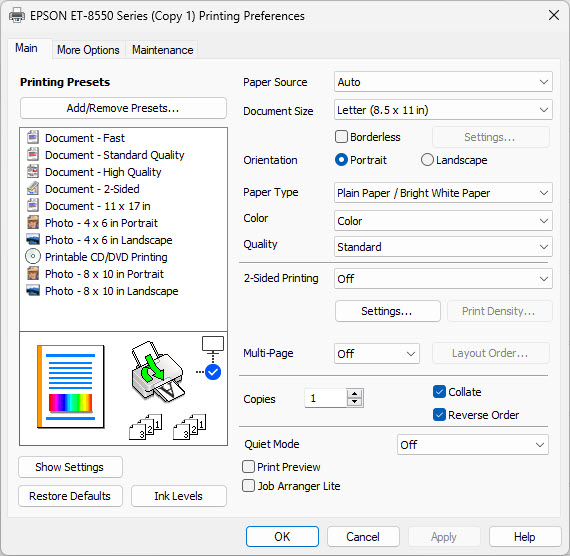
If you use an ICC color profile, do not use the Print Preview. It can interfere with the color management process. Results can include magenta color shift and dark prints.
Paper Type
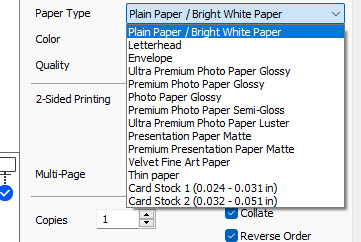
With each print, you must designate the type of inkjet paper (media) that you are using. You can think of media type as part color profile and part ink throttle. Different inkjet papers need different amounts of ink to perform correctly, and this is where the media setting becomes important.
Even using ICC color profiles, you must choose the right media type. The correct choice will be included in your profile's instructions. It is important to note that the drop-down menu at right is a fixed list and only contains Epson media names. When using non-Epson papers, you will choose the closest media type.
Paper Source
Paper Source tells the printer where you want paper to feed from.

- Cassette is the front tray for lightweight paper
- Rear Paper Feeder is the top tray for photo and heavier stock
- Rear Paper Feed Slot is the single sheet path for very thick paper and board stock
- CD / DVD Tray is for those who can remember what a CD or DVD looks like
Paper Source defaults to Auto, which uses Cassette 1. If there is not paper in Cassette 1 or you want to use another paper path, the print job will fail and you will have to stop and reset the printer from the printer's control panel. It is wildly frustrating and it still took dozens of times for us to make it a memory item.
Document Size
Oddly named, this is the dialog used to choose the PAPER SIZE you are using for the current print job.
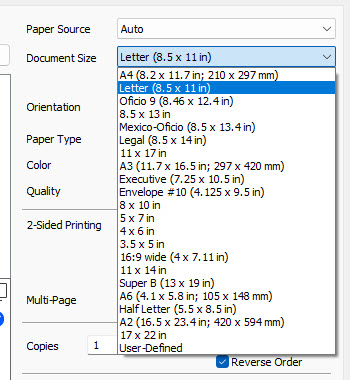
You may notice the last two sizes (A2 and 17x22) will not fit in your printer, which is at most 13" wide. Please don't choose these sizes.
User-Defined Paper Size
For paper sizes not already in the list, you can define a custom size. Once defined and saved, they appear in the Document Size dropdown.
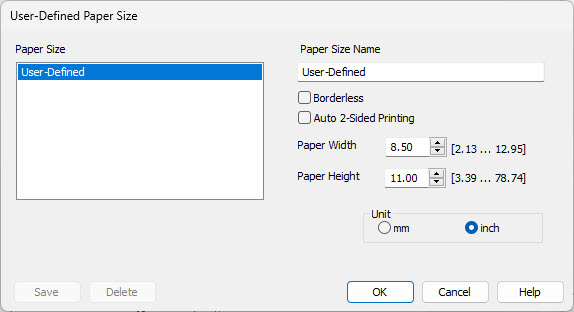
To create a user-defined size, name it, define the width and height, and save it. Important points:
- Width range 2.13 - 12.95"
- Height range 3.69" x 78.74"
- Units can be inch or mm
- Borderless option available
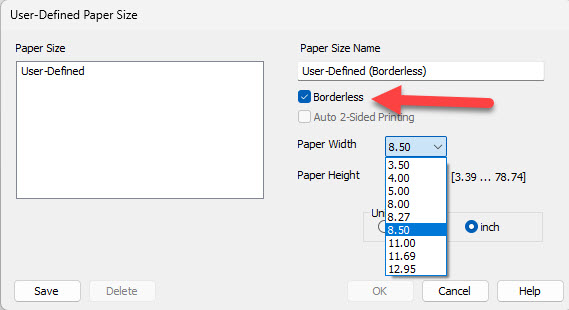
When you define a borderless user-defined size, you can choose from a pre-set list of widths. These widths correspond to ink overspray pads below the print head.
Borderless
Your printer can print without borders on many sizes.
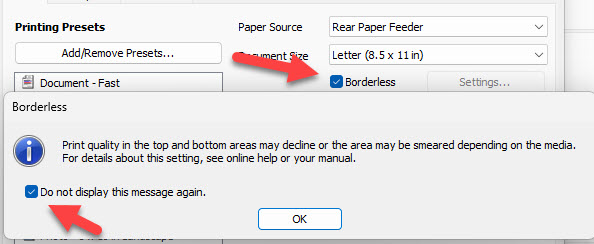
The first time you click the Borderless check box, a warning appears. Click the Do Not Display checkbox to make it stop appearing in the future.
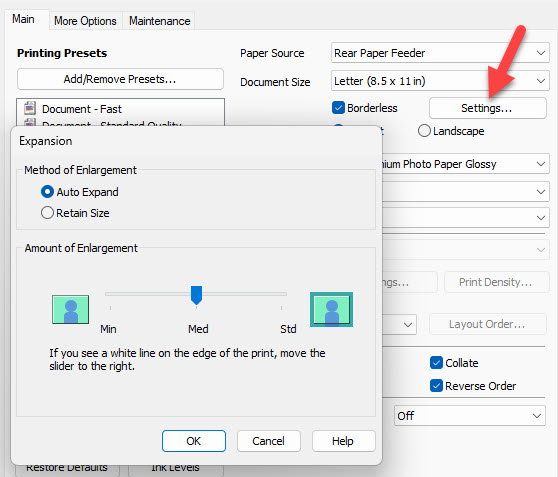
Click the Settings button to launch the Expansion dialog. When printing borderless, your printer expands the image area slightly to ensure ink goes to the edge of the paper. You can control this expansion or force the printer to retain the size of your image. In practice, what is at the outside edges of your image is rarely important enough to worry about. Leaving the enlargement method at Auto Expand and Std (the default) will provide good results.
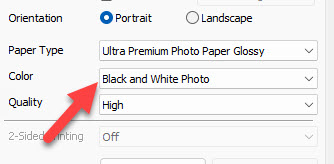
Color
Color controls the output as well as color management options available for each print job.
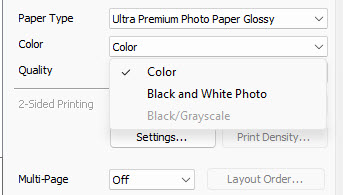
- Color - For any photo, art, design, or document with color
- Black & White Photo - For photography and artwork that are black & white only, using Epson's B&W driver technology
- Black/Grayscale - For documents and available with select Paper Type settings
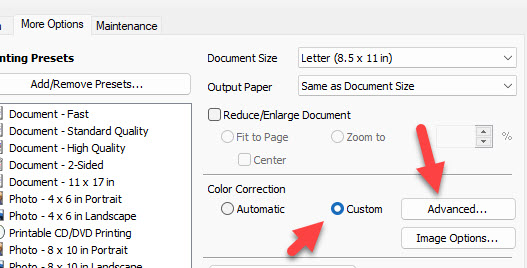
Custom Advanced Color Correction
Launch the dialog from the More Options tab > Color Correction Custom > Advanced.
Color Management options are the heart of this dialog.
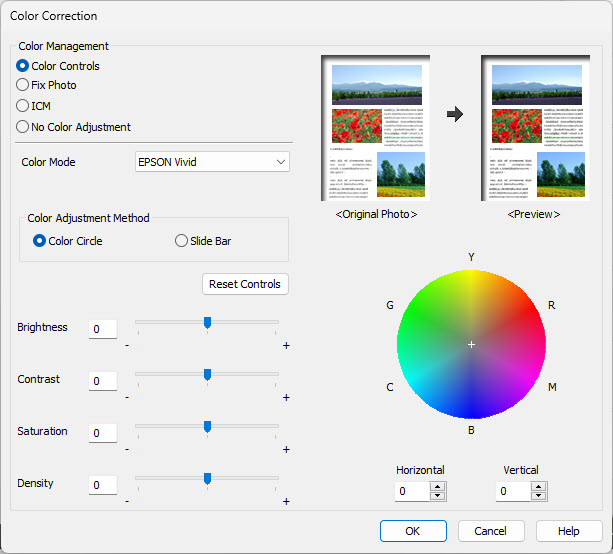
- Color Controls - allows the printer driver to manage color output
- Fix Photo - another driver option to automatically correct issues it finds with your image. We do not recommend this for most print jobs as the results can be random.
- ICM - allows the ancient Windows ICM system to manage colors. Not recommended.
- No Color Adjustment - disables the printer driver's color management and allows an ICC color profile to manage colors from your application (Photoshop, Lightroom, etc.)
If you allow the printer to manage colors via Color Controls, you can adjust a number of variables should output not match your expectations.
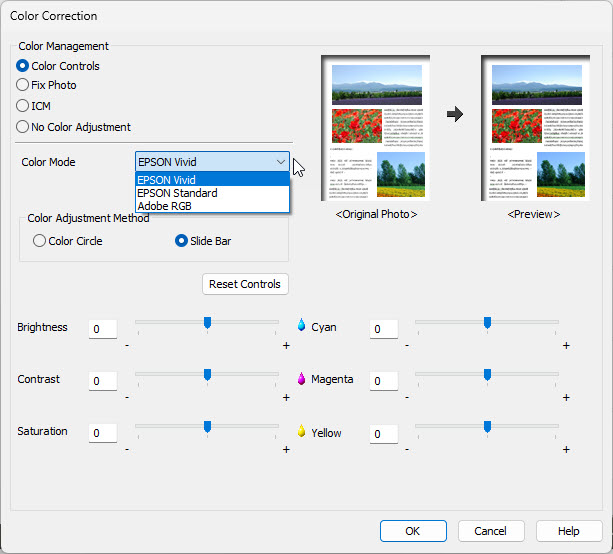
Epson has several Color Modes you can experiment with.
We recommend setting the Color Adjustment Method to Slide Bar as the interface is easier to understand than Color Circle.
If you set Color to Black and White Photo on the Main tab, the Color Correction dialog changed.
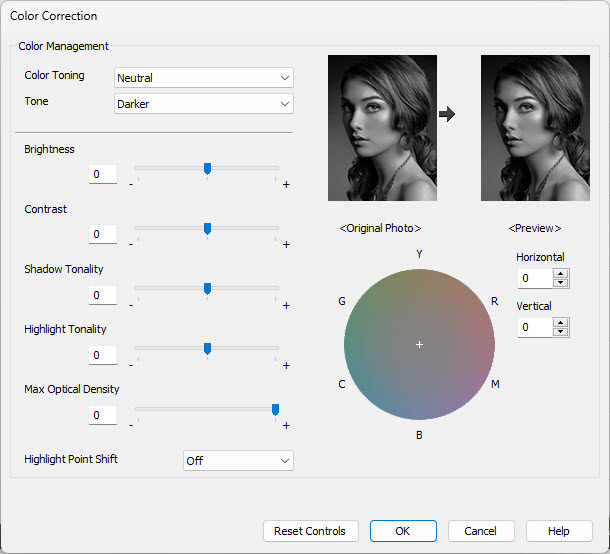
There is a bevy of controls in this dialog. The most important is Color Toning. Your choices are Neutral, Cool, Warm and Sepia. Brightness and Contrast are often used for fine edits. We explain the other sliders and controls in our article Epson Advanced Black & White Controls Explained.
Quality Options
Print quality is an important control and should be verified before any print job begins.
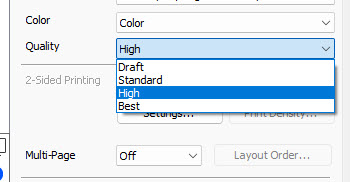
Available quality settings depend on the Paper Type chosen. For example, you will only see Draft when Plain Paper is chosen.
We recommend the High-quality setting for most photo and art print jobs. As a rule, the Best print quality rarely yields obvious better results than High while slowing down the print process and using more ink.
More Options
You'll visit the more options tab for color management options and more.
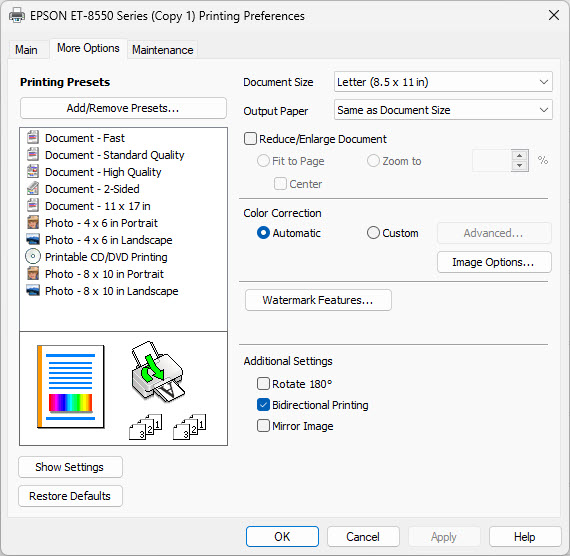
We've discussed the Color Correction portion already.
Document Size duplicates the same dropdown selection on the Main tab. Output paper will just get you into trouble so leave it at "Same as Document Size". We recommend using the Document Size selector on the Main tab to avoid any confusion.
Reduce / Enlarge Document allows the driver to resize your image based on your zoom selection.
Watermark Features will print a watermark onto documents. The printer has to manage color output for this option to be active.
Bidirectional Printing is the default and causes the print head to print when moving in both directions. Unclicking it will slow the print process as the print head drops ink in one direction only.
Mirror Image would be used when printing reverse images for screen printing and similar projects.
Maintenance Tab
This is an important tab and one you should explore.
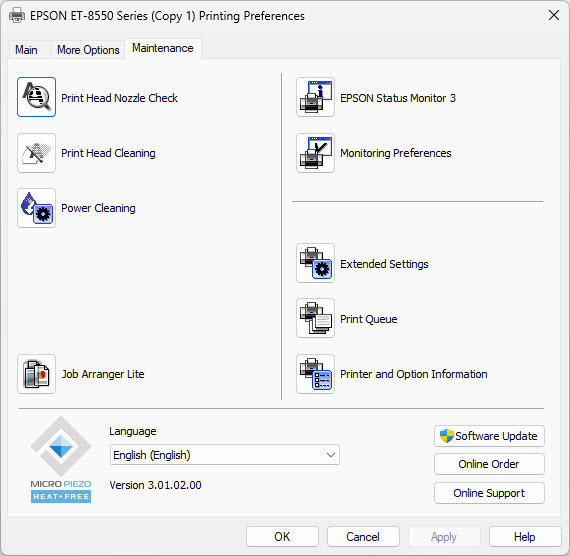
The nozzle check and print head cleaning are probably the most important features here. You can also access many of these features on the printer's control panel.
Extended Settings is essential as well.
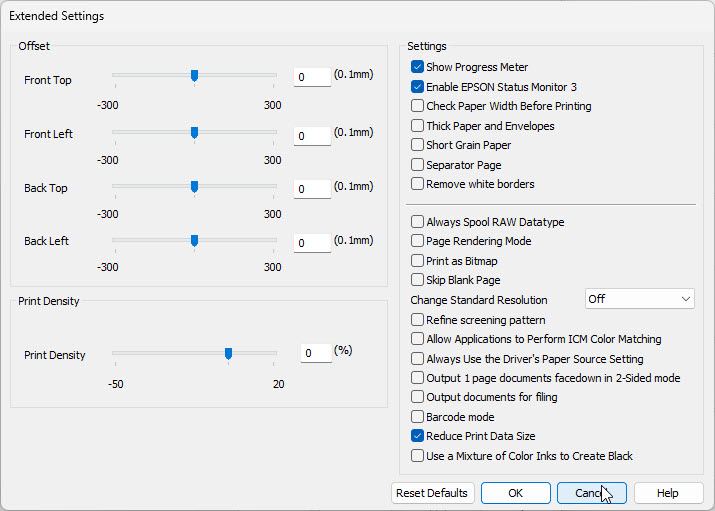
The Thick Paper & Envelopes check box should be checked when using any paper over 12 mil thickness.
Print Density can be helpful with thin paper, paper that has a thin coating layer - like film - and uncoated papers. Reducing density can stop paper warping and issues with drying.
Many of the other check boxes have little meaning for most users. You'll be hard-pressed to find them defined, even in Epson documentation.
Related Posts and Information
Last updated: October 29, 2023


