Unlock Accurate Color Printing in ON1 Photo Raw (Windows)
Getting perfect prints from ON1 Photo Raw starts with using the right ICC printer profile. If you’ve ever been frustrated that your prints don’t match what you see on screen, prints too dark, off-color, or flat, printer profiles could be the missing link.
This guide will walk you through, step-by-step, how to install and apply ICC color profiles in ON1 Photo Raw on Windows. You’ll learn:
- What ICC profiles are and why they matter for photo printing
- How to download and install printer profiles correctly on your Windows system
- How to select and apply the right profile inside ON1 Photo Raw’s print settings
By the end, you’ll have the knowledge and confidence to make your ON1 Photo Raw prints look true to life, whether you’re producing fine art, photography portfolios, or everyday keepsakes.
ICC printer profiles are the secret ingredient to getting prints that truly match what you see on your screen. An ICC profile is simply a set of instructions that tells your printer how to interpret color with a specific paper, so reds stay rich, blues stay deep, and skin tones look natural. Without a profile, your printer is just guessing, often leading to dull or inaccurate results. With the right ICC profile, you take the guesswork out of the equation and give your images the best chance to shine. At Red River Paper, we provide free custom profiles for every one of our papers, because we believe your work deserves the accuracy and consistency that professionals rely on.
GET STARTED
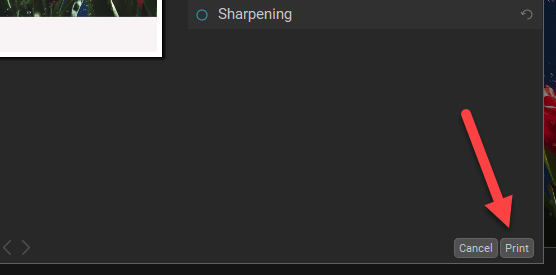
When you are ready to print, go to the File menu and click Print

The Print Settings dialog will appear
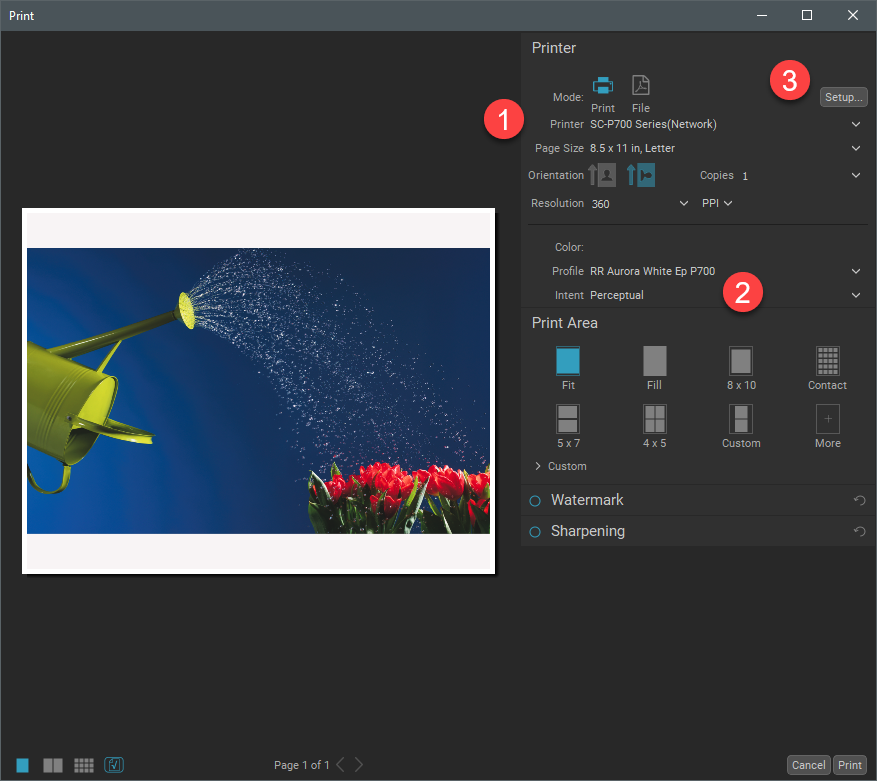
1. Select your printer from the Printer drop-down menu
2.
Choose the profile for your printer/paper combination from the
Printer Profile drop-down menu.
Intent - We recommend Perceptual rendering intent. Learn more about rendering intent here.
3. Click the Setup button
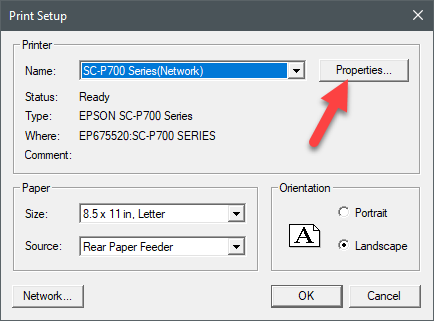
When this dialog appears, verify your printer is chosen and click Properties.
PRINTING WITH CANON
Scroll down for Epson help
After clicking the Print Setup button, your printer's property window will appear.
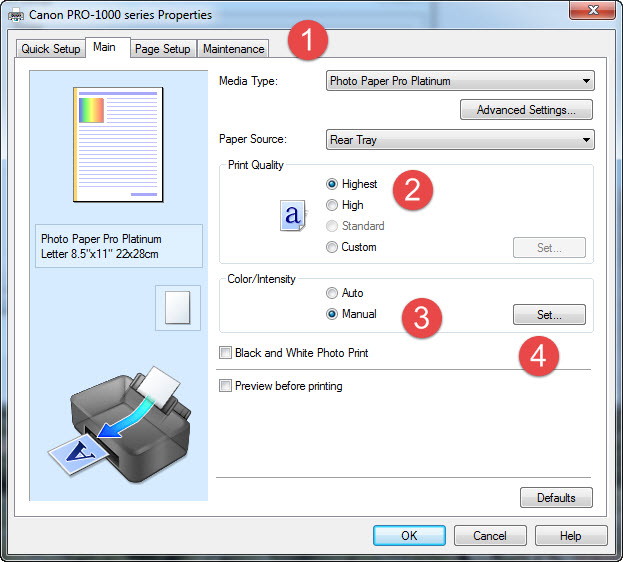
1. Set Media Type - You will find the recommended setting in the profile's instruction file.
You will not see Red River Paper product names in this drop-down.
2. Print Quality - For Canon printers, we usually recommend the highest possible setting.
3. Set Color / Intensity to Manual
4. Click the Set button.
The Manual Color Adjustment dialog will appear.
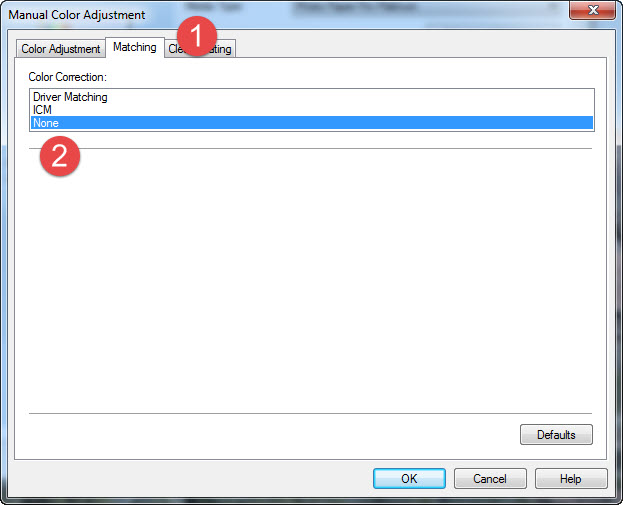
1. Click the Matching tab
2. Set Color Correction to None
Click OK to return to the printer properties. Once satisfied with all settings, click OK to return to the ON1 print dialog and click Print.

PRINTING WITH EPSON
Epson has several driver versions that look slightly different. All of the same functions are present, they are just shuffled around for some reason. Below you will see two of the most popular Epson driver versions and how to set them up.
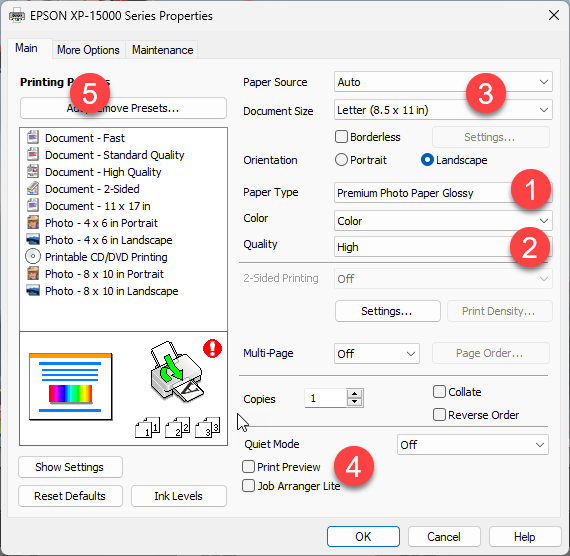
After clicking the Print Setup button, your printer's property window will appear.
1. Set Media Type - You will find the recommended setting in the profile's instruction file.
You will not see Red River Paper product names in this drop-down.
2. Print Quality - For Epson printers, we typically recommend Photo or 1440dpi quality.
3. Set Mode to Off (No Color Adjustment)
4. Choose your paper size.
Verify your settings and click OK to return to the ON1 print dialog and click Print.
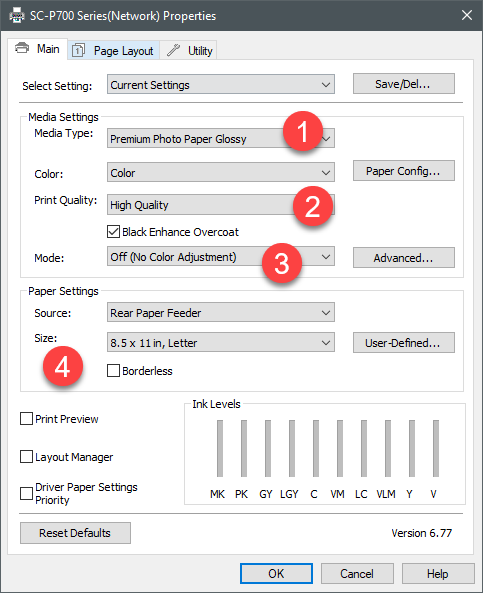
Alternative Epson Driver Version
1. Media Type: Select the media type shown in the instructions PDF included with your profile download.
Note: You will not see the Red River paper name in this menu. It only contains the names of the printer manufacturer's papers.
2. Print Quality: High Quality / 1440x1440 dpi for consistent high quality results.
3. Paper Size: Verify correct.
4. Print Preview: Do not use as it can cause poor print quality.
5. Click the More Options tab.
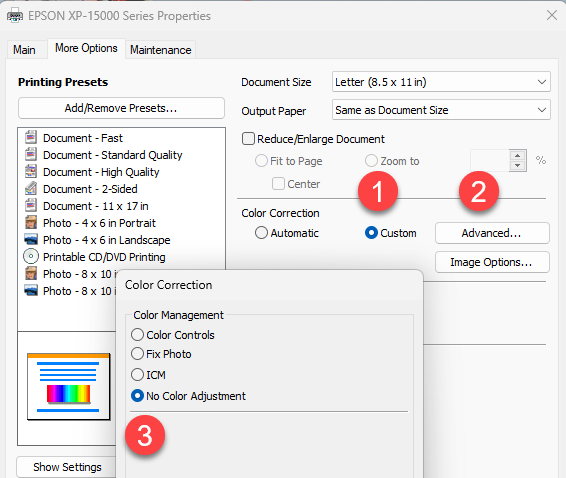
More Options tab
1. Color Correction: Custom
2. Click Advanced
3. Color Correction: No Color Adjustment
Click OK when you're ready to print.
Verify your settings and click OK to return to the ON1 print dialog and click Print.
Related Posts and Information
Last updated: October 29, 2025


