Color profiles are pieces of software that bypass your printer color management in an attempt to reproduce better color gamut and print quality for a specific paper, printer and ink set. If you are unfamiliar with profiles or Lightroom, read all support documents carefully before beginning.
This brief tutorial will show you how easy it is to use a printer color profile from Photoshop.
If you're not familiar, you can learn more about printer profiles and why they can be helpful.
Key Concept: In this tutorial, Lightroom manages color output via a printer color profile. Your printer color management systems are turned off.
To begin - File > Print or hit Ctrl + P on your keyboard.
The Photoshop print dialog with preview will appear. This dialog is important. Spend time to understand the available controls.
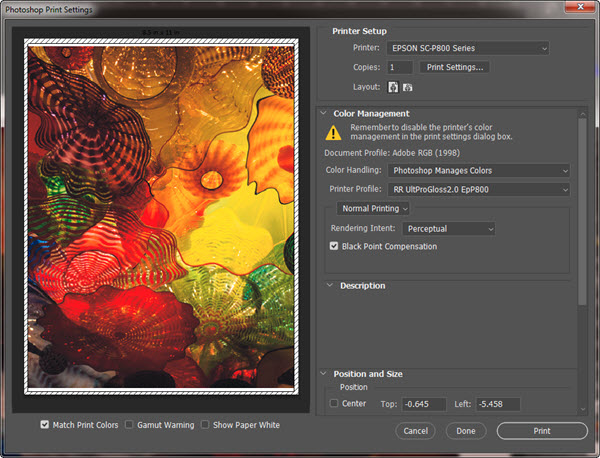
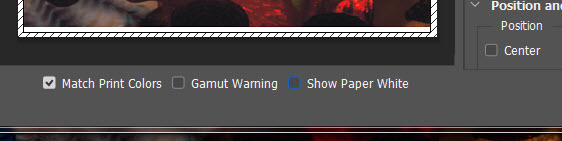
At the bottom left, you will notice three checkboxes. They activate a soft proof in the preview.
The preview uses the paper profile you will choose in the steps below.
Match Print Colors - A basic soft proof showing how a print using the profile might look.
Gamut Warning - Will highlight in gray areas of an image where the colors are out-of-gamut for the paper profile.
Show Paper White - Simulates how the tone of the paper will affect the print.
Photoshop Print Settings Dialog
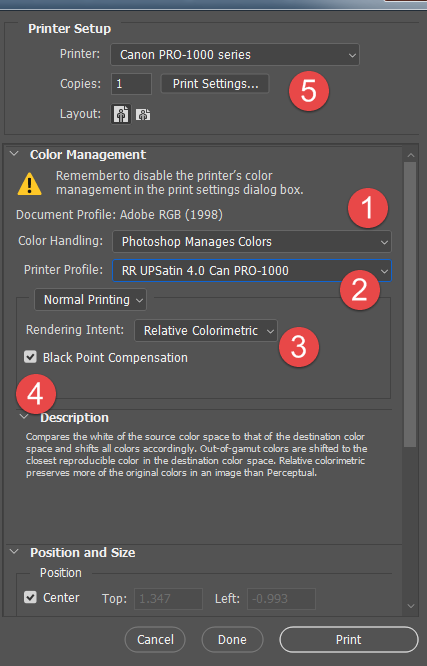
- Choose "Photoshop Manages Color" from the "Color Handling" drop down.
- Select the profile for your printer and paper in the "Printer Profile" drop down. This menu is arranged alphabetically. Red River profiles all start with "RR".
- Rendering Intent: Canon printers tend to do best with Perceptual but you can also try Relative. Learn About Rendering Intent.
- Black Point Compensation checked.
- Click the Print Settings to launch your printer's property dialog.
Printing Preferences / Properties Setup
Your printer's preferences or properties menu will launch after you click Print Settings above.
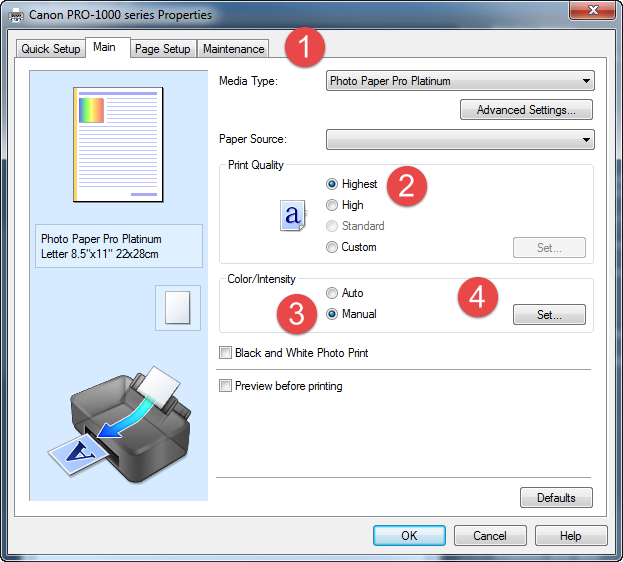
1. Set media type - Refer to the profile instructions PDF
Note: The Red River Paper profile name will not appear in this drop down! Only Canon paper types.
Exception: Some Canon models, when using AM1X Config files, will display the name of Red River Paper you are using as a Media Type.
2. Set Print Quality
3. Choose Manual Color / Intensity
4. Click Set. The Manual Color Adjustment dialog will appear.
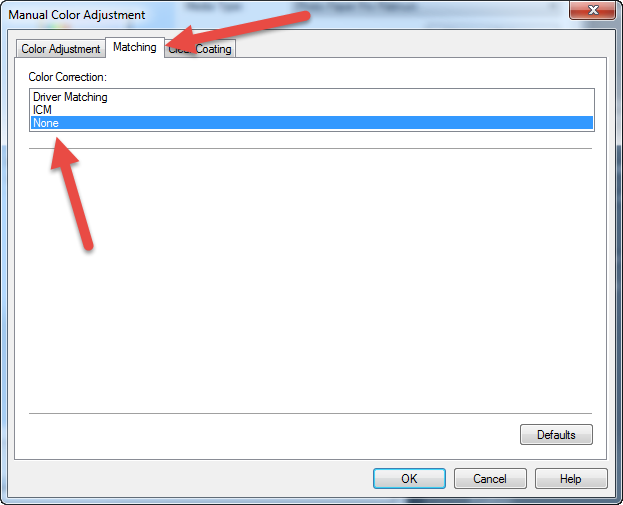
1. Click the Matching tab
2. Choose Color Correction: NONE
Click OK until you are back at the Photoshop print dialog. You can now click Print.
Video Tutorial Available
Watch the companion video to this tutorial
Questions?
Contact us via the support center
Last Updated: January 13, 2024
A Superior Canvas For Your World Awaits — Shop By
LEARN MORE
Inkjet paper from inkjet paper experts. Red River Paper, founded in 1997, is a team of photo and fine art paper experts with many years of combined experience in printing and printer technology. We hand-pick fine inkjet media from sources around the world. At our plant in Dallas, Texas, we convert the paper to an unmatched range of sheet and roll sizes and then add special features available only from Red River. You get access to direct wholesale pricing and the convenience of over 30 inkjet papers under one roof. We guarantee compatibility with your inkjet printer and back that up with free color management tools and technical support. Call or email us for expert help finding the right paper and tips for getting better prints.
Related Posts and Information
Last updated: January 13, 2024


