Introduction
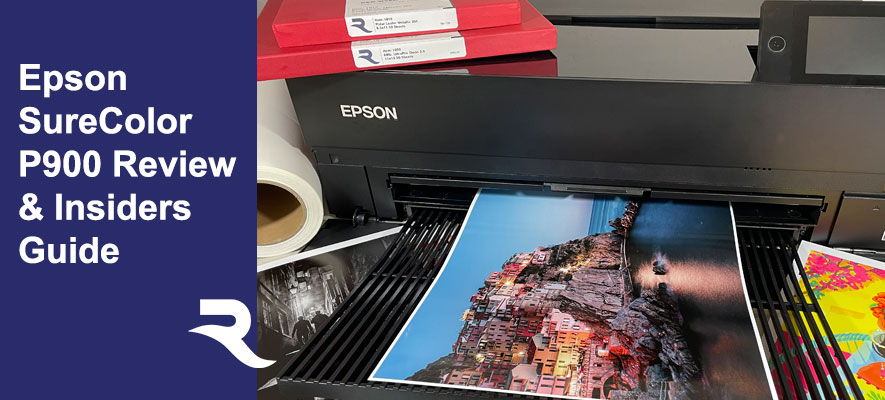
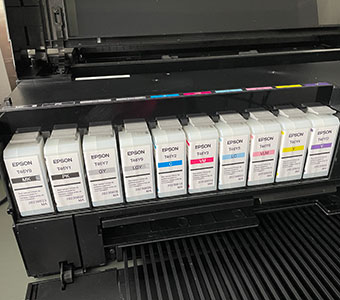
The Epson SureColor P900 Printer was released in October 2020. It is the successor to the Epson SureColor P800. The P900 is a 17" wide enthusiast-to-professional level photo and fine art inkjet printer featuring ten individual ink cartridges now called the "UltraChrome PRO10" system. The PRO10 system is pigment-based and uses six colors, two grays, and a black ink. The big news is that the P900, like the related P700, has dedicated ink channels for Photo Black and Matte Black inks and eliminates the need for black ink switching. Pigment inks are designed to be stable over long periods of time, allowing prints to be displayed (under proper conditions) for many decades. The P900 descends from a long line of top-quality pigment-based photo printers. Building on that lineage, Epson claims that the P900 has increased performance relative to last generation printers.
Just the Facts
17" Wide photo & fine art quality inkjet printer
Print 3.5" x 5" up to 17" x 708.66" banners. Max print length is based on file size.
Ten colors
Printing Technology - Advanced Micro Piezo® AMC print head with ink-repelling coating technology, 10-channel, drop-on-demand, inkjet print head
MSRP $1195
Ink Cost - $41.99 per 50mL tank (Price as of 5/2021)
Rating - We rate is a printer to "strongly consider" relative to caveats listed below.
Unpacking and Prep
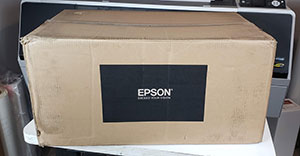
The P900 ships in a large, robust box. The printer is well protected with packing material and the contents were well organized.
The Epson P900 shipping box includes:
- SureColor P900 Printer
- Initial Ink Cartridges
- AC Power Cable
- User Guide Kit (Documentation and Warranty)
- CD/DVD Disc Tray
- Additional Maintenance Box
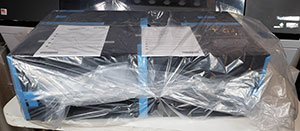
The printer ships wrapped in plastic sheets and anything that opens or moves is secured with tape.
Physical Specs - W x D x H
Printing - 24.2" x 35.6" x 20.5"
Storage - 24.2" x 14.5" x 7.8"
Printer weight: 35.3 lbs
Ink Install
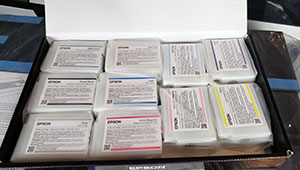
The P900 comes with a starter set of ink cartridges and two maintenance boxes, discussed below.
The cartridges fit into a bay on the front left of the printer. The P900's inks are connected to the print head via hoses.
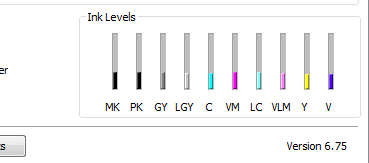
When the printer is initialized and ready to print, the printer reports each color is about 1/3 full.
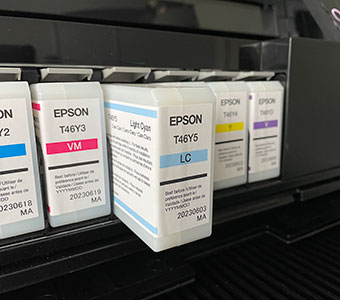
Epson P900 T46Y Ink Cartridges
- Cyan
- Light Cyan
- Vivid Magenta
- Vivid Light Magenta
- Yellow
- Violet
- Light Black
- Light Light Black
- Photo Black
- Matte Black
Maintenance Tank
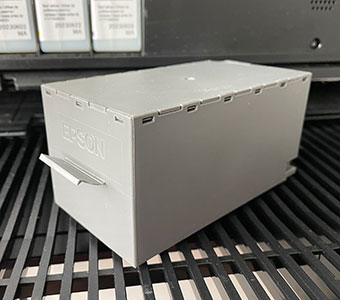

The maintenance tank, Epson called it the Maintenance Box, collects waste ink from cleaning cycles and borderless over spray. The printer comes with two. The first will be filled to about 75% capacity during setup. Afterwards, tank usage slows considerably. The maintenance tank is installed behind a small door on the right side of the printer. It retails for $20.00.
Driver Install

Driver installation and setup was straightforward in Windows and the Mac OS. Drivers are downloaded from epson.com/support/p900 website. In addition to drivers, you can download:
- Epson Connect Printer Utility
- Epson Photo+ Software
- Epson Print Layout
- Latest Firmware
- Epson Print Layout Mobile
Connectivity

The P900 can connect using these methods:
- Hi-Speed USB 3.0 (1 port located on the rear left - shown above)
- 100Base-T Ethernet (1 port located on the rear left - shown above)
- 2.4 GHz (802.11n) and 5 GHz Wireless (IEEE802.11 b/g/n/ac)
- Wi-Fi Direct
- AirPrint
- Google Cloud Print
- Epson Print Layout for iOS
Paper Feed Option


The P900 has three paper feed options.
- Main top-loading
- Front media path
- Optional roll adapter - $249 MSRP
Main Top-Loading

According to Epson, the top tray can hold up to 30 sheets of photo paper, up to 120 sheets of plain paper, and one sheet of thick fine art paper. Like the P700, the P900's feed mechanism is now located in the center of the tray, like Canon printers.
While the feed design looked promising, our experience with the main tray was less than stellar. If you are a regular reader of our reviews, you know we feel Epson paper feed design needs improvement. In the case of the P900, the paper feed mechanism is a step backwards relative to the P800. For lack of a better description, it lacks strength. The simple task of feeding a single sheet of 10 mil luster paper can become multiple misfeeds. As the printer is more or less designed around standard 10 mil RC paper, the feed trouble was disconcerting. After some use, the issue slowly dissipated. The big test came during our cost of print analysis, where 200 prints were made using UltraPro Satin. During the test, the P900 misfed (either did not feed or fed and failed) four times. A 2% failure rate is not all that bad. Later tests with larger sheets resulted in larger error rates.
Tips for Using the Main Top-Loading Tray
You will want to monitor the printer when feeding larger sheets. With sizes like 13x19, 16x20, or 17x25, it is best practice to supervise at the P900 begins the printing cycle. Watch for paper slippage or rotation. It is a rough feeling to come back to a big print with uneven borders.
Verify the guides are lightly pushed against the edge of the paper. Do not put too much pressure on the sheet. If the guides are too far from the paper, slippage and rotation will occur.
Extend the vertical paper support so that all of the sheet is supported.
Matte papers will misfeed more than glossy or luster. If you use lots of matte paper, consider cleaning the feed roller every 100 sheets. A barely damp lint free cloth or alcohol pad will do the trick. We are looking to minimize coating buildup which will eventually cause repeated misfeeds.
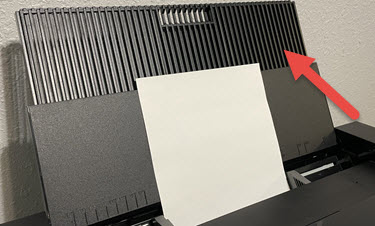
Front Single Sheet Path
The front single sheet path is for thick media, fine art papers, and poster board. We recommend this path for papers 13 mil and thicker. The P900 can accept board up to 1.27 mm (50 mil). The path is activated by pulling a tab above the output tray. A tray will extend and lower, and the touch screen panel prompts you to begin the load process.
This path is fairly easy to use. It takes around two minutes from start to ready to print.
Tips for Using the Front Single Feed Path
Be careful and deliberate when feeding sheets.
Open the guides a bit wider than the paper to start. Insert the paper and align with the markings as instructed. Then snug the guides up against the sheet.
Visually inspect the front edge of the sheet and ensure it is not crooked in the tray.
When using large sheets - bigger than 8.5x11 - make sure there is enough room behind the printer. The distance from the back of the printer to any obstacles should be at least 2/3 the length of the sheet.
Front Path Paper Sizes - The driver only allows these sizes for the front path.
A2, A3, A4
8.5x11
8.5x14
10x12
11x14
11x17
12x12
14x17
13x19
16x20
17x22
B4, B3
Custom sizes wider than 8"
If you feed paper and hit resistance, open the top of the printer. Inspect the area below the print head. If it appears clear, do not force the paper. Take the sheet out of the printer. Open the back cover where the roll adapter is installed. With a flashlight, inspect the paper path. On two occasions, we experienced feed problems because six small plastic parts had moved up and into the feed path. Though not we are not certain, they could be deployed when the roll adapter is attached. If you see them, close the front path, turn off the printer, wait a few seconds then restart. That should make them retract.
Roll Feeding
An optional roll adapter is available for $249. With the adapter, the P900 can use 8" to 17" wide rolls. The adapter's design allows you to use any diameter core.
- Media thickness range - 5 mil to 27 mil
- Maximum roll media width - 17 Inches
- Minimum roll media width - 8.3" (A4) Inches
- Available borderless printing widths
- 8.3" (A4)
- 8.5"
- 10"
- 11"
- 11.7"
- 13"
- 16"
- 16.5"
- 17"
- Roll media length - Manual Cut to Desired Length
Epson states that the maximum printable length may be limited by software application, OS, available media and RIP.
Epson Media Files
New to this series of printers is the use of Epson Media Files. They appear as media types in the printer driver and contain important information such as paper thickness, platen gap, drying time, and more. These important controls used to be available in the printer driver menus. The files are created, imported, and exported using the Epson Media Installer. This app is included when you first download drivers from the Epson website.
Red River Paper includes EMY files for our papers with our P900 printer profiles. They are not required but we suggest their use with thicker papers.
Read more about Epson Media files and how to use them here.
Printer Driver Tour

Get an in-depth view of the software-based controls for the Epson P900.
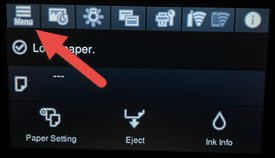
Printer Control Panel Details
New to the P900 is a touch screen display which can be angled for easy viewing while standing. A number of features can be controlled via the panel.
Among the features:
- Paper loading guide
- Ink level display
- Printer settings menu
- Maintenance processes - Nozzle check, print head cleaning
- Wi-fi setup and control
- Firmware updates
Media Load Guide
The media loading guide is helpful when using the roll and single sheet paper paths. It also allows you to specify the media type and size at the printer. Bear in mind that these settings are overwritten by your driver settings during the print process. All in all, we would use this particular control only for loading rolls and specialty media. Leave the media setting and paper size selections to driver settings.
Printer Settings Menu
This menu contains some important settings that you need to understand and activate in many situations.
To access it - Menu > General Settings > Printer Settings
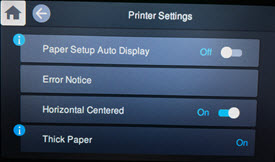
Page Setup Auto Display - On displays the Paper Setting screen when loading paper in the rear paper feeder. If you disable this feature, you cannot print from an iPhone, iPad, or iPod touch using AirPrint. Recommend you turn it OFF.
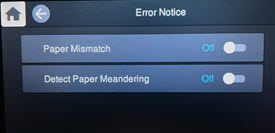
Error Notice
- Paper Mismatch - Displays an error when the output size or paper type settings differ between the driver and the printer. Recommend you turn it OFF. This saves time as you only need to set the driver settings. If your printer is away from your desk or in another room, definitely turn Paper Mismatch off.
- Detect Paper Meandering - It is intended to stop printing if the printer detects that your paper has rotated and skewed. It is a well meaning option but we find way more false positive results, which slow down the printing process. Recommend you turn it OFF.
Horizontal Centered - Recommend on to print the image in the center of the paper. Recommend you turn it ON.
Thick Paper - Epson removed the paper thickness and platen gap settings that were in their drivers. If you use paper thicker than 12mil on a regular basis, recommend you turn Thick Paper ON.
Print Quality Options & Results

Quality Settings
As mentioned in the printer driver tour, print quality choices are:
| Name | Resolution (dpi) | Notes |
| Level 5 / Max Quality Carbon Black | 5660 x 1440 | No borderless printing |
| Level 4 / Max Quality | 5660 x 1440 | No borderless printing |
| Level 3 / High Quality | 1440 x 1440 | Recommended setting |
| Level 2 Quality / Quality | 1440 x 720 | |
| Level 1 / Standard | 1440 x 720 |
We recommend 1440 x 1440 (Level 3) quality for most print jobs. It offers the best mix of quality, speed, and ink economy. It is difficult to detect significant quality improvement when comparing 5760 x 1440 to 1440 x 1440 at normal viewing distance. For Windows users, we recommend selecting the "Finest Detail" option for best results.
Learn more about print quality settings in the Windows or Mac printer driver tours.
The Truth About Inkjet Print Quality
There is no question that inkjet printers at the P900 level offer the best print quality you can buy. The resolution, color gamut, media compatibility, and fade resistance are simply stunning given the ease of use and cost of operation. If you are reading this review, you are either deciding which inkjet printer to purchase or if you should upgrade from a previous model. No one should be here trying to decide if print quality is "good enough" for their needs. The P900 is good enough and usually way more than most people need. That settled, let's get on with some new quality features and what different quality settings do.
Take an up-close look at prints from the Epson P900 at different quality settings.
Print Speed Examples
The image file, shown above, was printed from Photoshop on a Windows 10 computer connected via USB. Print time was measured from the first print head pass laying down ink to the point the paper was ejected from the machine.
| Quality | High Speed | Finest Quality | 4x6 | 8x10 | 13x19 |
|---|---|---|---|---|---|
| 1440x720 | Yes | Yes | 0:58 | 2:17 | 5:27 |
| 1440x1440 | Yes | Yes | 1:17 | 2:56 | 6:49 |
| 5760x1440 | No | Yes | 4:28 | 8:05 | 16:08 |
| 5760x1440 Carbon Black | No | Yes | 6:56 |
12:30 | 24:30 |
Borderless Capabilities
You can make borderless prints with the P900. Borderless sizes are preset at the factory and include:
- 3.5" x 5"
- 4" x 6"
- 5" x 7"
- 5"x 8"
- 8" x 10"
- A4 (8.3" x 11.7")
- Letter (8.5" x 11")
- 10"x12"
- 11" x 14"
- 11" x 17"
- A3 (11.7" x 16.5")
- Super B (13" x 19")
- 16" x 20"
- A2 (16.5" x 23.5")
- 17" x 22"
The P900 offers some custom borderless print capability. Borderless widths are chosen from a fixed menu in the Windows driver. The Mac driver does not display the available sizes or clear instructions on their use. We explain the process in the Mac driver tutorial linked below.
Learn more about the feature:
Black & White Performance

The Epson P900 can print with three black inks - Photo or Matte Black plus Light Black and Light Light Black. Using the printer driver's Advanced Black & White (ABW) mode, the three blacks are used together, although not exclusively, to make a print. The ABW system can produce truly neutral grayscale prints. Since this is a driver-based system, no ICC printer profiles are required.
ABW also has choices for cool, warm, and sepia-toned prints. Using the ABW advanced feature allows for fine-tuning of tone, brightness, contrast, and more. However, any changes to these settings cannot be soft proofed. As a result, test prints are required to perfect the output.
If you are printing a toned B&W image and want to replicate that tone with ease, print the file using a printer color profile instead of the ABW system. Keep in mind the file must be converted to B&W in your photo software before printing. Using a profile will more accurately reproduce the desired tonality when printed.

Above is an example of the ABW system and a printer profile at work. The original image file has a warm tone. The result using ABW (print on the left) is neutral and quite stunning. Using a printer profile (print on the right) maintains the image's warmth and is more accurate to the file.
Conclusion
The P900 is a mix of refinements and frustrations. For photographers and artists, print quality is without a doubt the best you can achieve. Color gamut and black density are excellent on a broad range of inkjet media. It is a flexible platform, able to use sheets from 3.5" to 17" wide. This means you can accomplish all manner of projects, from snapshots to greeting cards to gallery prints. Speaking of flexibility, Epson's decision to give photo black and matte black inks their own print head channel (finally!) is a big win. You can switch back and forth from matte to reflective papers without an ink swap. If you don't know what we're talking about, that's OK. Take it from us; it's a good deal.
Positives
- Better than lab quality output on luster, gloss, photo metallic, matte, fine art, and baryta-fiber based inkjet papers
- Bold and true to life color saturation
- Minimum gloss differential and almost no bronzing
- Good ink economy and cost of operation
- Touch screen control panel
- Custom borderless options are available - excellent for 13x38 and 8.25x25 pano sheets and pre-scored card stock offered by Red River Paper.
Quibbles
- Main paper tray feed mechanism weak
- Change to smaller ink tanks compared to previous models
Epson P900 Compatibility with Red River Paper Products
Red River Paper offers over 30 premium inkjet papers for use with the Epson P900. We make prints on each paper to verify print quality and offer custom profiles for more consistent and accurate results. See the Recommended Papers for the Epson P900.
Red River supports the P900 with free printer profiles and expert technical support.
Related Posts and Information
Last updated: May 05, 2025


