How To Make Perfect Prints In 5 Easy Steps
By ARTHUR H. BLEICH
Outputting high quality inkjet prints involves many variables and choosing the right ones can be confusing, to say the least. This post will set you on the right track by giving you a quick guide to getting prefect prints.
1. Run A Nozzle Check On Your Printer
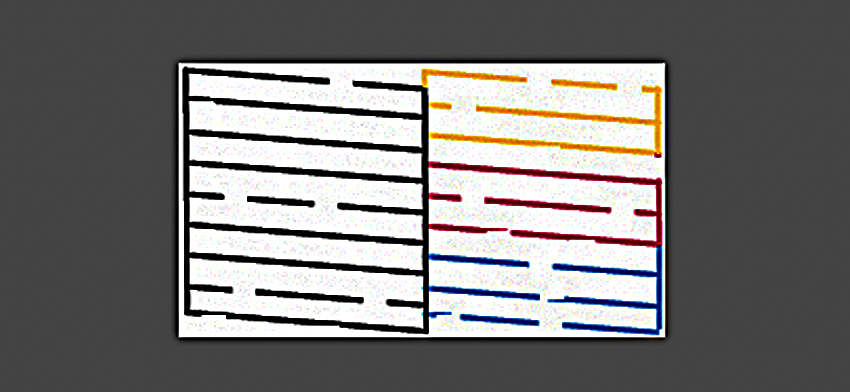
If any of your printer’s ink nozzles are clogged, your prints may look washed out, have horizontal streaks, or be missing colors. To perform a printer nozzle check, you can use either the printer's built-in Setup or Maintenance control panel or the software utility on your computer. You can run these checks using plain paper.
If there are any gaps in the test pattern (see image above), run the printer through one or more cleaning cycles (if needed), checking the nozzle pattern between each. Nozzles can become clogged if the printer is not used regularly or the humidity is low, causing ink to clog them. Some printer manufacturers use Teflon on their print heads to try to solve this problem, but the only way to confirm that the print head is not clogged is to run this test.
2. Make Sure Your Monitor Accurately Displays Your Image
Your printer uses your original image for color and other information when printing your photo. It couldn’t care less how that image looks on your monitor. If your monitor is not accurately displaying the information in your image file, you will never get satisfactory results.
Here’s why. Let’s say you’ve taken a portrait of someone, but your monitor displays it with a greenish cast. You then correct that in your imaging program and print it out. Whoops! Now the face is too red. How did that happen? Simple. Your monitor was not displaying the colors in your image file correctly. In fact, the face might have had perfect color, but your monitor was displaying it on the green side. So when you corrected it, you actually changed the original file from perfect to a red cast.
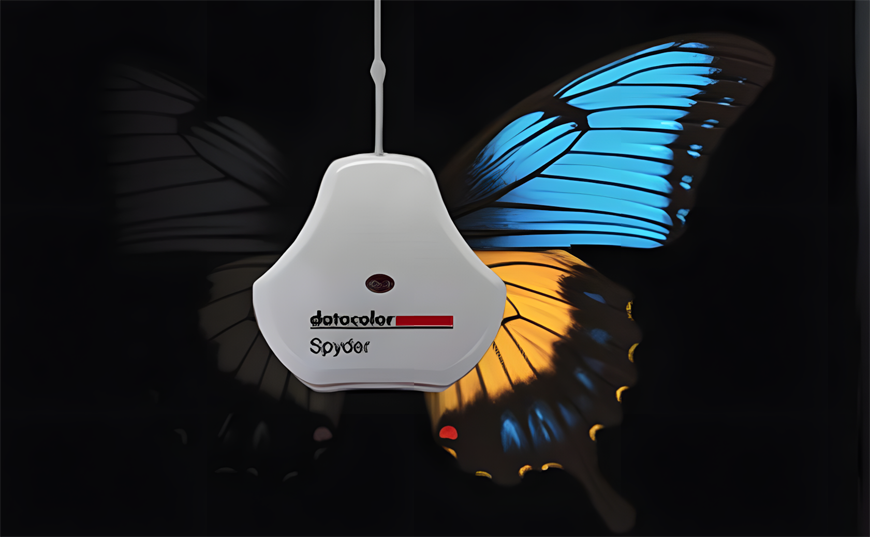
You can waste a lot of paper trying to fix the print by trial and error, or you can purchase a monitor calibrator (see image above and Resources below) and take a few minutes a month to hang it over your monitor screen so it can go through its paces to keep your monitor colors in sync with your original image. In the meantime, you should print some color test patterns available online and compare them to what’s displayed on your monitor to see if they match.
3. Images You Print Must Have Adequate Resolution
Lack of adequate resolution is usually the biggest killer of high-quality print output. Digital images are composed of tiny, square pixels. When they are enlarged too much, they become noticeable (pixelate), causing jagged lines, blocky shapes, and loss of fine detail. You cannot get good prints unless your images have enough pixels to produce a smooth, sharp image at the size you've chosen. How many pixels? 300 pixels per inch (PPI) is usually sufficient for printed images up to 16x20 inches and sometimes even larger.
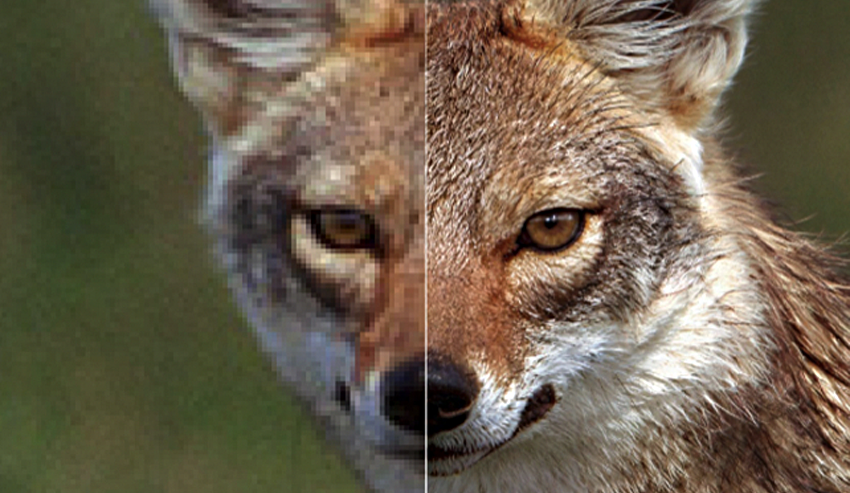
Your imaging program lets you change the size of your image by resizing or resampling it. You can try resizing your image to a larger size using the number of pixels it already has. If your monitor (or print) shows pixelation at your selected size, try resampling it. Your program will then use an algorithm to add additional pixels to the image, increasing its resolution. This solution is usually adequate for most moderately enlarged photos. But if that still isn’t satisfactory, AI upscaling software will usually do the trick. The image below shows a low-resolution portion on the left and another portion on the right that has been upscaled to provide sufficient pixels for a good print. (see Resources below).
4. Paper Profiles Can Give You More Accurate Color
Paper profiles (also known as ICC profiles)can help you make a better match between what you see on your screen and the specific paper type you’re using. Different paper surfaces, such as glossy, matte, and canvas, absorb ink and reflect light differently. Even the same surfaces produced by different manufacturers can have different characteristics.
If you want consistent results, you can easily install profiles for the papers you use most and then select them in your imaging program’s print menu prior to printing. Red River Paper offers free paper profiles for use on a multitude of printer models. They're easily downloaded from their website for use with your specific printer. (see Resources below.)
5. Choose The Correct Output Settings
Choosing the correct output settings on your imaging program can make a big difference in your print. Using Photoshop as an example (most other image programs are similar), here are suggested settings for maximum print quality. NOTE that they may be found in different locations on different printer menus and may be named slightly differently. If you need to, use the Web to get more detailed information about where to find these settings for your printer. model.
IF YOU USE ICC PAPER PROFILES: In the Color Management menu, select Photoshop Manages Colors and select the specific ICC profile for the paper you are using from the drop-down menu.
IF YOU DO NOT USE PAPER PROFILES: In the Color Management menu select Printer Manages Colors.
Image Resolution: 300 PPI (sometimes incorrectly referred to as DPI) is the standard for high-quality prints. For your information, PPI stands for pixels per inch in your image. DPI (Dots Per Inch) refers to the number of circular ink drops-per-inch required to reproduce those pixels. So, for example, selecting "Draft" quality outputs prints with fewer Dots-Per-Inch, and "Super Fine" with the most.
Color Space: Work in Adobe RGB (1998) for a wider color gamut, which most inkjet printers can output. However, some photographers prefer the color output of sRGB. Print the same image using both, and decide for yourself. Then make it your default for subsequent prints. NOTE: If your monitor gives you color space options, select the same one you’ve chosen for your prints.
Rendering Intent: "Relative Colorimetric" is usually best for photos.
Black Point Compensation: Make sure this is checked to insure good shadow detail.
Print Quality: Printers usually offer four levels of print quality. When set to the highest level, you will use more ink, it will take more time to print, and image improvement may not be noticeable compared to the next lower setting. So make a test print at each setting and decide for yourself which to use on a regular basis.
Once you make these five steps part of your workflow, you’re on your way to making beautiful prints. And you’ll be surprised at what your inkjet printer can do once it gets the right instructions.
RESOURCES:
Learn about basic free AI upscaling software
Learn more about Topaz professional grade upscaling software
Read more about using paper profiles
Original Publication Date: March 02, 2026
Article Last updated: March 04, 2026
Related Posts and Information
Categories
About Photographers
Announcements
Back to Basics
Books and Videos
Cards and Calendars
Commentary
Contests
Displaying Images
Editing for Print
Events
Favorite Photo Locations
Featured Software
Free Stuff
Handy Hardware
How-To-Do-It
Imaging
Inks and Papers
Marketing Images
Monitors
Odds and Ends
Photo Gear and Services
Photo History
Photography
Printer Reviews
Printing
Printing Project Ideas
Red River Paper
Red River Paper Pro
RRP Products
Scanners and Scanning
Success on Paper
Techniques
Techniques
Tips and Tricks
Webinars
Words from the Web
Workshops and Exhibits
all
Archives
June, 2026
May, 2026
April, 2026
March, 2026
February, 2026
January, 2026
November, 2025
September, 2025
August, 2025
more archive dates
archive article list


Red River Paper Inc. All contents © 1997 - 2026. 8900 Ambassador Row, Dallas Texas, 75247. Prices, specifications, and images are subject to change without notice. Not responsible for typographical or illustrative errors. Website Terms & Conditions | Acceptable Use
Site Development & Maintenance: Phosphor Media, LLC