How to Add a Paper Size to a Printer
How To Get Your Printer To Output Custom Paper Sizes
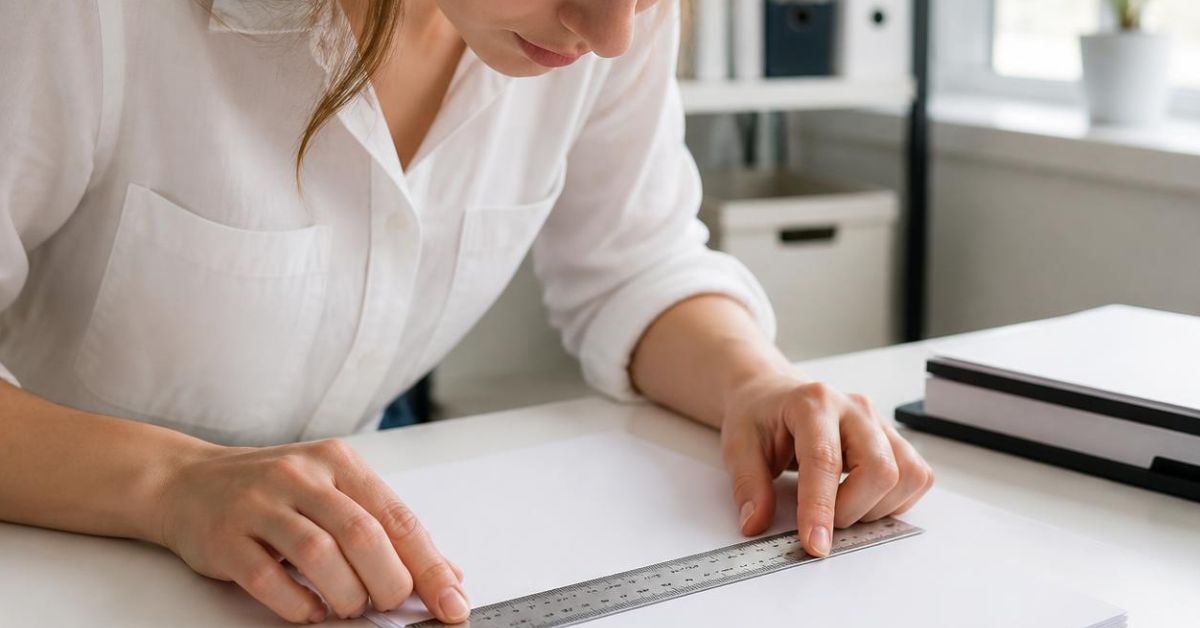
To add a paper size to your printer, open your printer's Printing Preferences or Page Setup settings, find the Paper Size menu, and select Custom, User Defined, or Manage Custom Sizes. Enter the exact width and height of the paper, save the new size, then select it in both your printer driver and the program you're printing from.
The exact menu names vary by printer brand, driver, operating system, and application. This guide covers the process you can use with most inkjet and photo printers.
Before You Add a Custom Paper Size
Before creating a new paper size, confirm three things:
- Measure the actual paper width and height.
- Verify that your printer supports that size.
- Make sure you have the manufacturer's full printer driver installed.
A printer cannot print a custom size simply because your computer allows you to create it. Every printer has minimum and maximum supported dimensions, and some paper trays or feed paths support different sizes than others.
For example, a printer may accept longer sheets through a rear or manual feed while restricting the same paper through the standard cassette.
Also, don't confuse paper size with paper or media type:
- Paper size tells the printer the physical dimensions of the sheet, such as 8.5 × 11 inches or 11 × 17 inches.
- Media type tells the printer what kind of paper you're using, such as glossy photo paper, matte paper, or fine art paper.
For the best print results, you usually need to set both correctly.
How to Add a Custom Paper Size to a Printer
The basic process is the same for most printers.
Step 1: Measure Your Paper
Measure the sheet from edge to edge.
Record the:
- Width
- Height or length
- Unit of measurement
For example, if you're printing on a 7 × 10-inch sheet, your custom size should normally be entered as:
Width: 7 inches
Height: 10 inches
Whether the shorter or longer dimension is entered first can depend on the driver and print orientation.
Step 2: Open Your Printer Settings
Open the printer's driver settings from your computer or from the program you're using to print.
Look for menus labeled:
- Printer Properties
- Printing Preferences
- Printer Settings
- Page Setup
- Paper Size
- Page Size
The exact wording depends on your printer.
Step 3: Find the Custom Paper Size Option
Open the Paper Size or Page Size menu.
Look for an option such as:
- Custom
- User Defined
- User-Defined Paper
- Custom Paper Size
- Manage Custom Sizes
- Define Custom Size
Epson drivers, for example, commonly use User Defined, while Canon drivers may provide a Custom paper size option.
Step 4: Enter the Paper Dimensions
Enter the exact width and height of your paper.
If your printer software allows you to choose units, select either:
- Inches
- Millimeters
Some drivers show the minimum and maximum dimensions your printer supports. If the size you enter falls outside that range, the driver may reject it or prevent you from saving it.
Step 5: Name the New Paper Size
Give the paper size a recognizable name.
For example:
7x10 Photo Paper
or
13x19 Custom Sheet
Using a descriptive name makes it easier to find later, especially if you create several custom sizes.
Step 6: Save the Paper Size
Select Save, OK, or the equivalent option.
The new paper size should now appear with the printer's standard paper sizes.
Step 7: Select the New Size Before Printing
Creating a custom size doesn't necessarily select it automatically.
Before printing, return to your print settings and choose the custom size you just created from the Paper Size or Page Size menu.
Step 8: Set the Correct Paper Type
Next, select the media setting recommended for the paper you're using.
For photo printing, this setting can affect:
- Ink limits
- Print quality
- Color reproduction
- Paper feed behavior
- Drying characteristics
If you're printing on Red River Paper, use the recommended printer settings or ICC profile instructions for that specific paper whenever available.
Step 9: Choose the Correct Paper Source
If your printer has more than one feed path, select the one that supports your paper.
Depending on your printer, this may be called:
- Rear Tray
- Rear Feed
- Manual Feed
- Top Feed
- Cassette
- Fine Art Paper Feed
Custom, thick, or unusually sized photo papers are often restricted to specific feed paths.
Step 10: Match the Paper Size in Your Printing Application
The document or image you're printing should also use the correct paper size.
For example, if you've created a 7 × 10-inch custom size in your printer driver but Photoshop is still set to Letter 8.5 × 11, your print preview may show incorrect margins, scaling, or positioning.
Before printing, verify:
Application paper size = Printer paper size = Actual sheet size
That simple check prevents many custom-size printing problems.
How to Add a Custom Paper Size in Windows
On Windows, custom sizes may be created either directly through the printer manufacturer's driver or through Windows printer settings.
For most photo printers, start with the manufacturer's driver.
Method 1: Create the Size in the Printer Driver
- Open the image or document you want to print.
- Choose File > Print.
- Select your printer.
- Open Printer Properties, Properties, or Printing Preferences.
- Find Paper Size or Page Size.
- Select Custom, User Defined, or a similar option.
- Enter the width and height.
- Enter a name for the new size if prompted.
- Save the custom size.
- Select it as your current paper size.
- Set your media type, print quality, and paper source.
- Print.
For example, Epson's Windows driver instructions use User Defined under the Size setting, followed by a paper-size name, units, width, and height. Canon drivers similarly provide a Custom option for defining dimensions.
Method 2: Create a Windows Custom Form
Some printer configurations use Windows-defined forms rather than creating the size directly inside the driver.
The general process is:
- Open Windows printer settings or Control Panel.
- Open the printer management area.
- Access Print Server Properties.
- Open the Forms tab.
- Choose the option to create a new form.
- Enter a name for the paper size.
- Enter its width and height.
- Save the form.
- Open your printer's Printing Preferences.
- Look for the newly created size in the paper-size list.
Windows supports printer forms through Print Server Properties, although whether a custom form appears or works correctly depends on the installed printer driver.
For photo printers, using the manufacturer's driver is generally preferable because it exposes the printer-specific paper, feed, quality, and color-management controls you need.
How to Add a Custom Paper Size on a Mac
macOS has a built-in Manage Custom Sizes feature that works from the Print or Page Setup dialog.
Apple's current process is straightforward.
Step 1: Open the Print Dialog
Open the image or document you want to print.
Choose:
File > Print
Depending on your application, you may also be able to use:
File > Page Setup
Step 2: Open the Paper Size Menu
Find the Paper Size dropdown.
Select:
Manage Custom Sizes
Step 3: Create a New Size
Click the + button.
A new custom paper size will appear.
Step 4: Name the Paper Size
Replace the default name with something descriptive.
For example:
Red River 7x10
Step 5: Enter the Width and Height
Enter your paper's exact dimensions.
Apple allows you to specify the width and height directly when creating the custom paper size.
Step 6: Check the Non-Printable Area
You may also see settings for the printer margins or Non-Printable Area.
These represent areas near the edges where the selected printer cannot normally place ink.
You can often choose your printer from the menu so macOS uses the printable-area information associated with that printer.
Do not automatically set every margin to zero unless you're intentionally using a supported borderless printing mode.
Step 7: Save the Size
Click OK.
The new size should now appear in the Paper Size menu for compatible printers and applications.
Canon's macOS instructions use the same general workflow: Paper Size > Manage Custom Sizes > + > enter a name, dimensions, and margins.
How to Add a Paper Size in Photoshop
If you're printing photos from Adobe Photoshop, the printer driver still controls which physical paper sizes your printer supports.
The workflow is generally:
- Open your image in Photoshop.
- Choose File > Print.
- Select your printer.
- Open Print Settings.
- Open the printer's Paper Size or Page Size menu.
- Select your existing custom size or create a new one through the driver.
- Return to Photoshop.
- Confirm the print preview.
- Set your print dimensions and positioning.
- Print.
If the custom paper size doesn't appear in Photoshop after you create it, close and reopen the Print dialog. In some cases, restarting Photoshop or the printer driver may be necessary before a newly created size appears.
How to Add a Paper Size in Lightroom
In Lightroom Classic, you typically define the physical sheet through Page Setup or the printer driver rather than creating the size directly in Lightroom's layout controls.
Use this sequence:
- Open the Print module.
- Click Page Setup.
- Select your printer.
- Select your custom paper size.
- If it doesn't exist, open the printer's custom-size controls and create it.
- Return to Lightroom.
- Configure your image cell and margins.
- Open Print Settings.
- Confirm the same paper size is selected in the printer driver.
- Choose the appropriate media type and print quality.
- Print.
The important distinction is that Lightroom's image or cell dimensions determine how large the photo prints on the page. They do not change the physical size of the sheet loaded into your printer.
What If the Custom Paper Size Doesn't Appear?
If you've created a paper size but can't select it, work through these checks in order.
1. Confirm the Printer Supports the Dimensions
Your printer has physical minimum and maximum paper dimensions.
If your custom size falls outside that range, the driver may:
- Reject the size
- Hide it
- Change it automatically
- Prevent printing
Custom-size limits can also vary by paper source.
2. Check the Paper Feed
Switch to the correct:
- Rear tray
- Manual feed
- Fine art feed
- Roll feed
if your printer requires one for that size.
A size that isn't available with Cassette selected may become available when Rear Feed is selected.
3. Install the Manufacturer's Printer Driver
This is one of the most important troubleshooting steps.
A basic or generic printer driver may not expose all of your printer's available paper sizes, custom-size controls, media settings, or color-management options.
Download and install the current driver provided by your printer manufacturer for your exact model.
After installation:
- Remove or stop using the generic printer instance if necessary.
- Select the printer that uses the manufacturer's driver.
- Reopen your printing application.
- Check the Paper Size menu again.
4. Check Your Media Type
Some printers restrict combinations of:
Paper size + media type + paper source
If a custom size becomes unavailable after choosing a particular media type, the driver may not support that combination.
Try selecting the paper size first, then select the appropriate media setting and see whether the driver reports a conflict.
5. Check Borderless Printing
Borderless printing usually supports fewer paper dimensions than normal printing.
A printer may support a custom paper size with margins while refusing to print that same custom size borderlessly.
If the size disappears when you turn on Borderless, disable borderless printing and check again.
6. Restart the Application
If you created the paper size while Photoshop, Lightroom, or another application was already open, close and reopen the print window.
If necessary, restart the application.
7. Restart the Printer or Computer
Printer drivers sometimes need to reload before newly created settings become available throughout the operating system.
Why Won't My Printer Accept a Custom Paper Size?
The most common reason is that the requested dimensions are outside the printer's supported range or aren't supported by the currently selected feed path.
Other common causes include:
- Generic or incomplete printer driver
- Unsupported borderless dimensions
- Incorrect paper source
- Conflicting media type
- Incorrect page orientation
- Application paper size doesn't match printer paper size
- Width and height entered in the wrong orientation
- Printer firmware or driver limitations
Start by checking the dimensions against your printer's specifications.
Why Is My Printer Cutting Off Part of the Image?
If your image is being clipped, compare these four settings:
1. Actual paper size
The physical dimensions of the sheet loaded into the printer.
2. Driver paper size
The size selected under Printer Properties or Print Settings.
3. Application page size
The paper dimensions selected in Photoshop, Lightroom, Preview, Word, or another application.
4. Image print size
The dimensions of the actual photo or artwork.
If any of these conflict, the printer may crop, scale, reposition, or clip your image.
Also remember that most printers have a non-printable margin unless you're using a supported borderless mode.
Why Is My Printer Scaling the Image?
Automatic scaling can occur when the document size doesn't match the paper size.
Check your print dialog for options such as:
- Fit to Page
- Scale to Fit
- Shrink to Fit
- Fit
- Fill
- Scale
If you need an exact-size photo print, disable automatic scaling and confirm that the application's print dimensions are correct.
For example, a 5 × 7-inch photo should be set to print at 5 × 7 inches, not automatically enlarged to fill an 8.5 × 11-inch sheet.
Can You Print on a Custom Paper Size?
Yes, if your printer supports the width, length, thickness, media type, and feed method you're using.
Creating a custom size in software does not override your printer's physical limitations.
Always check your printer's manual or Red River Paper's printer-specific instructions if you're using an unusual size, thick photo paper, fine art paper, greeting card stock, or a long panoramic sheet.
Can You Add Any Paper Size to a Printer?
No.
Every printer has a supported size range.
For example, your software may allow you to type a 4 × 20-inch custom size, but that doesn't mean your printer can physically feed or print that sheet.
The printer driver normally restricts custom dimensions to sizes the hardware supports. Epson's custom-size interface, for example, displays allowable ranges alongside the width and height fields.
Can You Save a Custom Paper Size for Later?
Yes. Most modern printer drivers and macOS allow custom paper sizes to be named and saved.
Instead of entering the dimensions every time, create names such as:
- 5x7 Photo
- 7x10 Card
- 11x14 Photo
- 12x18 Photo
- Custom Panorama
You can then select the saved size from your Paper Size menu whenever you print on that format.
Should Paper Size Match the Size of the Image?
Not necessarily.
Paper size refers to the sheet. Print size refers to the image printed on that sheet.
For example, you could print an:
8 × 10-inch image
on an:
8.5 × 11-inch sheet
The printer should therefore be configured for 8.5 × 11-inch paper, while your application controls the image at 8 × 10 inches.
This distinction is especially important when printing photos with borders.
What Paper Size Should You Select for Borderless Printing?
Select the exact physical paper size with its corresponding Borderless setting if your printer offers one.
For example, a driver might provide separate entries such as:
8.5 × 11 in
and
8.5 × 11 in (Borderless)
Only choose the borderless version if:
- Your printer supports borderless printing at that size.
- Your paper is actually that size.
- You want ink to print all the way to the sheet edges.
Borderless printing normally enlarges the image slightly beyond the edge of the sheet to prevent white slivers, so some edge cropping is expected.
Custom Paper Size Troubleshooting Checklist
If your custom size still isn't working, check the entire print path:
- Measure the physical sheet again.
- Confirm the printer supports those dimensions.
- Confirm the correct manufacturer printer driver is installed.
- Create or select the correct custom paper size.
- Choose the correct paper source.
- Select the recommended media type.
- Make sure your application uses the same paper size.
- Check portrait versus landscape orientation.
- Disable Fit to Page or automatic scaling when exact dimensions matter.
- Turn off borderless printing if the custom size isn't supported borderlessly.
- Check the print preview before printing.
Adding a Custom Paper Size: The Key Rule
For reliable custom-size printing, make sure these three values agree:
The size of the sheet loaded in the printer = the paper size selected in the printer driver = the paper size selected in your application.
Once those settings match, choose the correct media type, paper source, print quality, and color-management settings for your paper.
If your printer handles custom paper sizes differently, use the Red River Paper printer-specific setup guide for your exact printer model for the correct driver menus, feed path, supported sizes, and recommended photo paper settings.
Original Publication Date: August 14, 2026
Article Last updated: August 26, 2026
Related Posts and Information
Categories
About Photographers
Announcements
Back to Basics
Books and Videos
Cards and Calendars
Commentary
Contests
Displaying Images
Editing for Print
Events
Favorite Photo Locations
Featured Software
Free Stuff
Handy Hardware
How-To-Do-It
Imaging
Inks and Papers
Marketing Images
Monitors
Odds and Ends
Photo Gear and Services
Photo History
Photography
Printer Reviews
Printing
Printing Project Ideas
Red River Paper
Red River Paper Pro
RRP Products
Scanners and Scanning
Success on Paper
Techniques
Techniques
Tips and Tricks
Webinars
Words from the Web
Workshops and Exhibits
all
Archives
August, 2026
July, 2026
June, 2026
May, 2026
April, 2026
March, 2026
February, 2026
January, 2026
November, 2025
more archive dates
archive article list


Red River Paper Inc. All contents © 1997 - 2026. 8900 Ambassador Row, Dallas Texas, 75247. Prices, specifications, and images are subject to change without notice. Not responsible for typographical or illustrative errors. Website Terms & Conditions | Acceptable Use
Site Development & Maintenance: Phosphor Media, LLC