How To Create A Dramatic Panorama From A Single Image
_1783133795.png)
By ARTHUR H. BLEICH
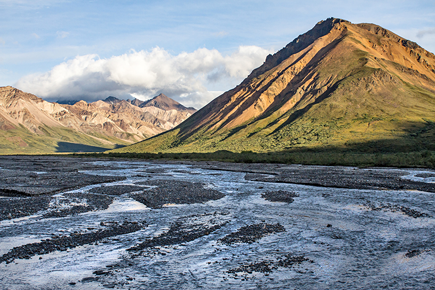
Panoramic images made from several photos stitched together are impressive, but creating them involves a lot of time and effort. Here’s an easier way requiring only a single photo and a few simple settings in your imaging program. First though, let’s get into the differences between the two techniques.
MULTI IMAGE VS. SINGLE IMAGE PANORAMAS
Producing traditional panoramas requires shooting multiple mages in portrait mode tat overlap each other by 25% to 50% so they can be accurately matched before being stitched together by special panorama software.
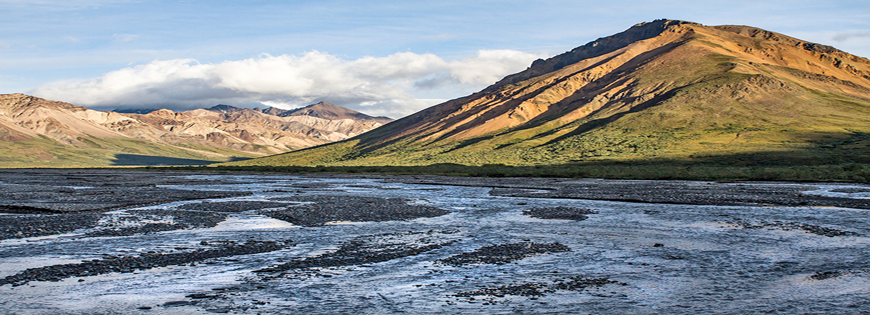
A single-image pano requires only a one image to produce a result equivalent to a three- to-five shot conventional panorama.
However, each section of an image used to produce a conventional panorama retains its original resolution. So the final composite image, even if it’s large, usually has enough resolution (pixels) to produce an acceptably sharp result.
Single image panoramas, on the other hand, lose resolution as they are stretched and may need an infusion of additional pixels. Your imaging program can resample the image and add pixels to improve its resolution which can improve the quality if you want to print large images. It usually does a good job on moderate enlargements, but it can it can fall short if you want to print larger images. Not to worry. A free, easy-to-use AI app can remedy that and later on I’ll show you how to use it if you need to.
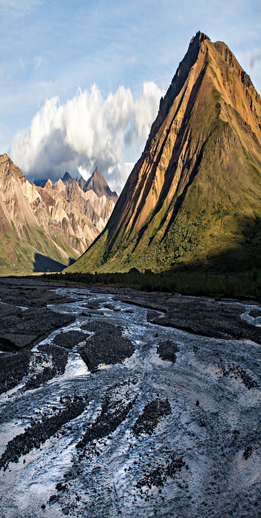
Finally There’s another difference between the two panorama methods. A single image pano may look slightly elongated but that can contribute to its visual impact, much the same as lenses of different focal lengths do when shooting images in conventional photography.
BEST SUBJECTS FOR SINGLE-SHOT PANOS
Landscapes, seascapes and other vistas look best as single-image panos. But don’t let that deter you from shooting other subjects or objects or even experimenting with images you’ve already shot. You can even achieve some extreme distortion which can really be eye-catching when you use this technique "to boldly go where no one has gone before. "
SHOOTING A SINGLE PANO IMAGE
1. If your camera gives you the option, set it to the highest resolution it is capable of.
2. Use a shutter speed of 1/125 sec or faster unless your camera is on a tripod, in which case, slower speeds are acceptable if the subject is static.
3. Hold your camera horizontally (in landscape mode). frame your image and shoot it.
4. Shoot several images so you can later choose the sharpest one to print.
5. If your camera has an anti-shake option, turn it ON if you are hand-holding it. If you use a tripod make sure the Anti-Shake option is OFF unless your camera manual says it’s okay to leave it on. NOTE: Most anti-shake settings get confused if the camera is already on a steady support and can actually produce shake rather than prevent it.
POST PROCESSING YOUR PANORAMA
NOTE: I’ve used Photoshop Elements. Other programs work the same way but may have slightly different names for their selections.
1. Open your shots and choose the best one.
2. Go to the TOP horizontal menu bar and choose Image > Resize. You’ll get a screen that looks like this:
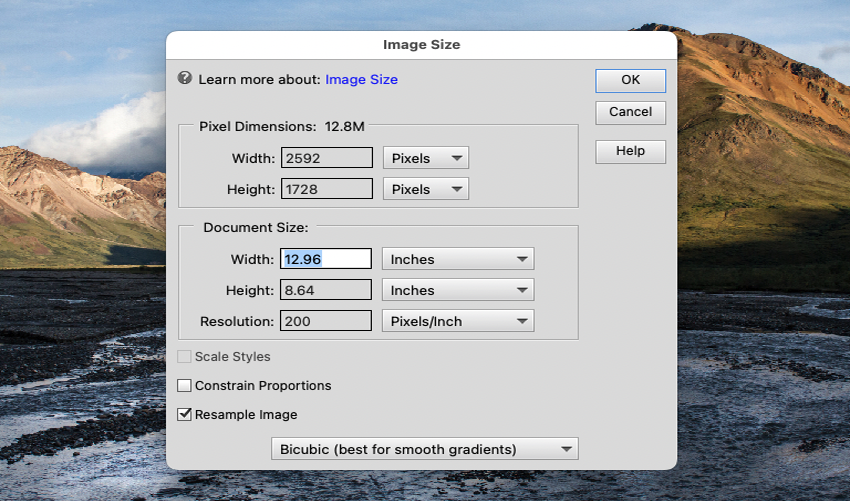
3. "Styles" and "Constrain Proportions" boxes should both be UNCHECKED.
4. Resample Image should be CHECKED.
5. Set the resolution in the range of 200-300 and enter the image size you want in pixels or inches. This will depend on the paper size you use. Red River has t two pano size papers that work well with desktop printers: 8.5 x 14 inches and 8.5 x 25 inches. (See Resourses below.) You may want to consider leaving a 1-inch border around your image.
6. Every desktop printer can use 8.5 by 14 inch paper which is Legal Size. Many can also use longer paper, the sizes of which can be entered iin the Custom Paper Size option. Check the manufacturer’s specs for the maximum paper length your printer can output, but first try an easier way to find out. Give Google your printer make and model and ask it for the maximum length of paper it can output. You'll not only get the answer, but instructions on how to set it up as a Custom Paper Size.
7. Resample the image to the size you have selected. Output a test print (or a section of your image on regular-sized photo paper) to see if its quality is satisfactory. If so, then print the entire image. NOTE: Using standard sized paper for testing will save you ink and paper costs.
NEED BETTER QUALITY? AI TO THE RESCUE!
If you find your image lacking in quality at the size you desire, it’s time to try Upscayl, a free AI app that’s simple and fast and will take your image into a whole new visual dimension. (See Resources Below.)
Read my blog post about Upscayl, download the app, and then let it go to work on your image to increase its resolution. It will add pixels and give much better definition to your image than your imaging program’s resampling can do. It can also increase the physical size of your image but you can then take it back into your imaging program and Resample it down to your desired size for printing.
NOTE: Most imaging programs can reduce image size quite well without loss of quality because it is easier for them to remove an over-abundance of existing pixels than to "guess" where to add new ones required to make an image larger.
HOW TO USE UPSCAYL
1. Open your image in Upscayle, select the Standard AI Model and set the enlargement value to 1. This will give your image a shot of pixels and other therapy while retaining its original size.
2. Take the image back into your imaging program and output a test print (or a section of the image on regular-sized photo paper) to see if its quality is satisfactory and, If so, print the entire image.
However, If the image quality is still not satisfactory, try enlargement factors of 2, 3 or 4 (which insert more pixels for higher resolution).. NOTE: as you use higher settings the image will become larger. This is normal. Then do the following:
1. Open the image in your imaging program.
2. If necessary, use the Resample option to adjust it to it to your desired printing size. Select the "Bicubic Sharper (best for reduction)” option.
3. Remember to switch your resampling selection back to “Bicubic Smoother (best for enlargement)” (or whatever other choice you usually have it set to) after you’ve adjusted your image to its final size and resolution.
4. CHECK the Constrain Proportions box after you’ve e finished with your panorama session and also if you make any size changes to your image after you have chosen the size you want to print it at. Otherwise it will not keep the same proportions.
The post-processing steps are pretty straightforward, but depending on the image(s) you work from, you may have to experiment a bit. But once you get into the groove, the results will really impress you– and anyone else who sees the exquisite results you can obtain with Single Image Panoramas.
RESOURCES:
The free Upscayl app and how to use it.
https://www.redrivercatalog.com/blog/upscale-your-images-wit...
Printing large images on small Desktop printers.
https://www.redrivercatalog.com/blog/get-bigger-prints-from-...
Red River's Pano Papers
https://www.redrivercatalog.com/browse/85-x-25-photo-paper-f...
Original Publication Date: July 06, 2026
Article Last updated: July 07, 2026
Related Posts and Information
Categories
About Photographers
Announcements
Back to Basics
Books and Videos
Cards and Calendars
Commentary
Contests
Displaying Images
Editing for Print
Events
Favorite Photo Locations
Featured Software
Free Stuff
Handy Hardware
How-To-Do-It
Imaging
Inks and Papers
Marketing Images
Monitors
Odds and Ends
Photo Gear and Services
Photo History
Photography
Printer Reviews
Printing
Printing Project Ideas
Red River Paper
Red River Paper Pro
RRP Products
Scanners and Scanning
Success on Paper
Techniques
Techniques
Tips and Tricks
Webinars
Words from the Web
Workshops and Exhibits
all
Archives
August, 2026
July, 2026
June, 2026
May, 2026
April, 2026
March, 2026
February, 2026
January, 2026
November, 2025
more archive dates
archive article list


Red River Paper Inc. All contents © 1997 - 2026. 8900 Ambassador Row, Dallas Texas, 75247. Prices, specifications, and images are subject to change without notice. Not responsible for typographical or illustrative errors. Website Terms & Conditions | Acceptable Use
Site Development & Maintenance: Phosphor Media, LLC