How to Get Big, Beautiful Prints From Scans

Billions of old photos slumber in storage places, dreaming of being scanned awake to share their precious memories. You can easily turn those vintage snapshots, negatives or slides into big, beautiful, inkjet prints. Here's how.
BY ARTHUR H. BLEICH
A SCANNER IS JUST A CAMERA
Simply put, a scanner is a camera that takes pictures of documents, artwork, prints or slides and converts them to a digital files that can be viewed on devices like computers, tablets, TVs or smartphones. Best of all, you can also print them, and at almost any size of your choice.
The scanner is controlled by an app that that lets you select various options prior to scanning— the most important of which is the resolution (quality) at which the image will be scanned. This value is in dots-per-inch (dpi) and determines how big your photo can be printed from that scan. The higher the dpi, the more detail the scanner will capture, and the bigger the pictures can be printed without loosing quality.
Why not just crank up the dpi resolution setting to the maximum for everything? Because there are some trade-offs you have to be aware of. Higher resolutions require longer scanning time per photo and produce larger file sizes. If you're scanning lots of photos and/ or have limited memory storage on your device, these need to be considered.
Next, it doesn't matter how small your image-to-be-scanned is. Even if it's a tiny 2x3-inch snapshot, or an even smaller 1x1.5-inch color slide, as long as you select a high enough dpi resolution, you'll be able to print it many times larger than its original size. Later on, I'll give you simple formula and some guidelines that make it easy to set that dpi resolution for the best results at whatever size you'd like your printed image to be.
Finally, make sure whatever you're going to scan is clean and bear in mind that if the original you want to scan is unsharp or has artifacts, scanning will not make it better; you'll need to do some subsequent work in an imaging program to improve it, just as you would with any photo.
THE FLATBED SCANNER
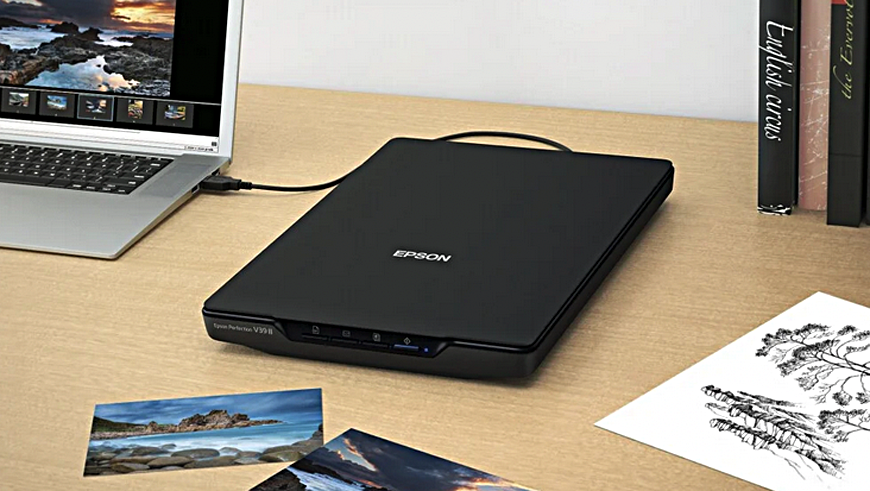
The most popular scanner is the Flatbed. It's sold as a standalone or included with many all-in-one printers.t will scan black and white and color prints and some may have attachments to allow slide scanning, though if that's your main purpose there are dedicated slide and negative scanners that make it easier and faster. Flatbed prices vary widely and you'll want to choose one that can scan at optical resolutions up to 4800 dpi. The Epson Perfection V39 II has been refined through the years and costs about $120 at Amazon.
ABOUT RESOLUTION: OPTICAL, INTERPOLATED, DPI AND PPI
Optical resolution is the true measure of a scanner's ability to capture detail, while interpolated resolution artificially adds pixels to create the appearance of higher resolution. When choosing a scanner focus on the optical resolution, as it determines the true scanning quality. Interpolated resolution is more of a marketing gimmick than a useful feature for serious photo scanning. If the scanner's specs mention two resolution numbers, the highest value is usually interpolated.and the other the maximum optical resolution.
We've discussed dpi (dots per inch) briefly but what about ppi (pixels per inch)? Both measure resolution and are often incorrectly used interchangeably. DPI is really a printing term that denotes the number of round ink dots a printer is squirting onto a square inch of inkjet paper—the more, the better the image quality. When you choose a “print quality†setting in you printer menu such as, Draft, Normal, Fine, Quality you are telling your printer how many of dots of ink per inch (DPI) you want it to use— the fewest at Draft (usually to save ink) vs. the most dots at the highest Quality setting on your printer to get the most detail in images.
PPI (pixels per inch) is also a measure of resolution but refers to the number of square pixels occupying a linear inch on a image. Lack of an adequate number of pixels per inch in photo, causes the pixels to stretch out and become bigger to fill the available space. This eventually makes them visible and degrades the image quality.
Since scanning produces digital mages consisting of pixels, the correct designation for scan resolutions is ppi since both scans and prints use pixels and not dots as resolution measurements. Be that as it may,you will find scanner resolution designated as either dpi or ppi. For flatbed scanning —right or wrong— they are used interchangeably,
THE SLIDE AND NEGATIVE SCANNER
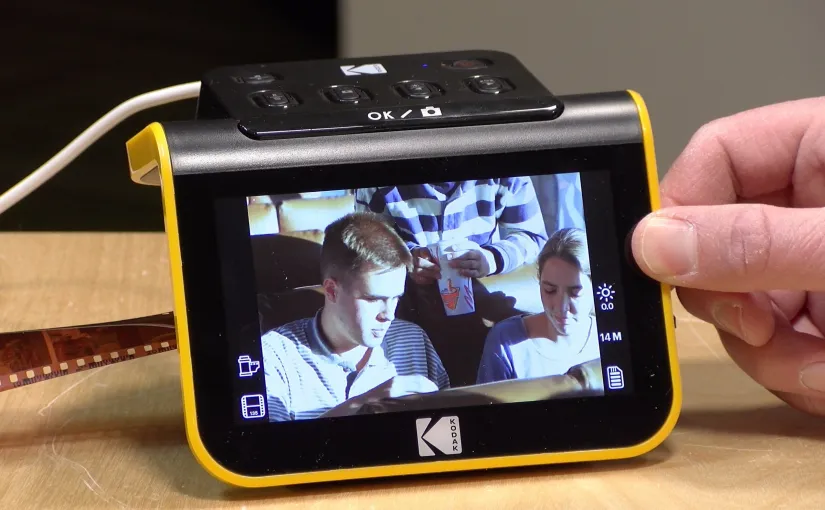
They are easy to use, fast, have preview screens and will give you good 8x10 blow-ups and maybe a bit more. .But with a little Photoshop work and some magic from A.I. upscaling software the sky's the limit (well, Almost). The popular Kodak Slide N Scan stores its scans on a memory card (not included) which can then be uploaded to your computer. It scans multiple sizes of color and black and white film negatives, 35mm slides and more. Its optical resolution is 13 Megapixels which can be interpolated to 22 Megapixels. $189 at Amazon. Image by Lon Seidman.
GETTING STARTED WITH SCANNING
If you're new to scanning, remember to keep whatever you intend to scan clean and dust-free. This is especially important when scanning slides and negatives. The easiest way to accomplish this by dusting them off with a soft, anti-static brush or them a short burst of compressed air from about a foot or more away.
Below are some basic setting options you'll find on flatbed scanner software and suggested choices. NOTE: Because 35mm slide and negative image areas are so small (1 x 1.5 inches), fewer resolution options are required on slide/negative scanners and these are specified in Megapixels— indicating the amount of detail (in pixels) that will be captured from the image area.
TYPICAL SCANNER SETTINGS
- Scan Settings: Photograph.
- Mode: Photo Mode.
- Document Source: Scanner.
- Document Size: Choose nearest size or choose Letter and crop the excess later.
- Image Type: Color or Black & White.
- Resolution: Indicate your DPI #.
- Image Format: JPEG, PDF, PNG or other.
- File Name: Give your scan file a name..
- Folder: Choose a destination folder or create a new folder.
When finished with your settings click on the Preview button to see how it will look. If you're satisfied, execute the actual Scan. The image will then be converted to pixels and becomes an file you can open in an imaging program, make further adjustments to, if desired, and then output on your printer.
If you're new to scanning I advise scanning several different sizes of test images at different dpi resolutions, print them out and then compare them. This will show you how various dpi settings can affect the quality of your final prints.
THE MOBILE SMARTPHONE SCANNER

Mobile scanners use smartphones to scan35mm slides and negatives. . They are inexpensive and come with scanning apps for your phone. The problem with most of them is that the camera lens must be positioned precisely over a small hole in the device and with some models of phones that sometimes creates problems. The KLIM K2 offers more flexibility and includes an internal backlight and long-lasting batteries. At Amazon for about $20.
CALCULATING SCANNING RESOLUTIONS
Here's a useful formula for choosing the proper flatbed scanner dpi resolution for whatever size image you want to print. In this case an 8x10 image that has a print resolution of 300ppi (pixels-per-inch) is desired from a 4x5 inch scan.
The dpi to set for scanning equals the final image width divided by the original image width multiplied by the final ppi desired. So if you want to print a quality 8×10 inch enlargement at 300 ppi from a 4 x 5 inch photo, divide 8 (the final image width) by 4 (the current image width) which gives you 2. Then multiply 300 by 2 which equals 600—the dpi setting to use for scanning.
If you're math averse, here are some general rules of thumb for flatbed scanning:
- For smaller photos (wallet-sized or smaller), a higher DPI like 600-1200 is recommended to capture enough detail for potential enlargements or fine-detail preservation.
- For standard photos (like 4x6 or 5x7), a resolution of 300-600 DPI is generally sufficient.
- For photos smaller than 4x6, use 600 DPI or more.
- If you plan on significant enlargements or extensive photo restoration, higher DPI settings (like 600 or more) are beneficial.
And here's some resolution information for 35mm slide or negative scanning:
- Slides and negatives should be scanned at 3,000 to 4,000 DPI. To achieve that resolution a 35mm slide o rnegative scanner should o be capable of scanning at 13.5 to 18.5 megapixels. Scanning at higher resolutions may actually degrade image quality by picking up excessive film grain or other artifacts.
ULTRA SIMPLICITY: SCAN WITH A LIGHT PAD

Laugh, you may, but it works! And you can scan slides and black & White and color negatives of any size—which might be a good reason to have one around in case you need to do an occasional 2-1/4 square or 4x5 negative or color transparency.Comes with 3 light settings and is USB-powered. Dgodrt Light Pad. $19 at Amazon.
There are companies that offer scanning for a fee, but you'll find that the price can quickly add up to the cost of a good scanner that will give you total control over your own photos and guarantee that your priceless images won't get lost or damaged. And this can happen, especially if the scanning is outsourced to a sub-contractor overseas where labor is cheaper.
Finally, you may want to consider offering scanning as a local service. With disasters happening regularly throughout the country, people are becoming aware of how easy it can be to lose their valuable photo memories. If you are a photographer, this could be an excellent sideline service to promote and develop. You can also offer to print some of the results which will produce additional income.
RESOURCES:
RELATED POSTS YOU MAY ENJOY:
Upscale Your Images With A Free A.I. App
Your Scanner Invites You To Create Exquisite Images
Original Publication Date: August 06, 2025
Article Last updated: August 06, 2025
Related Posts and Information
Categories
About Photographers
Announcements
Back to Basics
Books and Videos
Cards and Calendars
Commentary
Contests
Displaying Images
Editing for Print
Events
Favorite Photo Locations
Featured Software
Free Stuff
Handy Hardware
How-To-Do-It
Imaging
Inks and Papers
Marketing Images
Monitors
Odds and Ends
Photo Gear and Services
Photo History
Photography
Printer Reviews
Printing
Printing Project Ideas
Red River Paper
Red River Paper Pro
RRP Products
Scanners and Scanning
Success on Paper
Techniques
Techniques
Tips and Tricks
Webinars
Words from the Web
Workshops and Exhibits
all
Archives
June, 2026
May, 2026
April, 2026
March, 2026
February, 2026
January, 2026
November, 2025
September, 2025
August, 2025
more archive dates
archive article list


Red River Paper Inc. All contents © 1997 - 2026. 8900 Ambassador Row, Dallas Texas, 75247. Prices, specifications, and images are subject to change without notice. Not responsible for typographical or illustrative errors. Website Terms & Conditions | Acceptable Use
Site Development & Maintenance: Phosphor Media, LLC