How To Create A Handmade Photo Book

By ARTHUR H. BLEICH
In the early 1960s, L.A. pop artist Ed Ruscha hit the road to visit his mother in Oklahoma City and shot pictures of 26 gas stations along Route 66. When he returned from his trip, he assembled them to make a 5x7 inch, 48-page photo book and then had a local shop print out an initial 300 copies.
As it turned out, Twentysix Gas Stations spawned a genre of personal art and photography books that was embraced by the art world and is still going strong. In all, Ruscha had 3,900 books printed, sold them for $3.50 a copy, and made $13,000. In today's money, that's about $136,000. Stunned by his book's success, Ruscha quipped that he aimed to be “the Henry Ford of bookmaking.â€
LET OUR CREATIVITY SHINE
Although you may make some income from your handmade book, it's unlikely you'll even come close to Ruscha's haul. But if you want a creative endeavor that will provide great personal satisfaction and a unique opportunity to showcase your work, it's well worth looking into.
Today's photographers and artists are creating beautiful handmade books using inkjet printers and an extraordinary variety of beautiful Red River papers that you'll never see in traditionally published books. So if, like the master artisans of old, you want to have complete control of your creation from start to finish, handcrafting your own book will give you that satisfaction–and at practically no cost, since you already own the most important tool you'll need…an inkjet printer.
ILLUSTRATING YOUR PHOTO BOOK
You'll probably want to illustrate your book with your own images, but that doesn't have to be a limitation. You can do handmade books on any subject that you or your intended recipient(s) might be interested in. For birthday gift you might put together a compilation of photos of important events in their lives. All holidays are fair game for handcrafted book gifts…much more impressive than the usual alternatives. You can do a children's book or illustrate your favorite poems or quotes of others. Or how about a book about a little-known historical event? Subject matter is unlimited, as are images.
WHERE TO FIND FREE IMAGES AND ARTWORK
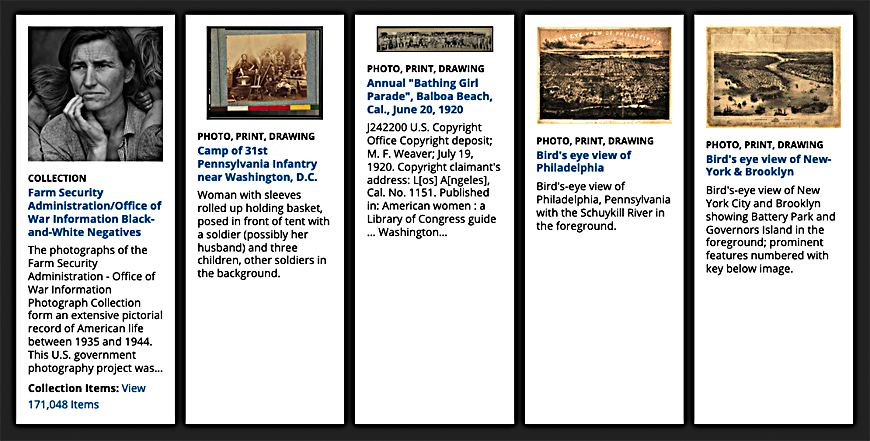
The web has many sites that offer free photos, but the one of the best is the Library of Congress. Its photo collections are extensive and many are available at various resolutions. Included are a wide range of subjects that have been photographed or painted in or about America, including those that have been produced by government agencies or contractors. A huge number are in the public domain, which means they can be used for any purpose (even commercially) at no charge.
Furthermore, as long as you are making a non-commercial personal book for your own enjoyment–or one that will be gifted to an individual–you can use just about any images you want to, even those captured from your TV screen or from DVDs you own.
CREATING YOUR PHOTO BOOK
Handcrafted books can be created in many shapes and sizes, but for your first book, I suggest beginning by using single sheets of letter-sized, inkjet paper to produce a book of about 20 to 30 pages. You can choose to orient the book in a vertical (portrait) or horizontal (landscape) format.
Next, you'll want to make a “dummy†of your intended book. Let's say the book will be 11 inches high by 8.5 inches wide and 20 pages long. Take 20 sheets of standard, letter-sized, plain paper and staple the sheets together along the 11-inch side. This dummy will be your guide to how images (and text) will be placed in your final book when it is printed.
KEEP YOUR FIRST PHOTO BOOK SIMPLE
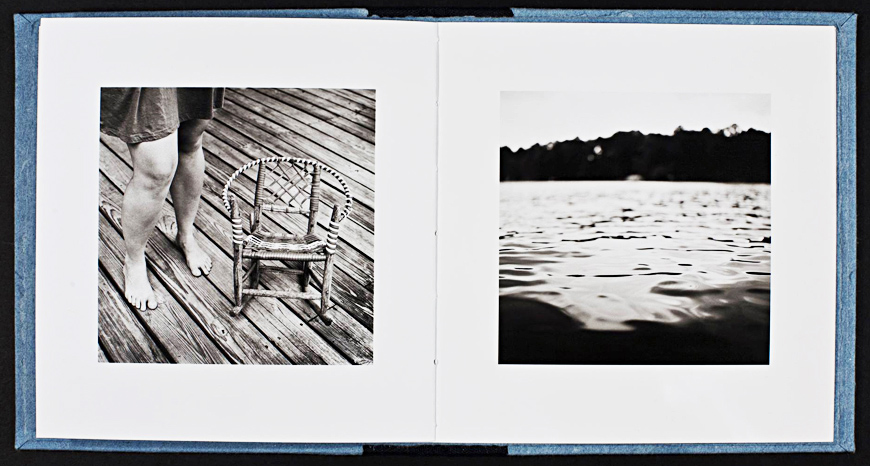
Next, number the pages in the dummy and then make some rough sketches and notes on the pages of the dummy to show the placement of images and text. Since this is going to be your first book, make it easy for yourself and don't over-complicate it. The first book I did had a classic layout: a single image appeared on each right-hand (odd-numbered) page and some text was positioned on the left-hand (even-numbered) page opposite it.
This allowed me to avoid using more labor-intensive layout applications that are needed to handle complex multiple picture placements. All I had to do before printing an image was to make sure it was in the correct orientation (portrait or landscape) and centered on the page before hitting “print.†The layout I chose also drew the reader's attention to each individual image, which I liked.
THE DUMMY MAKES IT EASY
Aside from keeping the picture sequence in order, the dummy also showed me where the text would be printed. Since it had to be opposite the picture it referred to, that meant it had to be printed on the back of the preceding page. Simple as this sounds to keep track of, without the dummy as a guide, it had the potential to become confusing.
To keep my images pristine, I printed the text on the uncoated side of the paper first, which avoided the image from having to make a pass through the printer face-down and possibly picking up abrasions. Let's say an image was to be displayed on right-hand Page 9. The dummy showed me that the back of Page 9 (which would be left-hand Page 10) had its text related to right-hand Page 11. So I would first print the text for Page 11 on the back of Page 10. Then I'd flip the paper to print the image for Page 10 and so on for all the pages in the book.
PRINTING ON THE PAPER'S UNCOATED SIDE
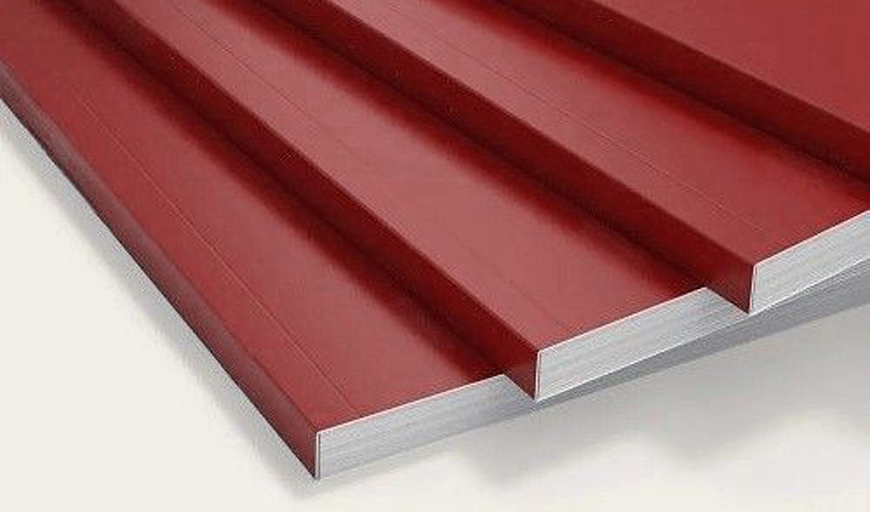
Most inkjet papers are coated on one side only to receive inkjet printer generated images. The uncoated (back) side is usually suitable for printing text and light graphics. These will not bleed through to images on the coated side because the underside of the coated layer acts as a barrier to stop ink from migrating to the other side.
But if you are going to print text on the paper's uncoated side, always run a test to make sure that the uncoated side will give you the text quality you want and does not smear ink. If the results are not good, you'll need to use paper that's coated on both sides, of which there are many choices. And, of course, that's also the paper to use if you want to print images on both sides of your pages.
ASSEMBLING YOUR PHOTO BOOK
When I finished printing the pages of my book I let them "rest" for 24 hours to allow the ink to dry thoroughly.
NOTE: If you are in an area of high humidity (or just as a precaution) you may want to spray the sheets after they dry, with a fixative to guarantee that the ink from one page does not offset onto the neighboring page once you assemble all the sheets into a book. If so, use Krylon UV Resistant Clear Matt spray in a well-ventilated area.
Then I assembled them in order and then used some lightweight picture matt board to make the front and back covers. The cover gives you a lot of leeway for creativity and as you do more books, you'll find many different materials that can make great covers. Just don't run them through your printer unless your printer can handle their thickness.
BINDING YOUR PHOTO BOOK
The final step was binding the book, which I had done at a local office supply store offering that service. They showed me several alternatives and, after I picked one, it was done in just a few minutes. If you begin to create handcrafted books, there are several basic ways to bind them.
Spiral binding, plastic comb binding and perfect binding with hot glue are all possibilities. You can even learn to saddle stitch folded groups of book pages together with either staples or by hand-sewing (easier than it sounds). And there are a plethora of books on the market and videos on the web that can demonstrate binding options.
Handcrafting a photo book will open a new world of creativity for you. It's also a great way to get kids or seniors involved in a fascinating hobby. And for gift-giving, it adds a personal touch and can even become a family heirloom that endures for many generations. Give it a try!
RESOURCES:
Tips at Red River Paper about binding.
Five basic Booklet Bindings explained.
Library of Congress Photo Collection
Red River Paper Suggestions For Handcrafted Books
UltraPro SemiGloss Duo 255
Premium Matte 120 Double-sided
50lb. Premium Matte Double-sided
68lb. UltraPro Gloss
68lb. UltraPro Satin
Original Publication Date: April 29, 2025
Article Last updated: November 24, 2025
Related Posts and Information
Categories
About Photographers
Announcements
Back to Basics
Books and Videos
Cards and Calendars
Commentary
Contests
Displaying Images
Editing for Print
Events
Favorite Photo Locations
Featured Software
Free Stuff
Handy Hardware
How-To-Do-It
Imaging
Inks and Papers
Marketing Images
Monitors
Odds and Ends
Photo Gear and Services
Photo History
Photography
Printer Reviews
Printing
Printing Project Ideas
Red River Paper
Red River Paper Pro
RRP Products
Scanners and Scanning
Success on Paper
Techniques
Techniques
Tips and Tricks
Webinars
Words from the Web
Workshops and Exhibits
all
Archives
June, 2026
May, 2026
April, 2026
March, 2026
February, 2026
January, 2026
November, 2025
September, 2025
August, 2025
more archive dates
archive article list


Red River Paper Inc. All contents © 1997 - 2026. 8900 Ambassador Row, Dallas Texas, 75247. Prices, specifications, and images are subject to change without notice. Not responsible for typographical or illustrative errors. Website Terms & Conditions | Acceptable Use
Site Development & Maintenance: Phosphor Media, LLC